Download Lightroom presets and LUTs, absolutely free. Use the presets to add creativity and style to your photos.
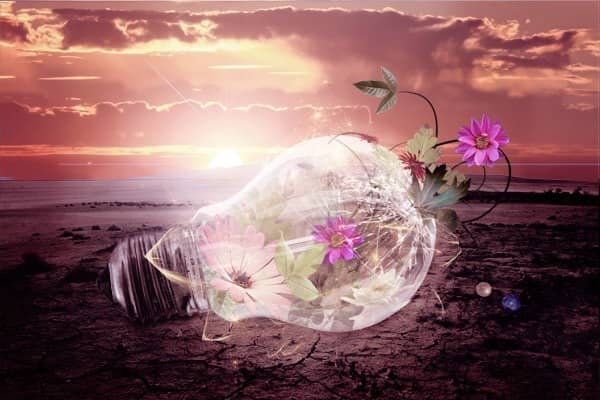
Step 26 - Darkening the Light Bulb
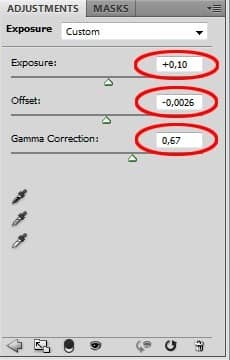
The light bulb should be bit darker. You'll fix it in this step. Add new adjustment layer Exposure on the top of all layers and set the values as it's shown on the following picture.
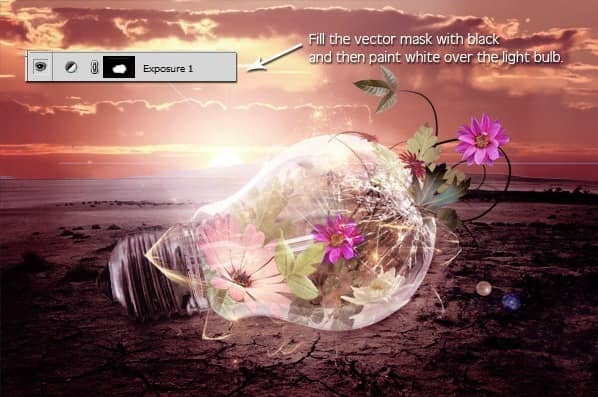
Because you want to the adjustment affects only the light bulb but not the rest of the image you need to make the adjustment visible only on the light bulb. Click on the vector mask of this layer. Grab the Gradient Tool (G), pick black color and fill the vector mask. Then grab the Brush Tool (B), pick white color, set the opacity on 80% and paint over the light bulb. Below it's shown how your image should look after this adjustment.
Step 27 - Changing Lights And Shadows
Lights and shadows on the flowers don't fit to the light scene of the rest image. You'll change them in this step.
Add new layer on the top of all layers and name it e.g. LIGHTS AND SHADOWS. Grab the Gradient Tool (G) and fill the layer with #808080 grey color. Change the Blending Mode of this layer on Overlay.
Grab the Brush Tool (B), pick white color, lower the opacity on about 15% and paint over the areas where lights should be. Then pick black color and paint the shadows. Below you can see what I painted to get the inspiration.
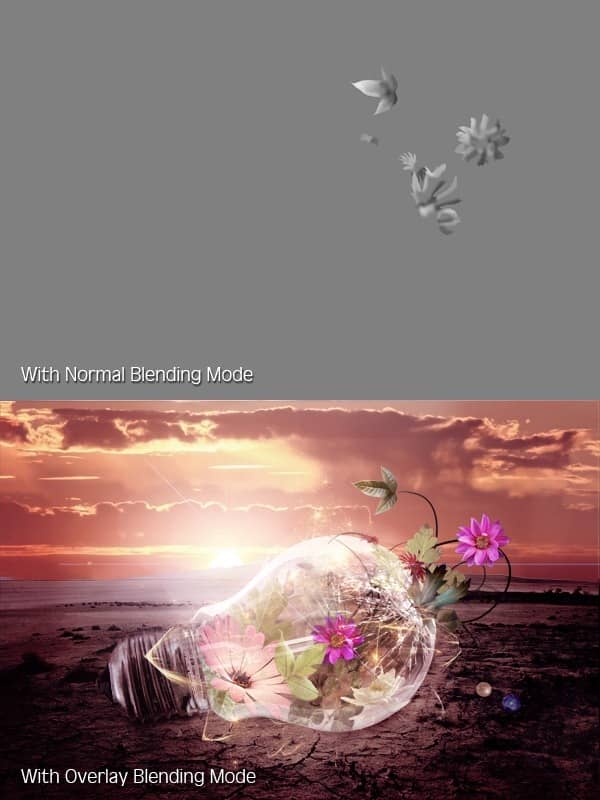
As you can see I focused on the flowers outside the light bulb because I think that the flowers inside doesn't need this step. But if you don't agree with it feel free to change also the flowers inside.
Step 28 - Adding the Blur
Flowers which are behind the glass should be bit blurred. You're going to fix it in this step. Press Ctrl + A to select the whole picture and then go to Edit > Copy Merged or press Ctrl + Shift + C on your keyboard. Then go to Edit > Paste or press Ctrl + V to paste the merged image. Place this new layer on the top of all layers and name it BLUR. Go to Filter > Other > High Pass... and set the value Radius on 3 pixels.
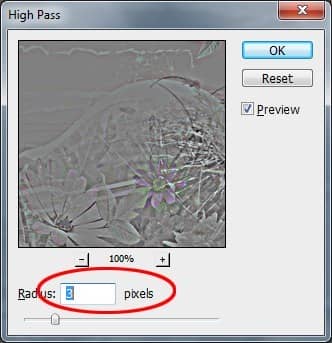
Now you need to invert the colors to get the blur. If you don't do it the adjustment would make the picture sharper. Go to Image > Adjustments > Invert or press Ctrl + I on your keyboard. Change the Blending Mode of this layer on Overlay.


2 comments on “How to Create an Inspiring Light Bulb Photo Manipulation in Photoshop”
detailed and creative. I,m from Belize CA. I got photoshop cs6 like 6 months ago and it has become my new hobby ever since. this tutorial has excellent tips on blending modes and will certainly improve my skills. keep up the good work and thanks for the inspiration.
Excellent.