Download Lightroom presets and LUTs, absolutely free. Use the presets to add creativity and style to your photos.
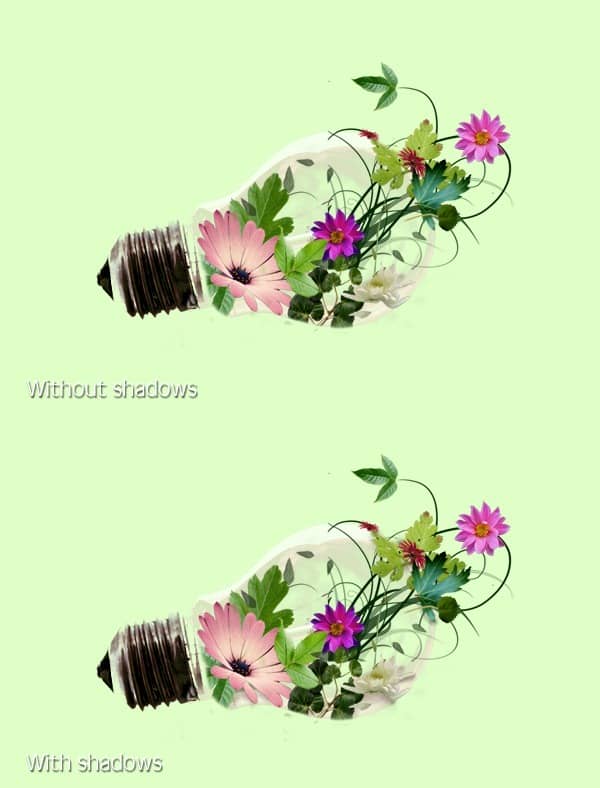
Now start painting shadows. Bellow you can see how the flowers look with and without the shadows. I change the background on light green color to you can see the result better.
Step 14 - Adding a Crack
Select one of the pictures with crack mentioned in the beginning of the tutorial (I selected the one named "01.jpg") and drag it into your manipulation. Place the layer on the top of all layers and name it CRACK.
Press Ctrl + T and resize it on proper size. You can also rotate it a little to it will fit better on the light bulb. Look at the following picture to get the inspiration.
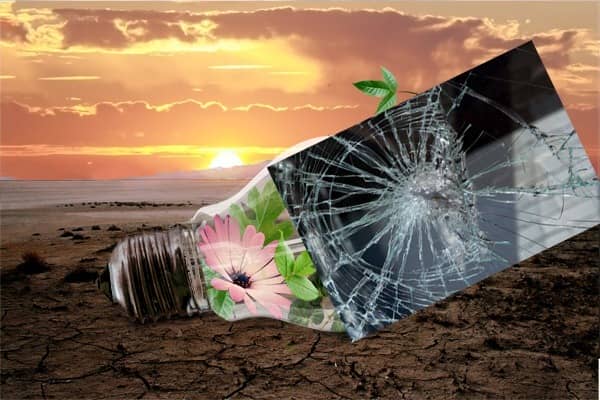
There is really easy way how to blend the image of the crack with the rest of the picture. Change the Blending Mode of this layer from Normal to Screen.
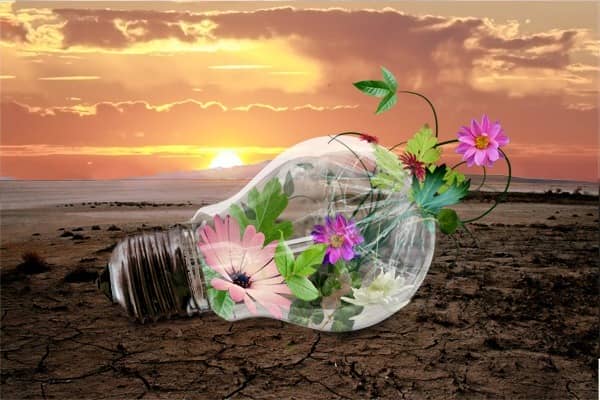
Add vector mask to this layer. Grab the Brush Tool (B), pick black color and paint over the areas of the crack which should dissapear to be properly blended. On the picture below you can see how the crack should look so far.
Step 15 - Warp the Crack
There are still two things I don't like about the crack. First the crack is quite bad visible and deserves bigger contrast. Second the crack doesn't copy the shape of the bulb. The bulb is rounded but the crack is too flat.
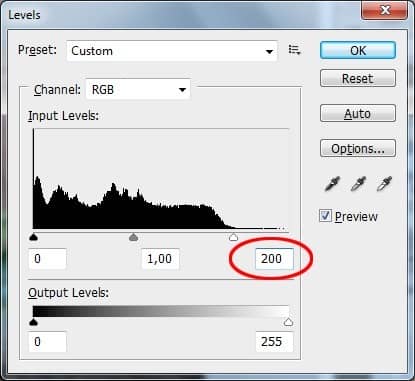
To increase the contrast of the crack go to Image > Adjustments > Levels... or press Ctrl + L and set the Input Levels on 0; 1,00; 200.
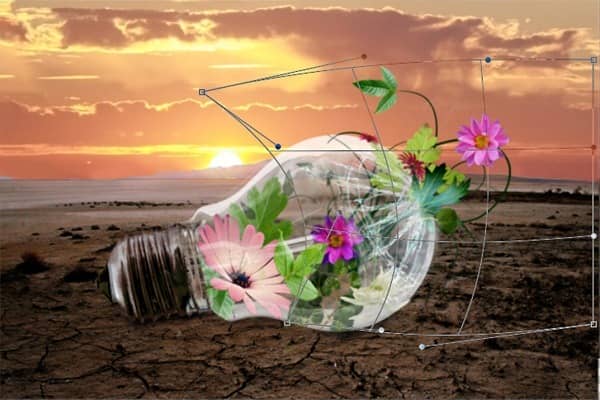
To make the crack looking like it's really on the bulb you need to warp it a little. To do that go to Edit > Transform > Warp. The grid shows up and you can adapt it to be similarly rounded as the light bulb. Below you can see how to do it.
Once you're satisfied with the shape of the grid press Enter on your keyboard to apply the warp.
Step 16 - Changing the Light
In this step you will change the light scene to gain more focus on the focal point of the manipulation, which is the light bulb.
Create a new layer on the top of all layers and name it LIGHT CHANGE. Grab the Brush Tool (B), select some big soft round brush and pick some dark violet color from the sky. Lower the opacity of the brush on about 30%. Paint a decent vignette around the image.


2 comments on “How to Create an Inspiring Light Bulb Photo Manipulation in Photoshop”
detailed and creative. I,m from Belize CA. I got photoshop cs6 like 6 months ago and it has become my new hobby ever since. this tutorial has excellent tips on blending modes and will certainly improve my skills. keep up the good work and thanks for the inspiration.
Excellent.