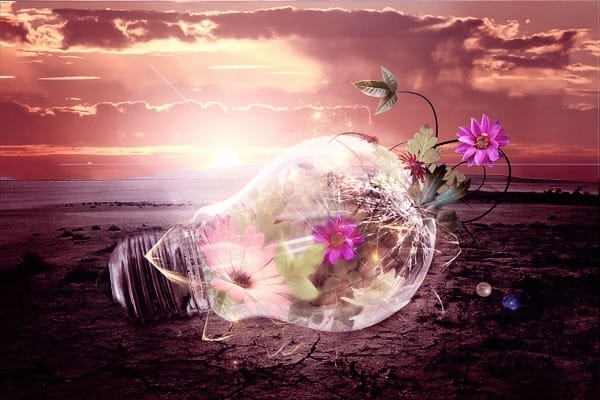
As you can see the whole picture is blurred but you want only the flowers in the light bulb. To make the unwanted blur invisible add vector mask to this layer. Grab the Brush Tool (B), pick black color, set the Opacity on 100% and paint over the areas you want to have sharp. After this step you should have your picture similar to the picture below.

Step 29 – Sharpening
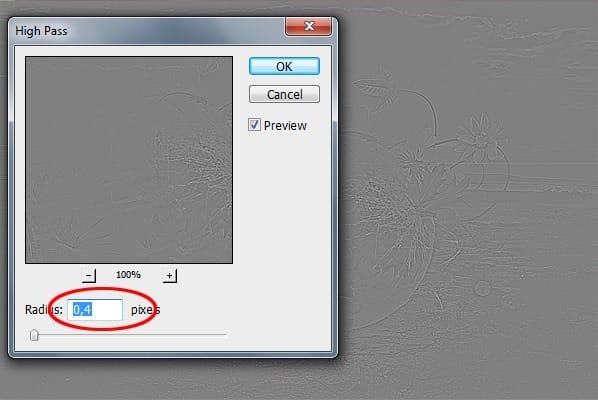
The image would look better if it’s sharper. To do that select the whole picture again by pressing Ctrl + A on your keyboard. Copy it merged (Ctrl + Shift + C) and paste it on the top of all layers. Name the layer SHARPENING. Go to Filter > Other > High Pass again but this time set the value Radius to you can see only thin lines around the edges. You can see what I mean on the picture bellow.

Change the Blending Mode of this layer on Overlay again.
Step 30 – Second Color Adjustment
In this step you’re going to add bit more violet tones to the picture and also increase the contrast little bit. First the violet tones – add new layer on the top of all layers and name it e.g. MORE VIOLET. Grab the Gradient Tool (G) and pick #6827C0 color. Fill the layer with it. Change the Blending Mode of this layer on Soft Light and lower the Opacity on 15%. To increase the contrast add adjustment layer Gradient Map on the top of all layers. Choose Black, White gradient and press OK. Change Blending Mode of this layer on Luminosity.

Because of the increased contrast the area around the sun is too bright and it doesn’t look nice. You need to hide the Gradient Map adjustment there. To do that click on vector mask of this adjustment, grab the Brush Tool (B) and paint with black over. You should get something like on the following picture.

Step 31 – Adding Vignette
I really like vignettes because they are easy way how to gently lead viewer’s eye into the picture. To create vignette add new layer on the top of all layers and name it VIGNETTE. Grab the Gradient Tool (G), pick white color and fill the layer with it. Now go to Filter > Lens Correction (the path may vary in different version of Photoshop) or press Shift + Ctrl + R. Set it as on the following picture.
2 responses to “How to Create an Inspiring Light Bulb Photo Manipulation in Photoshop”
-
detailed and creative. I,m from Belize CA. I got photoshop cs6 like 6 months ago and it has become my new hobby ever since. this tutorial has excellent tips on blending modes and will certainly improve my skills. keep up the good work and thanks for the inspiration.
-
Excellent.


Leave a Reply