Step 45
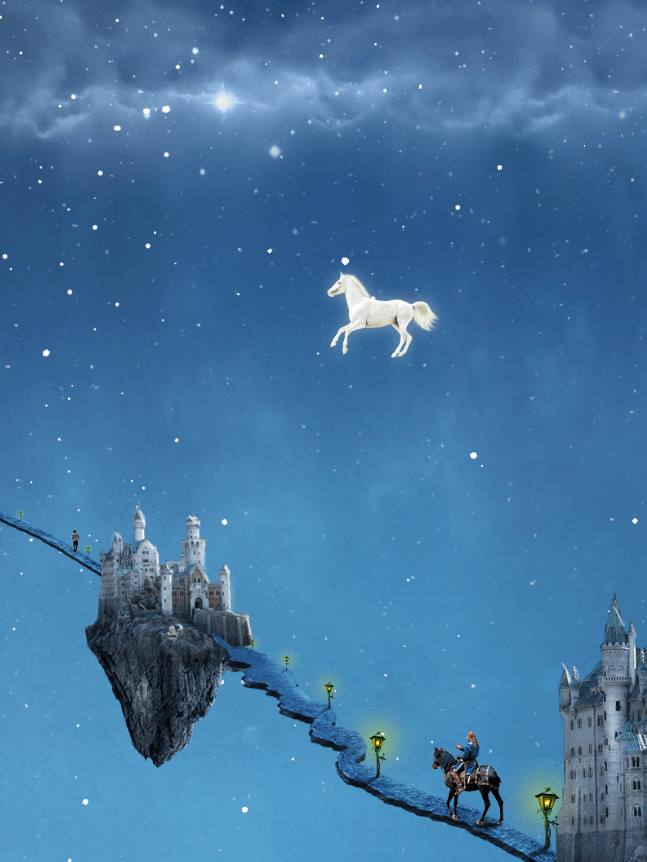
Right-click the horse layer and choose Blending Options from the drop down menu. Apply some Inner and Outer glow in order to create a magic looking effect.


Step 46
Create a new Curves Adjustment layer. Drag the curve up to lighten and clip the curves layer to the horse layer.


Step 47
Import the Fantasy Lighting brushes. Choose a glitter brush (if the Brush Presets window is not opened choose Window > Brush Presets) and with white as foreground color draw some glitter behind the horse to make it look like a trail of stars behind him.

Step 48
Open the file “Wings”. Copy and paste the wings into our document. Convert the imported layer to a smart object. Resize and position as shown below. Apply Inner and Outer glow to the wings like we did at step 45. Group all the horse related layers and name the group “Flying Horse”.

Step 49
Open the file “Wizard Duo”. Make a selection of the wizard and his pupil. Copy and paste it into our scene. Convert it to a smart object. Resize and position as shown below.

Step 50
Create a new layer and change the blending mode to Color Dodge. Clip this layer to the wizard layer. Paint some outlines around the wizard and his pupil with a round soft white brush.
I am going to share with you a little secret. In order to have beautiful compositions perform this step for all your imported objects in most of your scenes. There are some objects for which this effect doesn’t work but for most of them outlining with white (or a light color) will make them stand out and give them a special glow.

Step 51
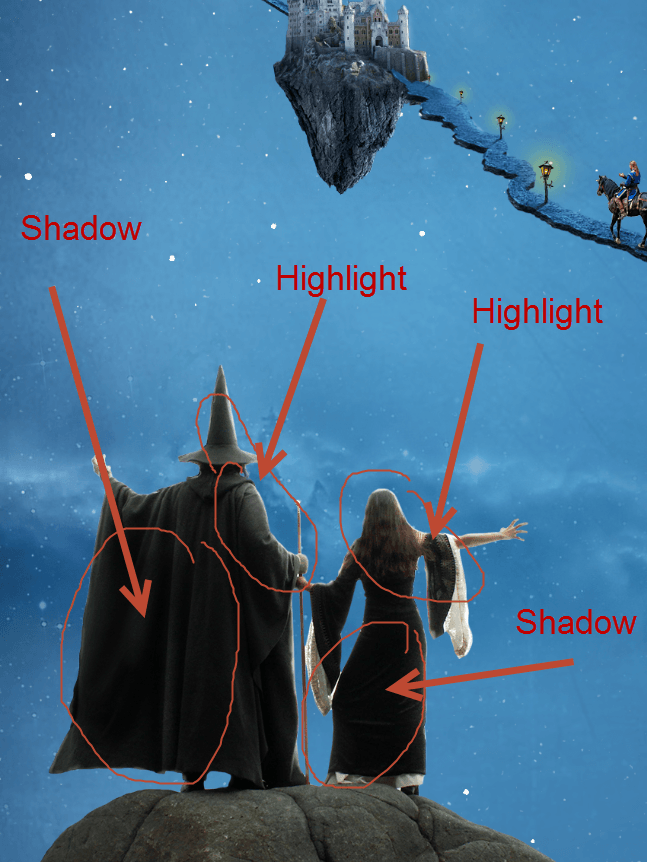
Create a new layer and change the blending mode to Overlay. Clip this layer to the wizard layer and paint with white and black some shadows and highlights on the wizard and his pupil.

Step 52
Open the file “Grass” and make a lower selection of the grass. Copy, paste into our scene, convert to smart object and add a layer mask. Import the Fern Brush and in the layer mask paint with black in order to randomly hide portions of the grass and making it look natural.


Step 53
Open the file “Daisy”. Copy and paste the flower into our scene. Convert it to a smart object. Resize and position it as shown below.
11 responses to “A Wizard and His Pupil – Create a Fairy Tale Manipulation in 75 Steps”
-
Interesting
-
?
-
nice photo editing tutorial
-
Bro i wanna talking to you plez send ur mobile no i u gave my no it s reason the reason is i love ur tutorial and i learning a awesome photoshop skills so u help me
-
I tried your tutorial and the result is fascinating. Thank you so much for sharing your work with us!!!
-
in step 19, when adding a new curve layer, this affect the entire image, not just the road, what am i doing wrong?
-
Step 7 doesn’t work = (. It just turns the floating island into the exact color that you copy rather than actually blending the color with the island.
-
Did you change the blending ode to color?
-
-
Awesome resources.Huge collection.Great job.Very useful post.
-
Tutorial looks great but i am unable to fetch its resources.
-
that is not their problem
-


Leave a Reply