Learn how to make this eerie photo manipulation with fairy and dragonflies flying around her. I’ll show you, how to make amazing depth of field on your manipulation by simple steps. You will see, how to use different blurs and blending modes on your work. You will learn, how to make magical glow in Photoshop. Throughout the tutorial, you’ll learn techniques that will help you create better matte paintings and photo manipulations.
What you’ll be creating
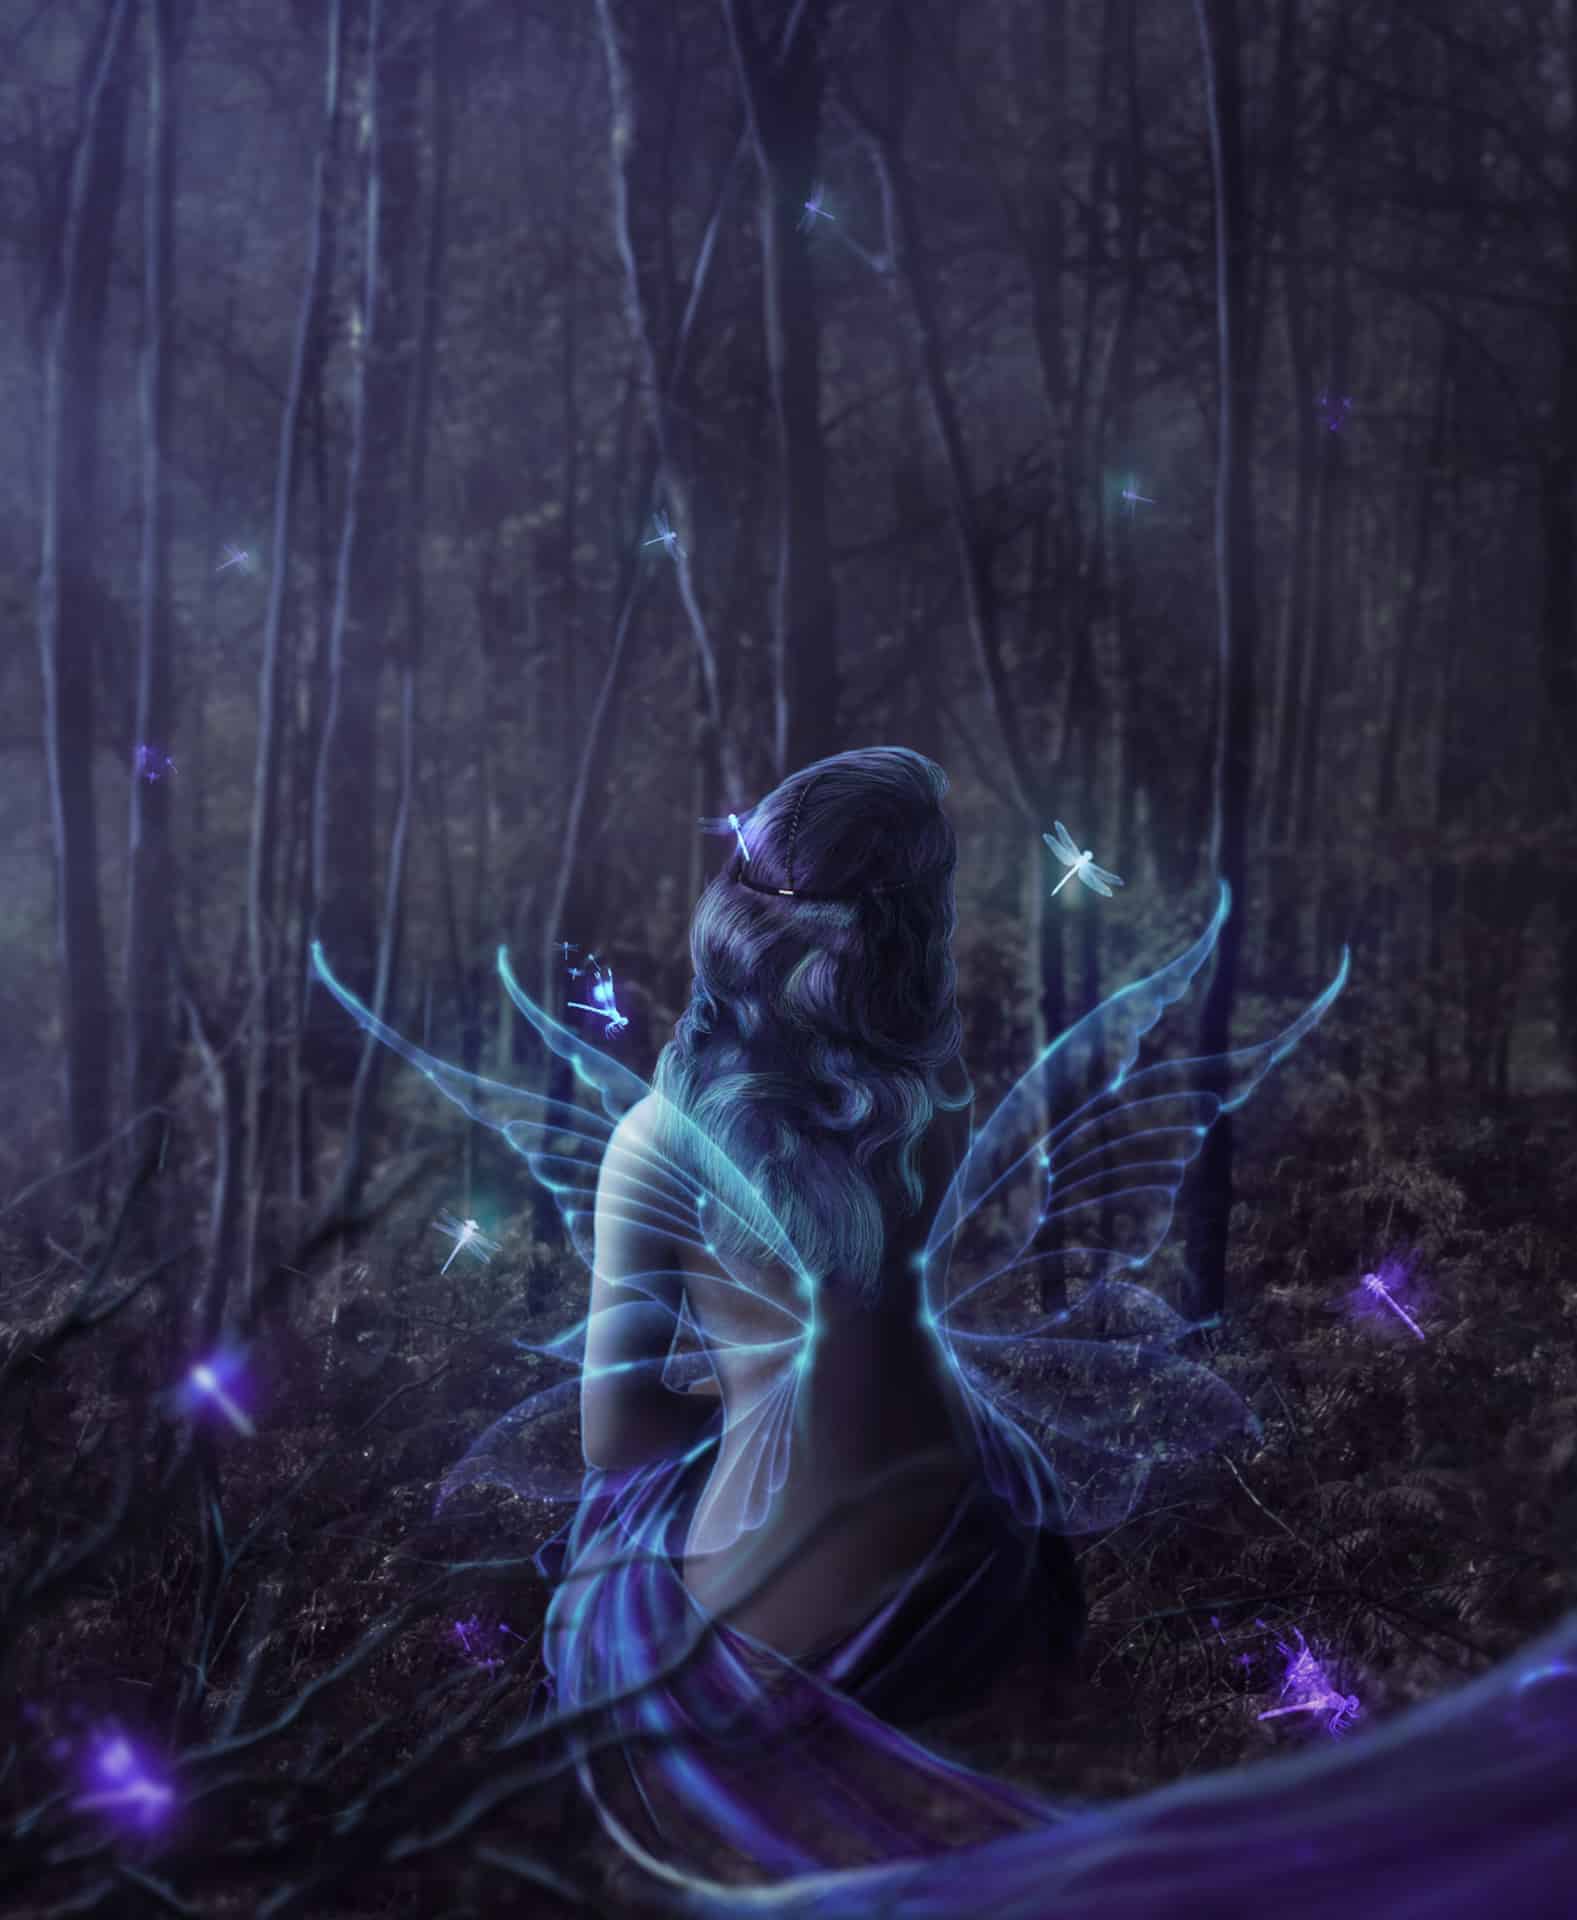
You will create magical photo manipulation – Faerie in the woods. I really love playing with the lights in this work. You will learn special lightning techniques and blurring tips. You will need Photoshop CS 5.5 to follow this tutorial.

Tutorial Resources
- Deep Forest– rgbstock
- Burst of light– rgbstock
- Dragonfly Brushes– Gothic11shadow
- Fae wings stock– Leaush
- Oracle stock 9– Charligal Stock
- Dead tree png– GD08
- LAV Flutter Pack Blue 01– Geoectomy Stock
Step 1
Create new file. Use portrait size.

Step 2
Place “Deep Forest” stock into your file.

Step 3
From top menu choose Filter > Blur > Gaussian blur… Set it to 2,8 px.

Step 4
As you can see, you can mask filters on your layer, by clicking white canvas next to Smart Filter Title. With big soft brush mask center of the ground. Don’t be afraid to use brush with smaller opacity. You can obtain true depth on your work! :)

Step 5
Duplicate your “Deep Forest” layer. Click RMB on Smart Filter title and choose Clear Smart Filters.

Click with RMB on your layer. Then choose Rasterize layer.

Step 6
From top menu choose Filter > Blur > Lens blur. I used this settings, but you can play with it, for gain other results :).

Step 7
Add mask to created layer (marked shortcut). Erase foreground and some trees on first plan.

Step 8
Decrease opacity of this layer to 35%.

Step 9
Now you will prepare your background to make night. Add Adjustment layer with Color Balance and set as is shown.

Step 10
Add new layer (Shift + Ctrl + N). In your color picker set black and white. From top menu choose Filter > Render > Clouds. I also make some black strokes on the bottom of the layer for better blending.

Step 11
For making foggy effect you should change blending mode to Screen and decrease opacity to 22%.

Step 12
In the night everything have less contrast, than in the day. Add adjustment layer with Brightness/Contrast and decrease contrast.
18 responses to “Playing with Glows and Blurs – Fairy in the Woods Photoshop Tutorial”
-

nice article
-
This article is awesome. I’ve problem to do Photoshop specially to do the contrast portion. But in this post the description is given step by step, which helped me a lot. But did you notice one thing? The shadow of the model is missing on the grass. Step-16 seems difficult to me when I was doing that. But you did a great job. Thank you so much.
-
thanks for the effort
-
how did you get the colors in step 21. i used the color the color specified and color dynamic. I’ve tried countless time to at least come close to what you have but to no avail.
-
Amazing.. thanks for the awesome post. Do you help with photoshop servides as well?
-
Amazing.. thanks for the awesome post.
-
May I know which photoshop version u use for these effects stuff??
-
MsRiotte, THANKS.Bardzo podobały mi lekcji I really liked your lesson.Your lesson is very different from other classes of masters . I would like to do more of your lessons. This is your only lesson ?
-
amazing!! great to see the amazing work of great experienced art directors!!
-
I come from china.
-
Witaj Monika.
Świetny tutorial. Dopiero zaczynam przygodę z Photoshopem dlatego pojawiły się u mnie problemy z krokiem 34, 35.
34.1: Którą firanę z LAV Flutter Pack dokładnie wybrałaś?
34.2: Jak zrobiłaś to że maskujesz w black&white? Wyłączyłaś wszystkie kanały kolorów i zostawiłaś tylko maskę (którą odwróciłaś – maska zakrywająca)?
34.3: (Najważniejsze) Jak to zrobiłaś że twoja firana ma tak niską paletę kolorów po tym jak ją umieściłaś (u mnie kolory są takie same jak przed umiejscowieniem)35.1: (Pewnie wynik wcześniejszych rzeczy) Kiedy stosuję Guassian Blur to firana zaczyna się mocno odznaczać. Szczerze mówiąc na screenie nie widzę różnicy sprzed użycia tego filtra i po użyciu.
Będę wdzięczny za pomoc!
-
1) LAV088 – Oczywiście możesz użyć innej, i tak – jak widziałeś, później po tym trzeba trochę pobazgrać ;)
2) Nie jestem pewna czy dobrze rozumiem, ale: Wybierz z górnego menu Layer (warstwa) > Layer mask (maska warstwy) > Reveal all (Odkryj wszystko). Później, za pomocą dużego pędzla na masce warstwy, wymaż białe tło (ręcznie i niestety nie ma innego sposobu na akurat ten stock ;P). Następnie, za pomocą mniejszego pędzla z mniejszą przezroczystością, wymaskuj transparentne fragmenty materiału. Na tym screenie jest pokazane, jak na koniec u mnie wyglądała już cała maska tej warstwy: http://i1.wp.com/www.photoshoptutorials.ws/wp-content/uploads/2014/07/step034a.png?resize=740%2C493.
3) Niska paleta kolorów to raczej złudzenie, po tym jak wymaskowałam (poprzedni punkt) bardziej przezroczyste fragmenty materiału. Uzyskasz ten sam efekt, przykładając się do maski. Popróbuj a na pewno ci się uda! :)
4) Jeśli firana mocno zaczyna się odznaczać, najprawdopodobniej jest to wina źle zrobionej maski. Spędź nad nią więcej czasu, albowiem dobre cięcie, to szczęśliwe cięcie i później mniej pracy :).
Super że przeczytałeś tutorial! :)
-
-
Nice work, but the model’s shadow is missing on the grass.
-
and and in step 34 how do you remove the white area so clearly?
-
I just masked it – bigger brush with pressure size for the edges and soft, smaller brush for transparent fragments of material.
-
-
which LAV flutter did you use?
-
LAV088 – sorry for late reply! :)
-
I come from chinese. You are so kind.
-
Leave a Reply to davidCancel reply