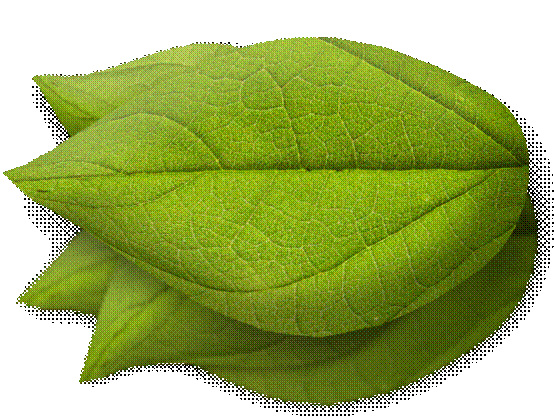
Step 9
On each layer you can add a simple drop shadow by double-clicking on the layer and checking the ‘Drop shadow’ box, and adjust the distance, size, and opacity of each leaf accordingly to give the leaves more depth. The larger leaf’s opacity is 64%, its distance is 23, and its size is 51. If you have a leaf directly above another, you will want to have the distance significantly lower, as well as the size. It should be more sharp and distinct.

Step 10
Double-click on ‘Leaf’ and check Bevel and Emboss box. Change the depth to 100%, size to 65px, and soften to 0px. You can also lower the opacity of highlight and shadow mode. Repeat with remaining layers:

Step 11
Let’s add some depth of field. Select the leaf that is below the rest then right-click on the layer in the Layer Window and select Convert to Smart Object (will allow you to change the settings of your applied filters non-destructively). Now select Filter > Blur > Gaussian Blur and set it to 2.6 pixels. Repeat with other leaves, working your way up to the top of the layer’s list, and remember to lower the blur as you get closer to largest leaf. Now select the Smart Object (in the layer’s panel) of the ‘Leaf’ layer. Hit D and paint over the main areas of the leaf except the edges (you’ll find that this removes the Gaussian blur in the areas that you paint black.) Play around with the warping as it’s the most important (and fun!) part.


Step 12
Now that we’re done with the leaves, let’s move on to the berries! In a new project with dimensions of 600 x 458 select the Elliptical marquee tool. Hold down shift and make a selection about the size of the following then fill with #ff0000. Name this layer ‘Piece’.

Step 13
Double-click on ‘Piece’ in the layer’s panel and apply the following settings:
- Inner shadow: Opacity: 75% – Distance: 5px – Choke: 0% – Size: 38px. Make sure the ‘Use Global Light’ box is checked.
- Bevel and Emboss: Depth: 32px – Direction: Up – Size 43px : Soften 16px. Leave the rest at default.
- Gradient Overlay: Black-White gradient – Opacity: 16 – Angle: 90.
This ‘piece’ will be duplicated and shaped into a berry, but for now we can hide this layer while we plan our berry’s shape. Click the eye next to the layer. Your ‘piece’ should look similar to this:

Step 14
Make a new layer then select the Pen Tool (P). Click once in the center near the top (but not too close!)(1), hold shift, and click once more in at the bottom toward the center (2). Now you have a straight line! Right click the pen tool and select Add Anchor Point. Toward the top of the line click directly on top once and drag it to your right (3). Anchor one more point at the bottom and pull slightly toward the right (4):


Leave a Reply