TIPS: The bigger is the area to smudge (example the cheeks or the forehead) the bigger will be the brush you’ll have to use. If you have to smudge difficult areas (for example the hair on the face) just use more strength. Anyway test it every time, because it’s not always the same.

This is so far what I have after the smudging action. We have to fix the mouth and the eyes because there is some hair. (Indeed I am used to use the smudge tool also on the mouth and the eyes anyway because it gives more a painted effect).

To smudge the mouth just do it following the direction of details otherwise it would be messed up. Below I show you how. (it’s probable you have to give more strength to the brush).

This is the result.. And hair has gone away!

You have to do the same thing with eyes. Follow the direction of the details. For the eyes, I used a strength set to 28%

As you can see below there are some parts that are difficult to smudge because of different colors. I suggest you to airbrush over them picking the same color of closer areas (the dark makeup in this case). After that, you can normally smudge.

Once that her right eye is done you’ll do the same for her left eye. Airbrush the hard parts with the same color and then smudge them!

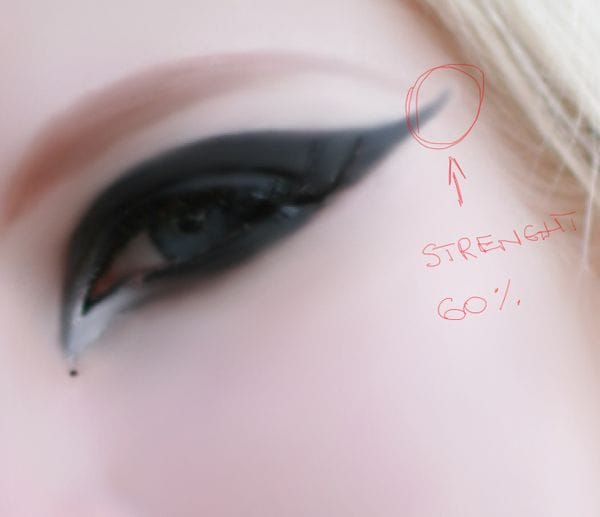
Now both eyes are done. Give more strength to the smudge tool (I used 60%) and do the makeup stretching it.

This is so far what we have right now.

Keep smudging the rest of the skin. I used Strength 10%-15% for the arms and the fingers.

Step 4 – Hair
If you are happy with the smudged skin, delete the layer containing the lady with the original skin and duplicate the one you were working on. Now work on the duplicated one. Load the Hair Photoshop brush. Select once again the Smudge tool and choose the 200px brush. I set 40px and Strength 95%. Start from the top of the hair and go down smudging out to create some strands (from inside to outside).

Once you have smudged out the borders low the strength of the brush at 86% and paint the hair following its direction like you are combing it. Brush size varies. It depends on how much is big the part to smudge. When you’re done delete the high part of the hair.
11 responses to “Create a Emotional Midnight Photo Manipulation with Painting-Like Effects”
-
Amazing work.. Loved it
-
That’s good!Thanks for sharing
-
Your image works beautifully with the mask Nancy!Thanks for sharing.
-
Thanks this is the result of this tutorial!
-
I agree with alicia, in the last part of the tutorial, many
passages was not specified in which layer we have to apply the layers/effects. Another thing I notice is that, even if
I downloads the lady photo from the same link,
my image have a bad resolution compared to the photo of the lady of the tutorial.. is very strange, I wish I could work with the same picture’s quality of this tutorial…
someone have notice this too?
But thanks for this tutorial, I really enjoy it ! -
Thank you so much for this tutorial! Very helpful and easy to follow even for beginners!
-
Hey guys there is a video of the tutorial on youtube showing you in a video format, you can have best of both worlds with the written and video, all respects payed to the creator.
Link to the video is: https://www.youtube.com/watch?v=bzIvBfJsj-g
-
The only problem I have with this is when you went to step 12 Dodge and Burn , You didnt state if that layer is behind the lady or on the lady or what
-
Who cares? And cellist play left handed as well. Rare as it is it happens.
-
way, way cool. I do gratus work for friends who cant afford the high cost of student photography. I always look for something that sets the bar higher for the underprivledged families I help. I want them to get a unique photo set others would pay highly for. This tut will go far for some of the folks Im helping. Thank you, and Lord bless you.


Leave a Reply