
Step 26
It starts to look good but we still need to make the city look more real. And the best way to make a city look real is to add smoke/dust. Create two new layers and name them Smoke. Place one between Dark Buildings group and Medium Dark Buildings Group. Place the second one between Medium Dark Building group and Light Building group. Choose a soft white brush at 1% Opacity and paint some smoke/dust (just draw some loose horizontal lines). The effect will be barely visible but it helps selling our city.


Step 27
Group all the city layers we created until now and name the new group City Outlines.

Step 28
Let’s create some extra smoke. Create a new layer, name it Smoke and paint a more pronounced smoke effect than we did at step 26. Place this layer above the City Outlines group.

Step 29
There are probably people still active in the city even at night (unless it is a deserted city) so let’s show that by creating some window lights. Create a new layer and name it Window Lights. Choose a light yellow color and with a round soft brush at 2-3px draw some dots where you feel that windows or doors should be. If you don’t feel anything take a look at how I did it below.

Step 30
Now let’s add some random detail to break the monotony. Create a new layer and name it Extra Detail. Using a 3-4px size brush at 10% Opacity squiggle a few lines here and there.

Step 31
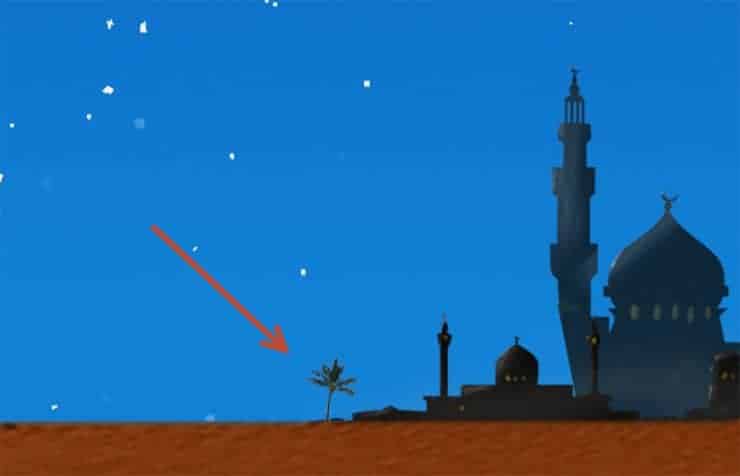
A city in the desert wouldn’t be a city without some palm trees. Open the file Palm Tree and press Ctrl + A to select all and Ctrl + C to copy. Go back to our document and press Ctrl + V to paste. Right click the newly pasted layer and choose Convert To Smart Object. Free Transform (Ctrl + T) to resize and position the palm to look like in the image below.

Step 32
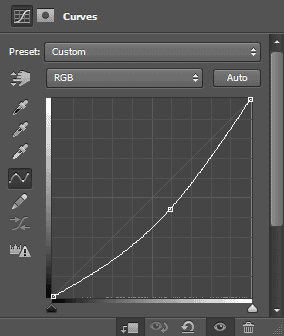
Let’s darken the palm so that it matches the city. Create a new Curves Adjustment Layer and place it above the Palm Tree layer. Clip the Curves layer to Palm Trees layer. Drag the curve down to darken the palm. Group both the Curves and the palm layer and name the group Palm Tree.


Step 33
In order to add more palms simply duplicate the Palm Tree group (Ctrl + J) and resize and rotate slightly each palm. Place 6-10 palms across the city length. Group all the Palm Tree Groups under a new group called Palm Trees.
19 responses to “How to Create Vivid Arabian Night Composite in Photoshop”
-
File please..
-
Hello
-
link to the download ?
-
This is some half-assed work indeed. The stars can been seen straight through all over the moon. The clouds are overblown to white and badly blended. This looks like the work of a troll to me. I mean come on.
-
There’s no link to the download file!!!
-
The PSD file …
-
-
its so informative tutorial.
-
its really helpful tut i learn many things from this.
-
wtf is this shit? looks like something a kid in elementary school would draw = /
-
There’s no link to the Clouds image… : ((
-
This is a really inspiring collection for all, I like it, thanks for shearing!
-
Thank you for the great tutorial! It has been very helpful to see a few techniques in action.
-
Really amazing photo manipulation tutorial.
-
Nice tut!
-
what a hard im just a highschool
-


Leave a Reply