
Step 26
Repeat the step 25 & 26 to add the rest details in the character. Change the brush size and color whenever necessary and smooth with a soft brush to get rid of hard brush strokes. After adding all details your result will look like this.

Step 27
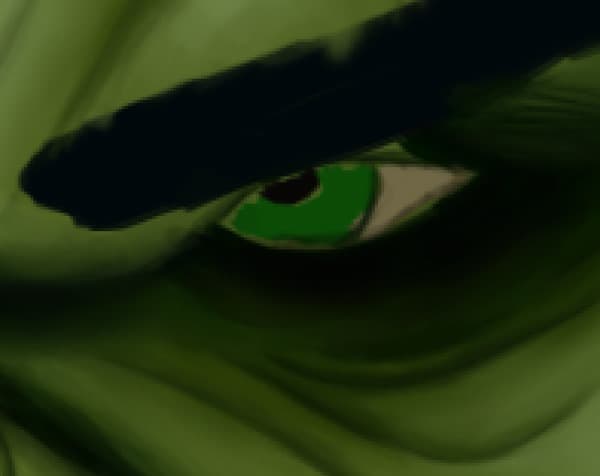
Now we will add details in eyes for this, select sketch brush with opacity jitter set to pen pressure. Change its color to #051102 and size to 5 pixels and start adding details in the eye.


Step 28
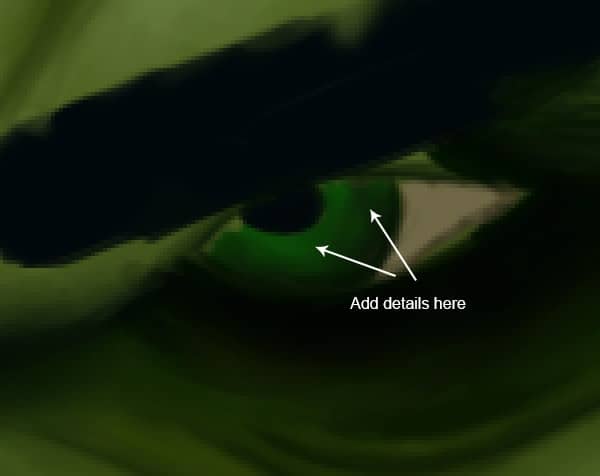
Change your brush size to 5 pixels & color #0f1a09 and brush to add more details brush inside pupil. Now we will add some light reflection to the eye to give it natural look. Reduce your brush hardness to 25% and set your brush color to #699e5c and add lights reflection to the eye.


Step 29
Select the sketch brush that you created in this tutorial, set its hardness to 50% and size 3 pixels. Set brush color to #4a422c and add shading to the eyeball to give it depth. Change brush color to #27210e and more details to the eyeball.

Step 30
Now we will add vein in eyeball to give eye more natural look. To add veins select sketch brush of size to one pixels and color to #2e1d0f and paint veins in the eye.

Step 31
Repeat the step 27 to 30 and add details to the other eye to give it natural look. Pay attention to the light reflections in the eye to make it realistic.

Step 32 – Adding details to the mouth
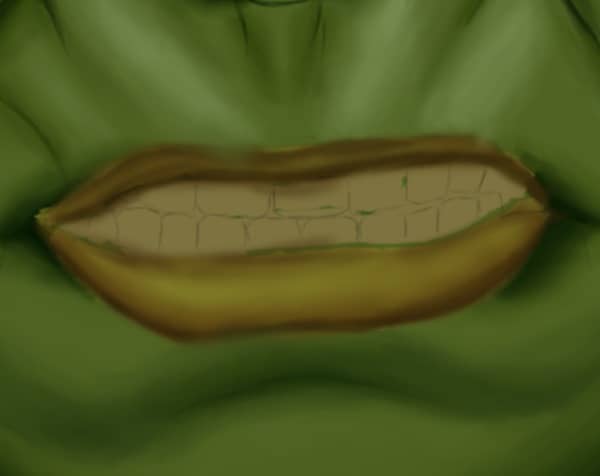
Now we will add the details to the mouth for this we will create teeth first. Select sketch brush, change its color to black and reduce its size to one or two pixels to create teeth in the mouth.

Step 33
We will first add details to the lips to create desired outline of mouth. Select a soft round brush of hardness 70%, color #5f3d10, set “Opacity Jitter” to “Pen Pressure”. Change brush color to #563810 and add shading to the lips. Change brush hardness whenever required to get better results.

Step 34
Now change your brush color to #3a2c0a and add some dark shading to the lips.

Step 35
Now we will add some lights to the lips. Change your brush hardness to 50% and set its color to #9f8925 and start adding lights to the upper and lower lip.

Step 36
Change your brush color to #afa66c and add some more lights to the lips in random order. Avoid too hard brush strokes. This would give a nice light reflection effect to the lips.
21 responses to “Create an Amazing CG Illustration of The Incredible Hulk”
-
How do you download blur’s good brush 4.1 pro :(
-
güzel video abone oldum oh
-
bu video mu gerizekalı
-
-
k
-
Stuck in step 12 :(
-
What are you stuck with? If you’re using a mouse, the pen pressure won’t work. So you’ll need to adjust the brush opacity manually.
-
-
Dude you’re insane … i love your work. I followed this with procreate because the concepts are the same.
-
Tengo un problema con Photoshop me. Podrían ayudar es sobre el error 22
-
Please Sir photoshop serial number
-
Who else loves unlocked cell phones ?
-
I do pls aw can i get access to it
-
-
That is one badass hulk drawing!
-
Ye bina Pen Tablet ke kaise draw hongi starting lines, Please jaldi batana mujhe ek Digital Painting jaldi banani hai.
-
These are amazing. Super creative and imaginative and all things that are good.
-
how do you do step #6.. I cant find the color palate.. help
-
There are very incredible themes!.Thank you for your amazing effort.
-
WoW! Thanks so much for the tutorial and specially the PSD file. I learnt a lot more than any other tutorial.
-
How the heck are ya gonna put stitches on the Hulk?
-
A good tutorial but “tablet” should be listed in the tutorial resources.
-
xalk
-
A good post with the technique of illustrator design.


Leave a Reply