Step 3
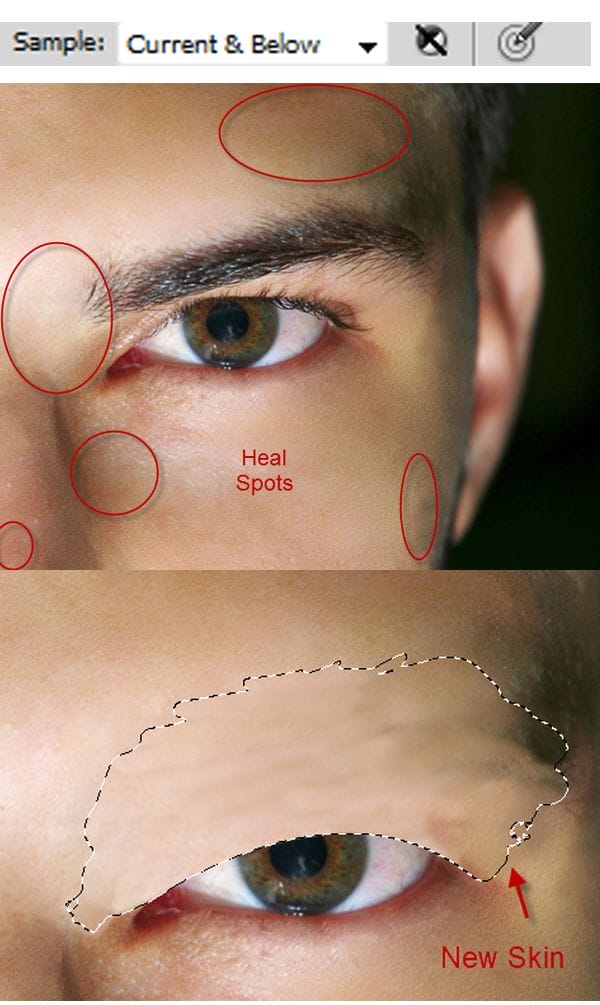
With the new skin selection still active (the skin that replaced the eyebrow) make a new layer and fill the selection with whatever color. Then apply a Drop Shadow effect. Add a layer mask and mask away the unnecessary shadows.
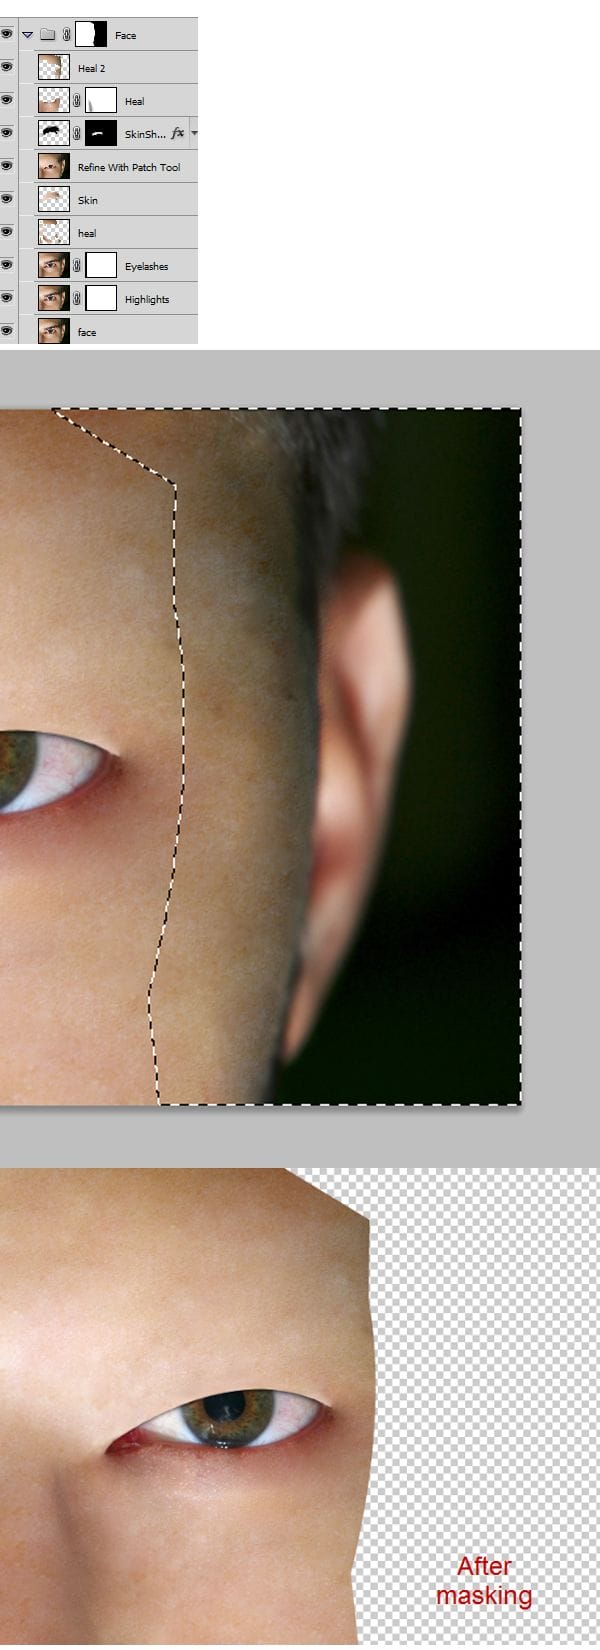
Make a new layer and using the Healing Brush tool with Lighten blending mode heal the lower portion of the face. Notice however that because of the healing process the dark shadow from the nose is gone in the process leaving us with a fake face. To correct this add a layer mask to the Healing layer and using a 30% black soft brush mask away some of the healed skin. This step will partially hide our Healing Layer thus revealing some of the shadow underneath. Don’t overdo, a hint of shadow is enough for our imagination to do the rest.
Make yet another layer and heal the rest of the face. Don’t trouble yourself with healing the outer part of the face because we will be cutting it off.
TIP (When using the Healing Brush tool use lots of layers. This way if you do a mistake you can always revert to an original state. Don’t follow my exact steps, but instead use your own workflow with lots of layers. You can always merge the layers if they clutter – to merge the layers select them and press Ctrl+E.)

Step 4
Group all face related layers and add a layer mask. Using the pen tool or the lasso tool to make a precise selection like shown below than with the layer mask selected fill this selection with black.

Step 5
Open file “Metal1” and press Ctrl+A to select all. Then press Ctrl+C to copy an Ctrl+V to paste it into our document. Press Ctrl+T to free transform it like shown below than move this layer below the group “Face”. Add a layer mask and mask away the areas shown below.
Press Ctrl+V again to paste the metal sheet into our document again than add a layer mask and fill it with black. Using a round soft white brush at 100% opacity reveal the areas shown below. Reduce the brush opacity to 20% to mask the transitional areas between metal layers.
Add a Curves adjustment layer and use the settings below. Fill the layer mask with black and using a round white soft brush paint over the areas shown below to add some depth the metal skull.
2 responses to “How to Create a High-Tech Cyborg Photo Manipulation in Photoshop”
-
Elegant, modern, very different..
-
you can always be creative in making robotic effect to an object. This Adrian’s is an example, simple effect for beginner to try. I like IA, so I made some androids from my fave actors. Hi5, Adrian! :)


Leave a Reply