Download Lightroom presets and LUTs, absolutely free. Use the presets to add creativity and style to your photos.

Step 6
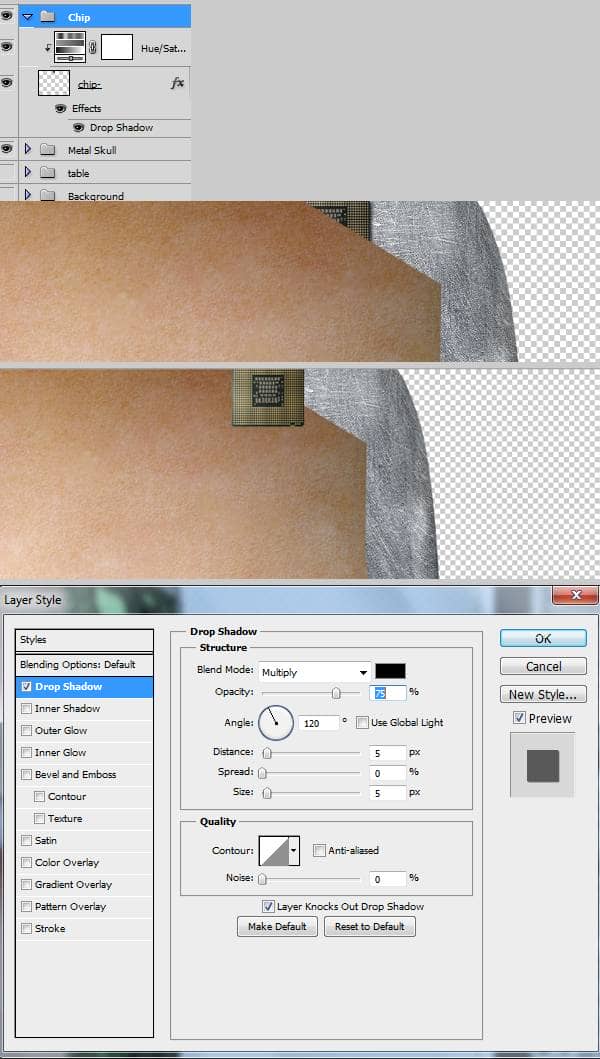
Open file "Chip1" and select the chip. Press Ctrl+C to copy than press Ctrl+V to paste it into our document. Press Ctrl+T to free transform the chip than place this layer between the "Face" and the "Metal Skull" layer. Add a Drop Shadow effect than add a clipped Hue/Saturation layer to lower the saturation.

Step 7
Open file "Circuits1" and press Ctrl+A to select all than Ctrl+C to copy. Press Ctrl+V to paste it into our document then Ctrl+T to free transform the circuit like shown below. Add a layer mask and mask away the outer edge of the circuit.
Press Ctrl+V again to paste the circuit again than free transform it so it merges with the first circuit. Add a layer mask to make the transition between the circuits seamless.
Add a Curves adjustment layer with the settings below than fill the layer mask with black. Use a round soft white brush at 30 % opacity to brush the outer edges of the circuit in the layer mask. This step will create a better sensation of spatiality.
TIP (Dark areas seem to be further away and light areas closer so if you want to make an object look more 3D darken the areas that should be further and lighten the ones that should be closer. Also note that objects further away are less saturated and tend to have a cooler hue than those that are close. And if you really want to perfect the 3d sensation blur the further objects and sharpen the close ones.)

Step 8
Turn off the visibility of all layers except for the circuits and the curves above them then press Ctrl+Shift+Alt+E to make a new layer from all visible. Add a 2 px Gaussian blur to this layer than add a layer mask and fill it with black. Using a soft round white brush at 50% opacity reveal some of the blurrend areas in the outer portion of the circuits. Turn on the visibility of other layers.
Add a Hue/Saturation adjustment layer and reduce the saturation. Then select the Linear Gradient Tool and using black and white as default colors drag in layer mask to reveal only the outer part of the circuits. This way the effects will only be visible on the outer parts.


2 comments on “How to Create a High-Tech Cyborg Photo Manipulation in Photoshop”
Elegant, modern, very different..
you can always be creative in making robotic effect to an object. This Adrian's is an example, simple effect for beginner to try. I like IA, so I made some androids from my fave actors. Hi5, Adrian! :)