Step 28
Now let’s add the umbrella guy in our scene. Open the file “Guy with umbrella” and copy/paste the man with the umbrella in our scene. Use the Free Transform tool to position him as shown below.

Step 29
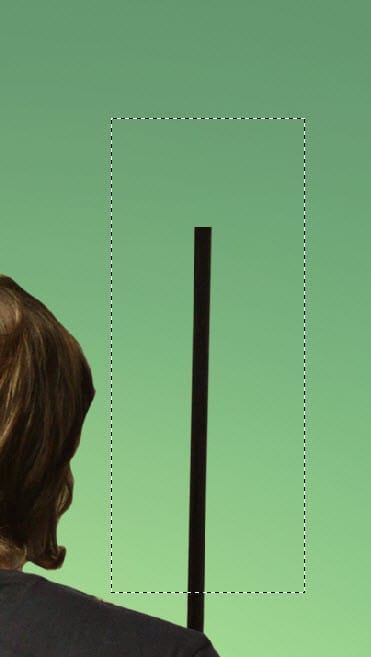
Make a selection of the umbrella with Rectangular Marquee Tool as shown below and create a copy of the selection by pressing Ctrl + J. You now have the cut umbrella on a new layer.

Step 30
Resize the duplicated umbrella with Ctrl + T and place it as shown below – it will be barely visible because it is over the original umbrella but you should see it.

Step 31
Go back to our guy layer and add a layer mask. Use the chalk brush to hide the big umbrella (paint with black over it). Now only the duplicated small umbrella layer is visible.

Step 32
Use the Rectangular Marquee Tool to select the umbrella stick (you should have the guy with the umbrella layer active – click on it to make it active – and not the small umbrella layer).

Step 33
Now press Ctrl + J to make a duplicate of the umbrella stick selection you created at the previous step. Move this duplicated umbrella stick with the Move Tool (V) until it connects with the small umbrella above.
Group the duplicated stick and the duplicated umbrella layers under a new group (hold Ctrl and click on each layer – press Ctrl + G to group) and name this group “Umbrella”. We’ll come back to this group later in the tutorial.

Step 34
Now go back to our original guy with the umbrella layer. In the layer mask use a round soft brush at 40% Opacity to paint with black over the region that sits underwater (the legs and a part of his bottom). This will give the impression that he is sitting in the water.

Step 35
Let’s start color correcting and blending the guy with our scene. First create a Levels Adjustment Layer and use the settings shown below to darken. Clip this layer to the guy layer and use the layer mask to hide the section where the darkness is too much.

Step 36
Add a Color Balance Adjustment Layer with the settings shown below and clip it to the guy layer to match his color with that of the environment.
11 responses to “Create a Melancholic Scene of a Guy Standing in the Rain”
-
Thank you for the fucked up tutorial, you jumped from step 19 to 80, i have lost 2hrs of my time for nothing, just to get stuck, such a waste of time , grrrrr.
-
And you can follow the tutorial until step 19 then you get jumped onto step 80 :D
Alright everyone, surprise surprise, you all got trolled :D
-
I really like this art… reminds me one my favorite 68´s song…everyday people—
Sometimes I’m right and I can be wrong
My own beliefs are in my song
The butcher, the banker, the drummer and then
Makes no difference what group I’m in
I am everyday people, yeah, yeah! -
I can’t find the chalk brush. I downloaded a couple but none of them produce the same results with the settings provided.
Thanks for a great tut, though. I learned a lot.
-
-(((
I don’t know what happened with your site but…
I can’t see any steps in this tuts(((
and an other tuts (2-too)
where is:
step 1
step 2
step 3
,,,
???
hope you understand me and will help me to use your site)))-
Adblock is blocking the article div. Whitelist the div or stop using Adblock and use Adblock Plus or Ghostery instead.
-
-
Excellent tutorial thank you
-
Excellent tutorial, Thank you
-
Beautiful beautiful beautiful
-
Where is the tutorial? I just can see the image.
-
Awesome <3 Vry nice TUT " i'm lovin' it <3 (y)


Leave a Reply