

Your image doesn’t have to be exactly like mine, use your imagination and try to create a unique landscape!
Step 4: Add the Stars
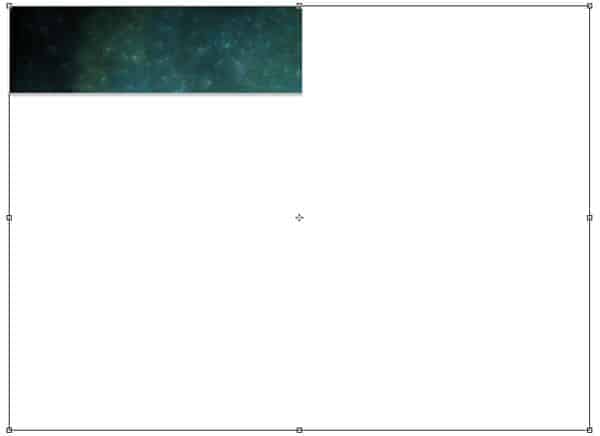
Now let’s add the sky. Open the fractal stock, hit Ctrl/Cmd+A to select all of it, and then copy (Ctrl/Cmd+C) and paste (Ctrl/Cmd+V) it into our project.

Your image should look like this now. Make sure the sky layer is above all the others

Press Ctrl/Cmd+T to use the Free Transform Tool and change the Width and Height values in the top toolbar. Set them to 77%.

Place the image in the right place again (click and drag), and you should have something like this now:

After resizing the stars a little bit, move them like shown in the image below (just click and drag to move).

Now change the name of this layer to Stars and place it below the Trees layer. Click and drag the layers to move them around

Step 5: Improving the Sky
Our sky is looking okay, but we’re going to make it even better. First, load the brushes we installed before (like we did in Step 2). There are three brushes to improve the sky: “Galaxies_bySunira”; “Planets2_bySunira” and “stars and galaxys”. After you load them (one by one), they’ll be appended to the bottom of our brushes (Right Click while using the Brush Tool to view them).

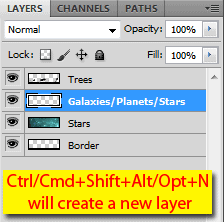
Like we did before, create a new layer (Shortcut: Ctrl/Cmd+Shift+Alt/Opt+N) called ‘Galaxies/Planets/Stars’ and place it between the Trees and the Stars layers.

Now we’re going to paint (like the name of the layer suggests) stars, galaxies and planets in our image. We’re going to paint with white, so press D to return the colors of your pallet to black and white, and press X to swap black with white (white will be your foreground color now). Here are some tips while painting this part:
- Remember to set the opacity of the brush to 100% before start painting
- You can quickly decrease or increase the size of the brush hitting ‘[‘ or ‘]’ respectively
- Be creative in this part, but be careful to not overcrowd the image
- Some brushes have some hard edges, so you’ll have to use the eraser (Shortcut: E) to erase the borders (Opacity:100% / Hardness:0%)
- You can also use the eraser (as mentioned above) to erase some parts of the brush that you don’t want
- A big planet on the bottom of our image will add a good effect to the landscape
- Keep the nebulas and galaxies in the top part of our image (don’t place them too close to the landscape)
- If you want to rotate the brush, go to Window > Brush and change the Angle until you’re happy with the result
- You can also use the standard round brush with 0% hardness to make the stars
- d here’s the step-by-step of my painting in this step:


To finish this step, add some fog near the landscape using one of the nebula brushes (I used Nebula 3). Remember to keep the same settings we used before (100% opacity with white color), and paint something like this:
- Don’t click and drag the brush to create this fog, give a few clicks randomly in the image until you’re happy with the results
- Make sure you lower the size of the brush before start painting (or you can use only the top part of the brush to paint if you want)


Step 6: Painting the sky
Our sky is looking good with all these stars, planets and galaxies, but we’re going to make it even better in this step. Create a new layer (Shortcut: Ctrl/Cmd+Shift+Alt/Opt+N) called “Colors”, set the blend mode to Color and place it between the Trees and the Galaxies/Planets/Stars layers.
11 responses to “How to Create a Stars and Planets Time Lapse in Photoshop”
-
Your image works beautifully with the mask Nancy!This looks like a great tool. I’m going to try it out. Currently.Thanks for sharing these useful information….
-
I made it although i made it and uploaded the video on facebook!
(I uploaded as a video not a .gif)
So here is the link: https://www.facebook.com/photo.php?v=646167675410197&set=vb.100000509100609&type=3&theater
You can see it and if you like it just hit the like button.
Thank you for this tutorial.. im glad i learned a couple things!! -
I have a small problem!!
I dont have the animation timeline you have..
My photoshop has a timeline but i have to make the animation frame by frame and only..
I have adobe photoshop cs6 Version 13.0 x32.. i dont know if that helps -
Nice tutorial. Keep it up Guys!
-
I am trying to save a file, but I don’t have the “QuickTime Export” option. What it might be wrong?
-
I would add some motion blur to it so that it doesn’t look so choppy. Nice to see an animation tutorial :)
-
Very nice! Thank you a lot!
-
Please help me!!! I don’t know how to download the brushes and the other things!!!
-
Took me awhile to find the download link but it’s on the right-side between all the clutter
-
Superb graphic design tutorials and thanks for share….
Awesome and difference articles…thanks to share..


Leave a Reply