
With the blue arrow still at 02:00f, click the stopwatch of the Position in our Meteors layer.

Set the blue arrow somewhere between the 03:00f and 15f and using the Move Tool (Shortcut: V), drag the meteors diagonally until they disappear of the scene in the left border (remember to hold Shift).

Here’s the result:
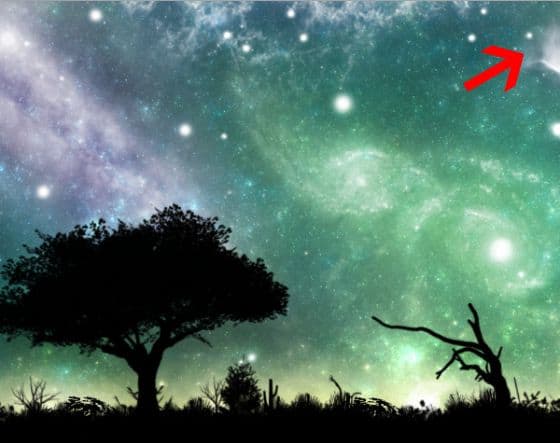
Let’s add another meteor in the end of our scene. Create a new layer (Shortcut: Ctrl/Cmd+Shift+Alt/Opt+N) and name it Meteor. Place it below the Meteors layer we created before.

Right click the Meteors layer and click in Copy Layer Style.

Right click the Meteor layer and click in Paste Layer Style.

Using the same brush we used before, increase its size to around 75px, and draw a single meteor on the top right corner of the screen. · If you’re not sure what brush it is or what angle to use, just look in the pictures above (when we created the Meteors layer)

With the Move Tool (Shortcut: V), hold the Shift key and drag the meteor diagonally out of the screen.

In our timeline, place the blue arrow at 06:00f and set a keyframe of the Meteor position there (like we did before, just click the stopwatch of the position).

Now place the blue arrow at 08:00f and use the Move Tool to drag the meteor diagonally to the bottom of our scene.

Your timeline should look like this:

And here is the final result:
Step 11: Exporting the scene
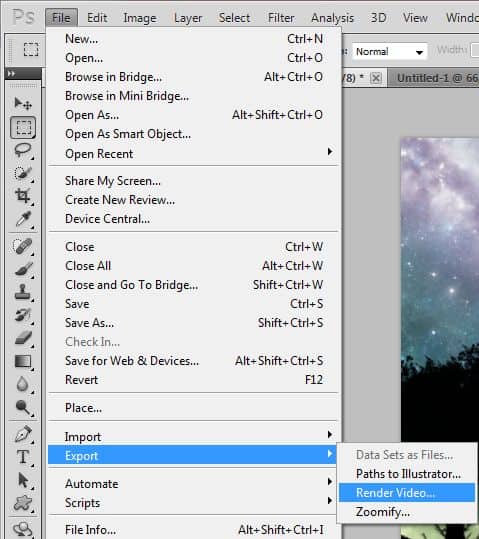
This is the last step of this tutorial, we’re going to export our scene into a movie format because if we exported it as a gif image we would loose a lot of the colors in the image. In this tutorial I’m going to show you how to export an animation in QuickTime format, but if you have Photoshop CS5 Extended it would be better to export it as a MPEG-4 file. Go to Export > Render Video.

Change the name of the file to anything you want, then select the folder where you want to extract it. In File Options, select QuickTime Export and QuickTime Movie. In Range, make sure the All Frames option is selected. All the settings are maximized by default, so if you don’t want your video file to be around 300MB click in the Settings button (after the QuickTime Export) and lower the quality of your scene.
11 responses to “How to Create a Stars and Planets Time Lapse in Photoshop”
-
Your image works beautifully with the mask Nancy!This looks like a great tool. I’m going to try it out. Currently.Thanks for sharing these useful information….
-
I made it although i made it and uploaded the video on facebook!
(I uploaded as a video not a .gif)
So here is the link: https://www.facebook.com/photo.php?v=646167675410197&set=vb.100000509100609&type=3&theater
You can see it and if you like it just hit the like button.
Thank you for this tutorial.. im glad i learned a couple things!! -
I have a small problem!!
I dont have the animation timeline you have..
My photoshop has a timeline but i have to make the animation frame by frame and only..
I have adobe photoshop cs6 Version 13.0 x32.. i dont know if that helps -
Nice tutorial. Keep it up Guys!
-
I am trying to save a file, but I don’t have the “QuickTime Export” option. What it might be wrong?
-
I would add some motion blur to it so that it doesn’t look so choppy. Nice to see an animation tutorial :)
-
Very nice! Thank you a lot!
-
Please help me!!! I don’t know how to download the brushes and the other things!!!
-
Took me awhile to find the download link but it’s on the right-side between all the clutter
-
Superb graphic design tutorials and thanks for share….
Awesome and difference articles…thanks to share..


Leave a Reply