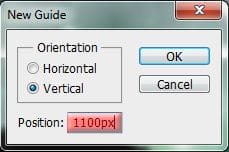
Set the Orientation to Vertical and input 500px in the Position.

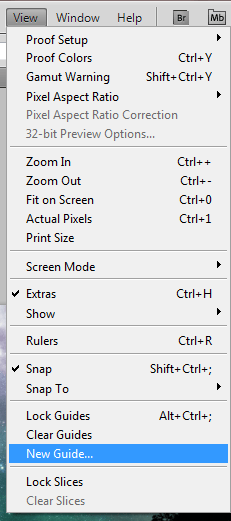
Then go back to View > New Guide and this time set the Position to 1100px.

Tip: If you want to erase a guide just select the Move Tool (Shortcut: V), click in the guide you want to erase and drag it out of the screen You should have something like this now:

Now with the Trees layer selected, use the Move Tool (Shortcut: V) to move the trees to the right until the end of the trees touches the left guide. Like this: · Hold Shift while using the Move Tool to move in only one axis

With the other two layers selected (Hold Ctrl/Cmd and click them), do the same thing but this time drag them to the left until the border reaches the right guide like this:

Hit Ctrl/Cmd+Alt/Opt+C to bring up the Canvas Size menu. Select pixels, and lower the Width to 600px.

And this is the result:

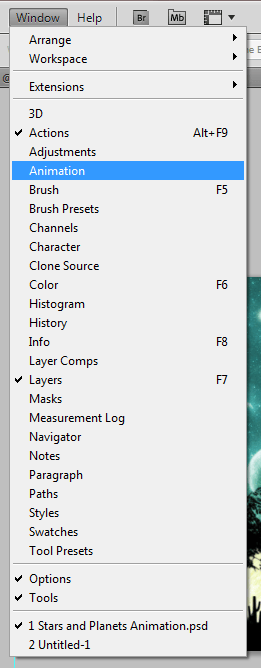
Go to Window > Animation to bring up the Animation panel.

This is the panel we’re going to use to animate our scene. It may seem a little bit confusing at first but it’s actually really simple. Let’s start with the trees, click in the little arrow on the left of the Trees to expand their animation panel, then click in the stopwatch of the Position, cause that’s what we’re going to animate now.

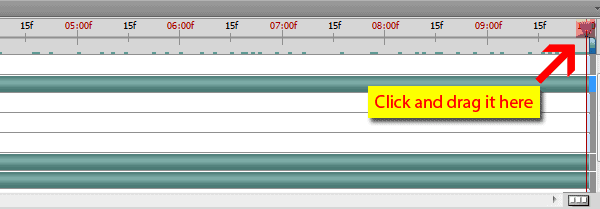
By clicking in the stopwatch there, we just told Photoshop where our Trees layer will start the animation (Position). Now we just have to grab that blue arrow in the timeline, drag it to the end of the animation, and tell Photoshop where we want the Trees layer to end. Click and drag the blue arrow to the end of the timeline (10:00f).

Select the Move Tool (Shortcut: V) and drag the Trees layer to the left. Drag it until the right side of our layer matches the right border of our scene (Remember to hold Shift while dragging so it only moves in one axis), like this:

If you did everything right, a keyframe will appear in your animation panel, and you can already see what your animation is looking like by pressing the Spacebar.

We’re going to use the exact same steps we used to animate the Trees layer to animate our two other layers, the only difference is that this time we’re going to animate both layers at once. Expand the animation panel of the Sky and the Stars Glow layers. Make sure that the blue arrow is at the beginning of our timeline, and click in the stopwatch of the Position in both of these layers.
11 responses to “How to Create a Stars and Planets Time Lapse in Photoshop”
-
Your image works beautifully with the mask Nancy!This looks like a great tool. I’m going to try it out. Currently.Thanks for sharing these useful information….
-
I made it although i made it and uploaded the video on facebook!
(I uploaded as a video not a .gif)
So here is the link: https://www.facebook.com/photo.php?v=646167675410197&set=vb.100000509100609&type=3&theater
You can see it and if you like it just hit the like button.
Thank you for this tutorial.. im glad i learned a couple things!! -
I have a small problem!!
I dont have the animation timeline you have..
My photoshop has a timeline but i have to make the animation frame by frame and only..
I have adobe photoshop cs6 Version 13.0 x32.. i dont know if that helps -
Nice tutorial. Keep it up Guys!
-
I am trying to save a file, but I don’t have the “QuickTime Export” option. What it might be wrong?
-
I would add some motion blur to it so that it doesn’t look so choppy. Nice to see an animation tutorial :)
-
Very nice! Thank you a lot!
-
Please help me!!! I don’t know how to download the brushes and the other things!!!
-
Took me awhile to find the download link but it’s on the right-side between all the clutter
-
Superb graphic design tutorials and thanks for share….
Awesome and difference articles…thanks to share..


Leave a Reply