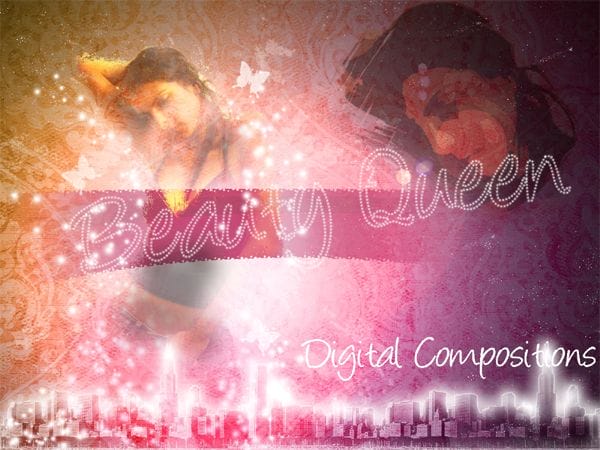
This tutorial will help you create a fashion wallpaper with several techniques. It also shows you the effectiveness of default Photoshop brushes & blend modes, and how you can use them to greatly improve artworks.
Fashion Wallpaper Photoshop Tutorial
Preview of Final Results

Raw Materials
This is the list of things we need for making this artwork.
Stock Photos
Brushes Needed
OK. Now before you guys think this is a really easy artwork with some cheap filters , let me tell you that it isn’t so. In fact it’s quiet long and detailed so if you get stuck while skipping steps then i guess you’re on your own. Also I’m taking a different approach to this tutorial. While most tutorials go by the order of steps, I’m dividing the tutorial into 7 Groups so as to make things easier. Here is the arrangement of Groups. You can set these up before we start.
![1[4] 1[4]](https://cdn.photoshoptutorials.ws/images/stories/FashionModelPoster_10B6D/14.jpg?strip=all&lossy=1&webp=82&avif=82&w=1920&ssl=1)
Group 1 – Background(BG)
Lets start off with a new blank canvas with white (#ffffff) as the background. Make a new layer (Ctrl + Shift + N) and fill it with a gradient going from the top left to bottom right corner of the canvas.
![2[4] 2[4]](https://cdn.photoshoptutorials.ws/images/stories/FashionModelPoster_10B6D/24.jpg?strip=all&lossy=1&webp=82&avif=82&w=1920&ssl=1)
I used these to as the colors for the gradient.
- Orange : #ffb33a
- Pink : #fd0083
![3[4] 3[4]](https://cdn.photoshoptutorials.ws/images/stories/FashionModelPoster_10B6D/34.jpg?strip=all&lossy=1&webp=82&avif=82&w=1920&ssl=1)
Next we add the patterned background over it.
- Blend Mode : Luminosity
- Opacity : 55%
Make sure to group these layer into Group BG. Now we need to add the main element for this artwork – the girl. So let’s save this for now and open up the image of the girl in Photoshop.
Extraction Of Girl
As you can see, this image is totally messed up. Nothing matches with the artwork we’ve made so far; lighting , color , mood. And this is where Photoshop comes in.
![5[4] 5[4]](https://cdn.photoshoptutorials.ws/images/stories/FashionModelPoster_10B6D/54.jpg?strip=all&lossy=1&webp=82&avif=82&w=1920&ssl=1)
Using the Pen Tool(P) or Polygonal Lasso Tool(L) extract the girl from the image. I personally prefer the Pen Tool in such images since there’s mostly straight lines and you get greater smoothness while cutting along the turns.
![6[4] 6[4]](https://cdn.photoshoptutorials.ws/images/stories/FashionModelPoster_10B6D/64.jpg?strip=all&lossy=1&webp=82&avif=82&w=1920&ssl=1)
Don’t worry about the jagged edges of the cutting around the hair since that can be dealt with once we put the picture in our canvas. If you’ve done it with the pen tool, after making the path, right-click on it and select make selection.
- Feathered Radius : 2px
- Check anti-aliased.
![7[4] 7[4]](https://cdn.photoshoptutorials.ws/images/stories/FashionModelPoster_10B6D/74.jpg?strip=all&lossy=1&webp=82&avif=82&w=1920&ssl=1)
Now select the Move Tool(V) and transfer the girl to our canvas. Re size appropriately and move her to the left side of the canvas since this is the side that we first see in any image. Name this layer “girl” It goes in the group ‘Girl’.
3 responses to “Fashion Wallpaper”
-
This is so cheesy and 2000s teenager vibe
-
wow awesome tutorial..
very nice explanation …. -
I Love this technique


Leave a Reply