Download Lightroom presets and LUTs, absolutely free. Use the presets to add creativity and style to your photos.

Grab the Brush Tool (B), set the Master Diameter on 2 - 5 pixels, lower its Opacity on 5% and pick white color. Start painting on the areas which should be lighter because of the sun rays. Paint also over the dinosaur's head because it's too dark.
Below you can get inspiration where you should paint. These areas are highlighted with red color.

Step 6 - Adjusting Shadows
Now it's time to do the same with shadows. By doing these two steps you not only create more realistic scene but also add bit more drama to the picture because you'll increase contrast between lights and shadows.
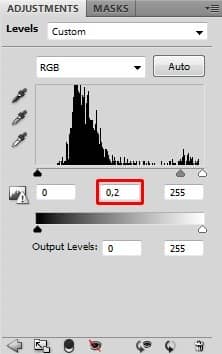
Add new adjustment layer Levels on the top of all layers and this time set the Input Levels on 0; 0,2; 255.

Grab the Paint Bucket Tool (G) and fill the layer mask of this layer with black same way you did it in previous step. Then grab the Brush Tool (B), use the same setting as before and paint shadows - on the opposite side of trees, add bounced shadows under the trees and on the dinosaur. Then make woman's hair bit darker.
Let's take a look where to paint. That areas are highlighted with blue color.

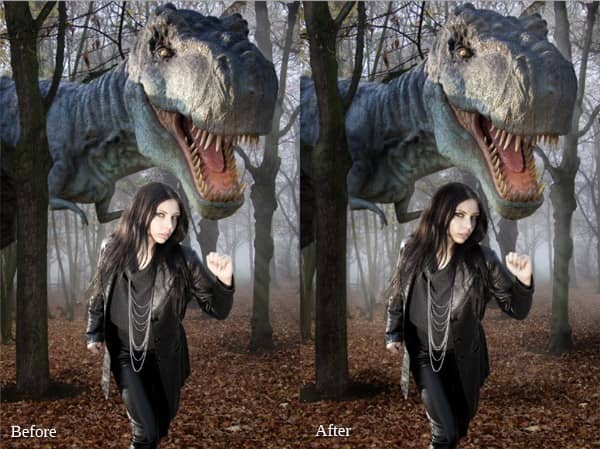
On following photos you can compare how the manipulation looks before and after two recent steps.

Step 7 - Adding More Light From Left
In this step you'll add more light coming from the left side of the image. Right now it's bit darker than the rest of the image and it doesn't create harmony and doesn't look balanced.
You'll create light on two separate layers - one will be diffused light and second some more sun rays. Let's start with diffused light.
Add new layer on the top of all layers and name it e.g. DIFFUSED LIGHT. Grab the Lasso Tool (L) and carefully make selection of the tree. Be as careful as possible to get the best result. The better masking means better looking and more realistic images even if it's more time consuming.

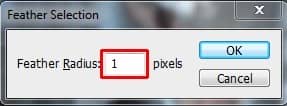
To make the selection bit smoother go to Select > Modify > Feather (the path may vary in different versions of Photoshop) or simply press Shift + F6 on your keyboard. Set the value Feather Radius on 1 pixel and press OK.

You want to paint outside the tree, not inside. Because of that you need to invert the selection. Go to Select > Inverse or press Shift + Ctrl + I on your keyboard.

