Grab the Brush Tool (B), select some soft round brush with big Master Diameter and lower its Opacity on about 15%. Pick some light yellow color (avoid white, remember what we said above?) and paint one or two dots on the left. Take a look on the following picture to get the example. I painted with red instead so you can see it better.
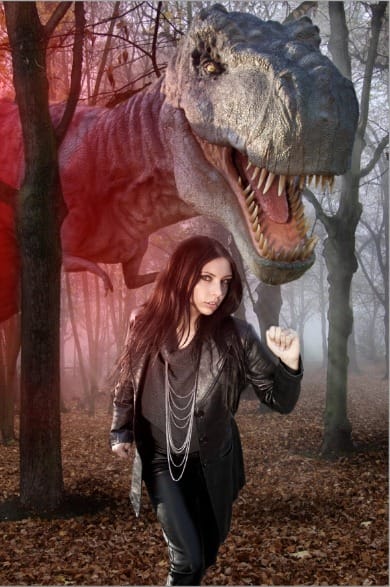
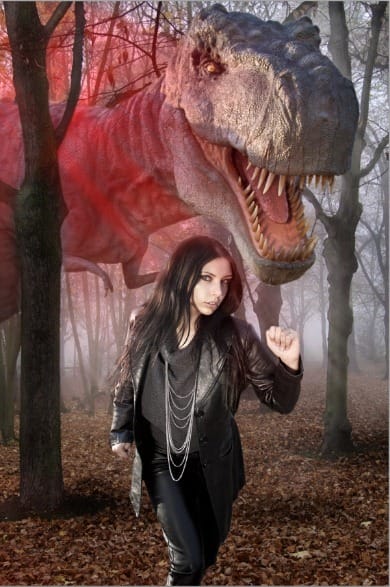
Let’s move on light from sun rays. Add another new layer on the top of all layers and name SUN RAYS. Grab the Brush Tool (B) and select some sun ray brush you’ve installed in some of the previous steps. Set the Opacity on about 30%, pick some slightly different tone of light yellow color and paint rays.
Below you can get the inspiration. I painted with red again so you can see better what I did.
Step 8 – First Color Adjustment
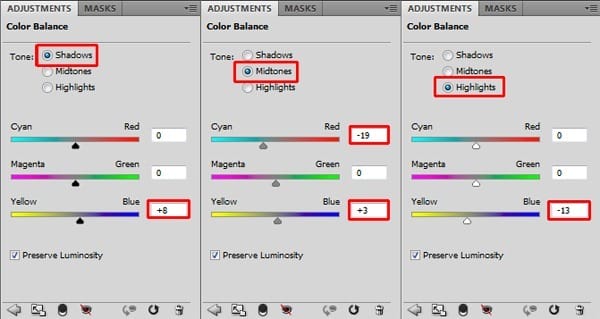
It’s time to begin with setting the mood of the image. Because it’s some calm, autumn morning I think that more colder color palette would suit better to the image.
To do that add new adjustment layer Color Balance on the top of all layers and set the values as shown on the picture below.
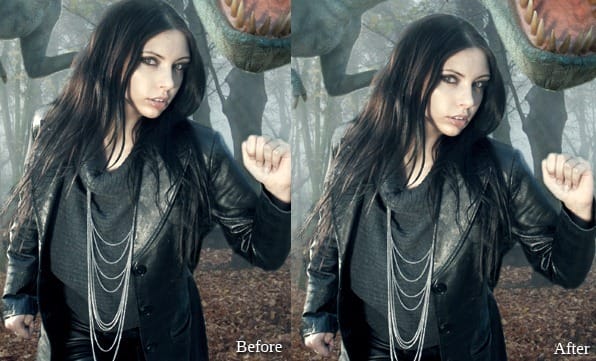
Let’s compare how the photo looks before and after this adjustment, shall we?

Step 9 – Retouching Highlight on Jacket
I strongly believe that what makes the photo manipulation great is focusing on details. Which is why you’ll remove some highlights on the woman’s jacket. They’re both disturbing and too bright given the overall light scene.
Let’s take a look at the highlights you are going to retouch in this step:
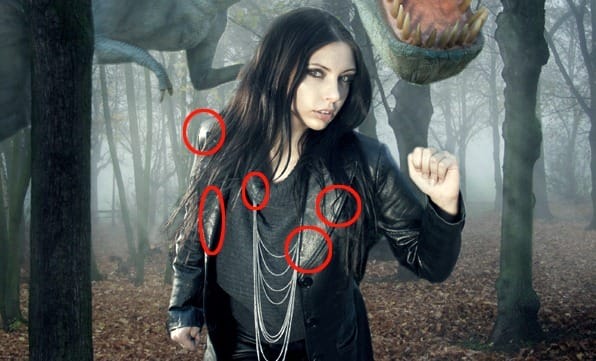
Add new layer on the top of all layers and name it e.g. JACKET RETOUCH. Grab the Stamp Tool (S), select some soft round brush and set the Master Diameter on about 30 pixels. Set the Opacity on 100% and clone some pattern from darker areas into the circled areas.
If you don’t know how to use the Stamp Tool (S) I strongly recommend you to check out some tutorials about it because it’s very useful Photoshop tool.
Change the source of cloning to avoid repetitive pattern which never looks realistic in pictures. Below you can compare how the jacket looks before and after using of the Stamp Tool (S).
Step 10 – Darkening Trees and Hair
Right now trees look flat because there are no shadows on them. Also hair of woman should be bit darker to look better and more contrasted. You’ll easily fix it in this step.


Leave a Reply