Make invisible the layer WOMAN. To do it click on the small icon of eye next to that layer.
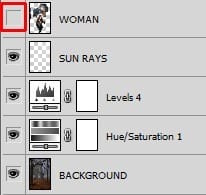
Now paint some light rays. Keep in mind that to get realistic look they all should come from the same site. Also don’t paint much of the rays, it wouldn’t look realistic.
You can get the inspiration of what to paint on the picture below.
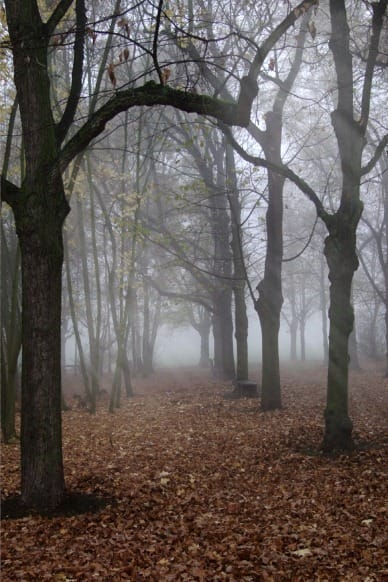
After you finish painting make the layer WOMAN visible again.
Step 4 – Adjusting Woman
Let’s make first adjustments on woman. Because of the light scene her stock photo was shot, her skin has yellowish tone, which doesn’t fit to the color palette of the forest. To fix it you’ll make her bit darker and less saturated.
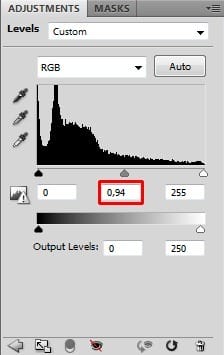
Create mask of the woman (e.g. with the Lasso Tool (L) or the Pen Tool (P)). With the mask still activated add new adjustment layer Levels on the top of all layers and set the Input Levels on 0; 0,94; 255.
On the picture below you can see how the thumbnail of the layer mask should look like. (Thumbnail is the red circled part.) As you may notice the white part is where the adjustment appears and the black part remains unedited.

Activate the mask of woman again. You can do it simply by clicking on the thumbnail of the Levels adjustment layer (highlighted on the picture above). Hold Ctrl on your keyboard while doing it. If you don’t the mask doesn’t active.
With mask activated add new adjustment layer Vibrancy and set the value Vibrancy on -60.
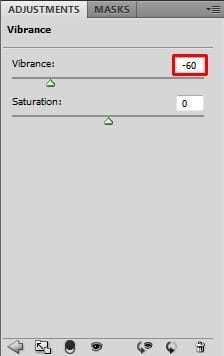
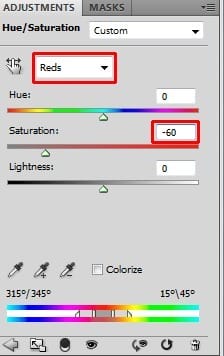
Note: Vibrancy adjustment is available only in Photoshop CS3 and higher. But you can get almost the same result in older versions of PS if you add adjustment layer Hue/Saturation, choose Red as color and set similar value as you would set for Vibrancy.
Let’s take a look.
Woman’s skin still doesn’t fit exactly to the rest of the image but don’t worry about it now. You’ll fix it in some of the next steps.

Step 5 – Adjusting Highlights
Let’s move on adjusting highlights in the background and on the dinosaur.
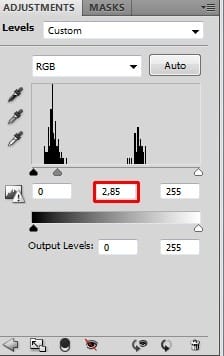
Add new adjustment layer Levels on the top of all layers and set the Input Levels on 0; 2,85; 255.
Right now the whole picture is very light which you obviously don’t want. You want to adjust only parts where sun hits. To achieve that click on the thumbnail of this layer, grab the Paint Bucket Tool (G) and fill the layer mask with solid black color.


Leave a Reply