You can find the button Add layer mask in the bottom part of the palette Layers.
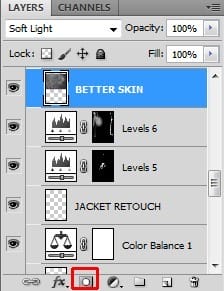
Grab the Brush Tool (B), select some soft round brush, set the Opacity on 100%, pick black color and now simply paint over the areas you want to hide.
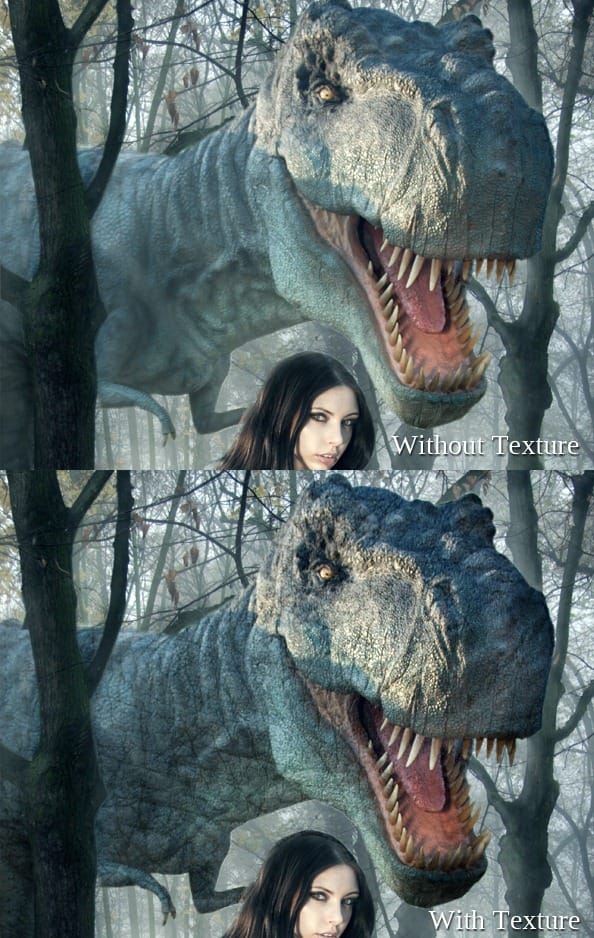
Below you can compare how the photo looks with and without texture.
Step 12 – Adjusting Dinosaur’s Head I
If you look carefully on dinosaur’s head you may notice that it doesn’t fit properly to the rest of the image because it’s too contrasted and also bit darker because of the light scene it was originally shot in. You’ll take care about in this step.
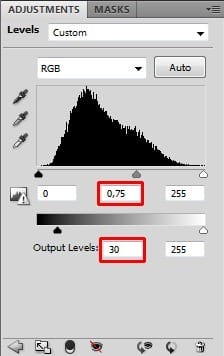
Add new adjustment layer Levels on the top of all layers and set the Input Levels on 0; 0,75; 255. Then set the Output Levels on 30; 255.
To adjust only dinosaur’s head and not the rest of the image grab the Paint Bucket Tool (G) and fill the layer mask with black color.
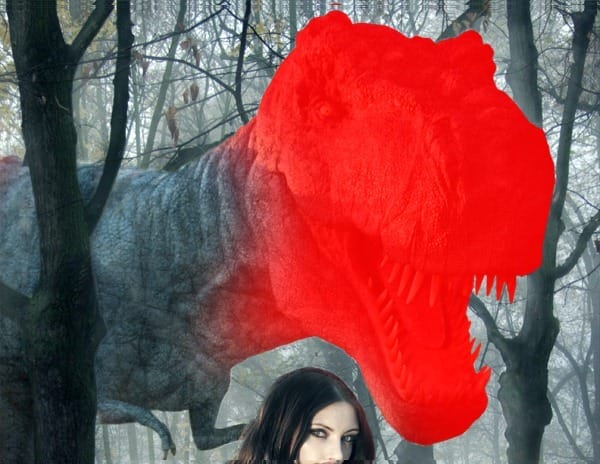
Grab the Lasso Tool (L) and create selection of dinosaurs head. Paint inside the selection with the white brush. Then cancel the selection (press Ctrl + D on your keyboard or go to Select > Deselect). Lower the Opacity of the brush on about 40% and create nice soft transition between adjusted and non-adjusted part of the dinosaur’s neck.
On the following image you can see better what I mean. Mask is highlighted with red color. Notice the soft transition on the neck.
Step 13 – Quick Background Cleaning
Do you see the branch which leads directly into dinosaur’s mouth? It looks really weird, isn’t it? You’ll retouch it away in this step.
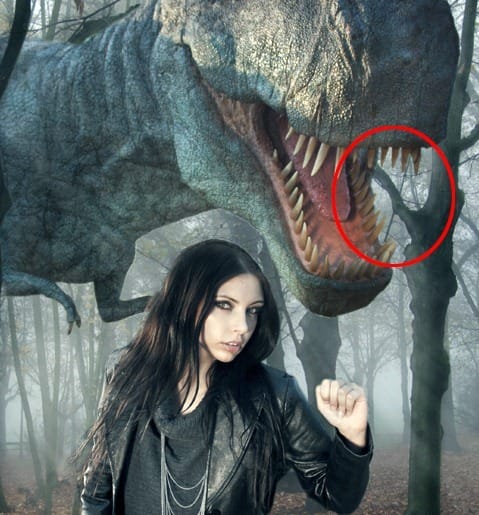
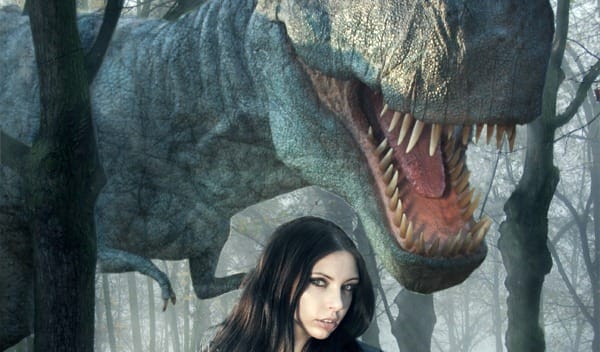
Add new layer on the top of all layers and name it e.g. NO BRANCH. Grab the Stamp Tool (S), set the Master Diameter on about 50 pixels and the Opacity on 100%. Choose some part of misty forest as the clone source and carefully clone it over the branch.
You should get something like on the following picture.
Step 14 – Adjusting Dinosaur’s Head II
Dinosaur needs some more adjustments to actually look like it’s part of the scene, especially its head. To achieve that you desaturate yellow light on the head.
To get rid off the yellow light add new layer Hue/Saturation on the top of all layers. Choose Yellows as color and set the value Saturation on -100.


Leave a Reply