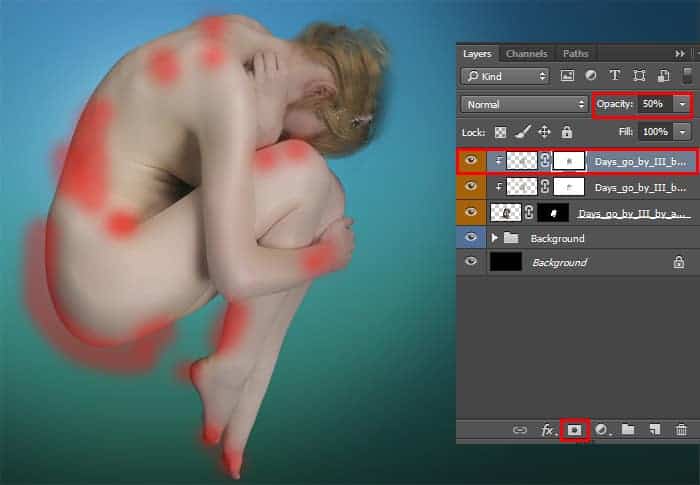
Add a layer mask and use Brush Tool (B) with black color to remove effect from unwanted parts.

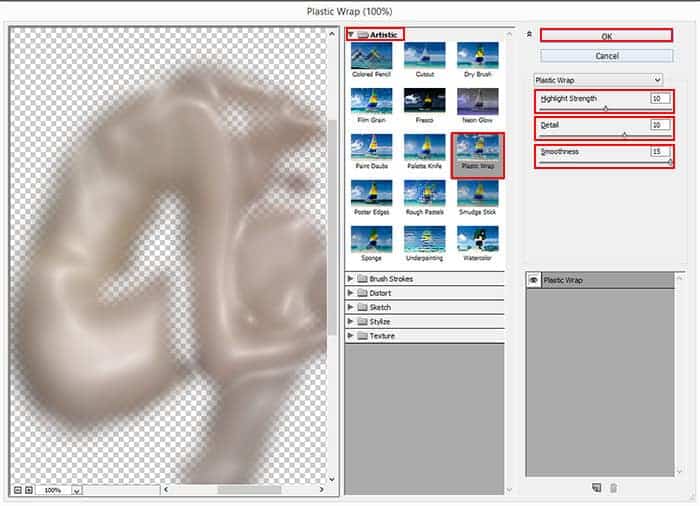
Duplicate layer with “Plastic Wrap” filter (Cmd/Ctrl + J), clip it and change Opacity to 15%, Blending Mode to “Color Burn”. This layer bit returns the natural color of the skin and remove excess white tone after the filter is applied. Now you can merge all layers with the model into one (Cmd/Ctrl + E) or in a group (Cmd/Ctrl + G). Working with model retouch is finished.

Step 9
Let’s proceed to the more tedious and important part. The next couple of hours you spend for one occupation – the creation of robot parts. In principle, it is very easy! Create a new group (Layer > New > Group or use icon on Layer panel) above model layer (you will have a lot of layers) and then follow the procedure. Create some support and large ellipses. I use Ellipse Tool (U) with black fill (or use hard brush with large size). This will be our main parts.

Set hard brush with Size: 3px, Opacity: 100% and black color, take a Pen Tool (P) and draw path where you need it, do right click – Stroke Path – Brush and do not forget to remove the path – Del on keyboard or right click – Delete Path. Also is welcome the independent use Brush Tool (B). A little advice, you will be much easier and faster to do this if you start with central lines. So you quickly realize that you want to draw. The most important rule in this activity is to create a new layer for every one stroke.

If you need to fix a point in the path, use Direct Selection Tool (A) to quickly switch to this tool, hold Cmd/Ctrl. Keep up the good work and you will get a good result! The main thing do not doubts. This is my result. When you’re sure to accurately drawn and satisfied, then Merge all detail layers into one (Cmd/Ctrl + E or Layer > Merge Layers).

Step 10
Now make there lines are real. To the layer with mechanical parts add style “Bevel & Emboss”, double click on Layer or go to Layer > Layer Style > “Bevel & Emboss”. In the window that appears set settings like shown in the image below. As you can see there was the effect of the internal circuit, which makes parts a realistic, but still not enough.
3 responses to “Create a Chilling Sci-Fi Scene of Cyborgs in Bubbles”
-
love it
-
Nice one..enjoy ur tutorials..pls I have questions ..what does a vector mask do
-
Thank you, a cognitive a lesson )) the result from the by curves differs


Leave a Reply