Luminar AI lets you turn your ideas into reality with powerful, intelligent AI. Download the photo editor and see how you can completely transform your photos in a few clicks.
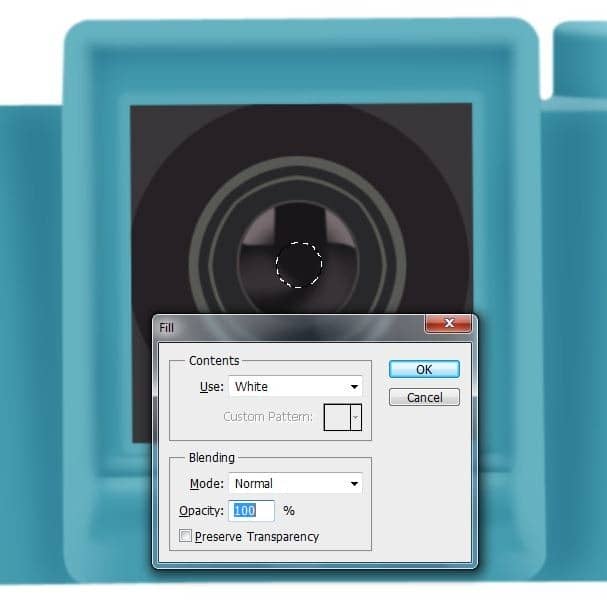
Step 41
Select the first circle ( CTRL + Click on layer ) like in the photo and make new path with Pen Tool (P) like me . Right-click select Make selection and select subtract from Selection . Press Shift +F5 or go to Edit-fill and select black from menu .
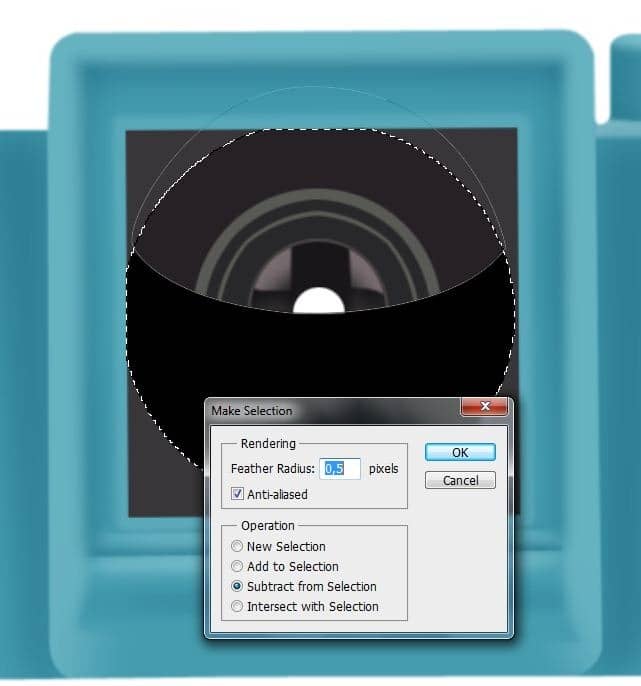
Set layer Blending Mode to Soft Light and opacity 40%

Step 42
Select the first circle ( CTRL + Click on layer ) like in the photo and make new path with Pen Tool (P) like me . Right-click select Make selection and select subtract from Selection . Press Shift +F5 or go to Edit-fill and select white from menu .
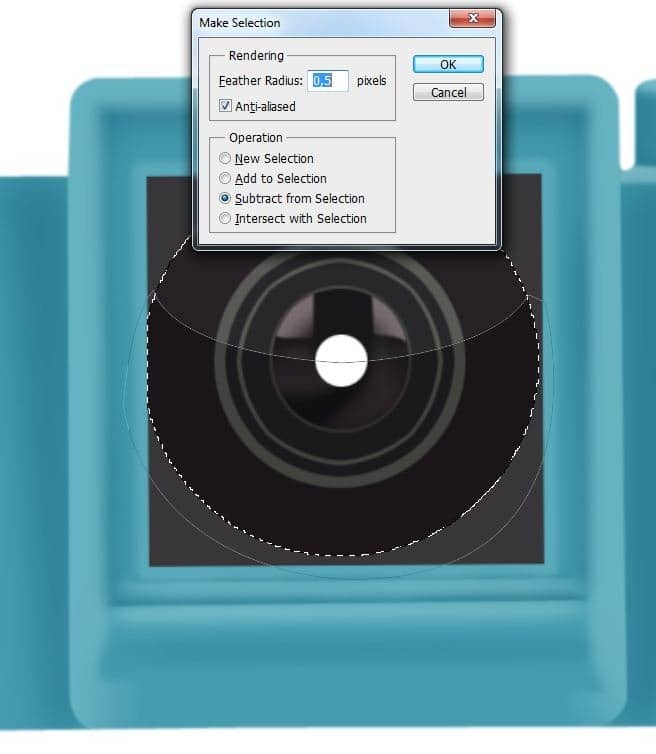
Set layer Blending Mode to Soft Light and opacity 40%

Step 43
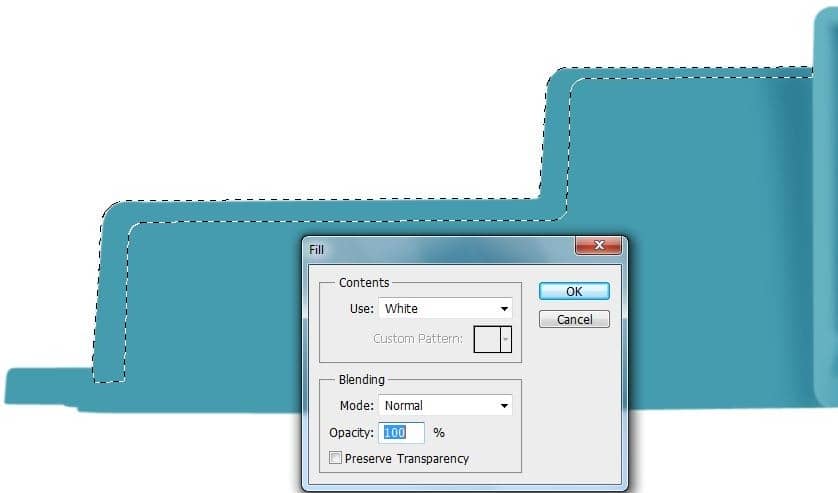
Make new path with Pen tool (P) like in the photo .
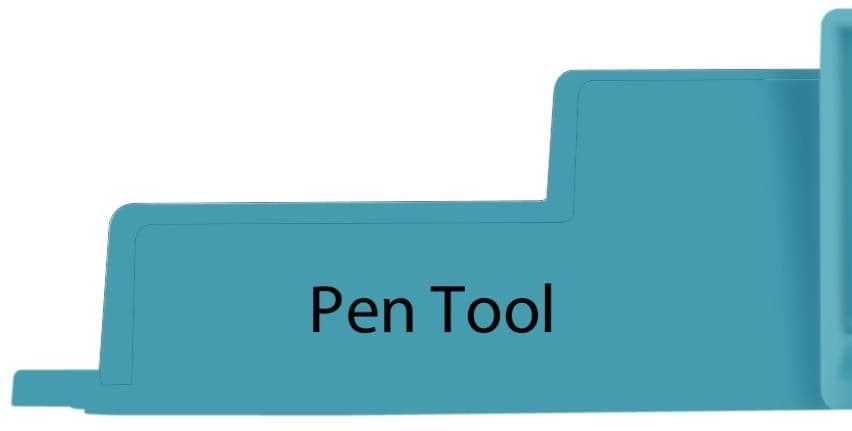
Right-click and select make selection with 0,5 father . Go to Edit-Fill or press Shift+F5 and select from menu white .
Step 44
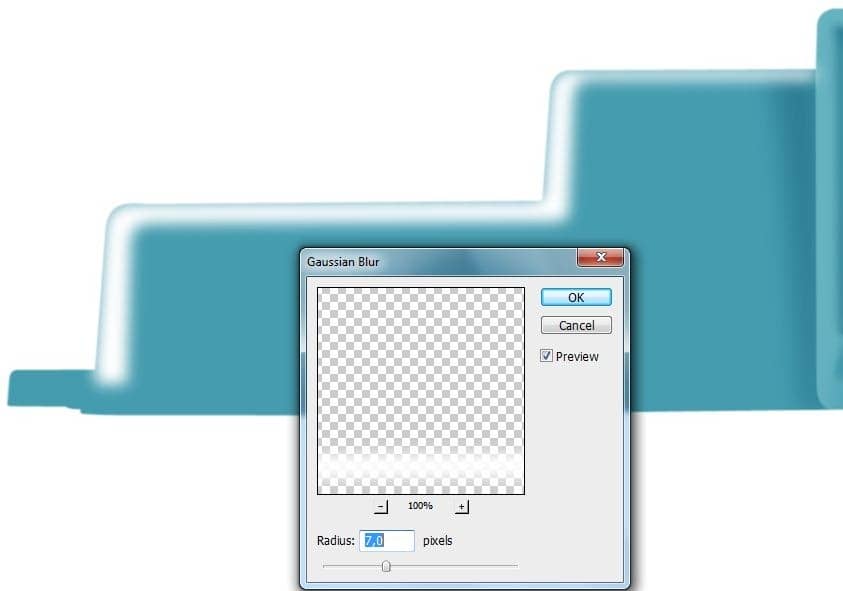
Go to Filter-Blur-Gaussian Blur and use the settings show bellow .
Step 45
Erase where the arrow indicate .
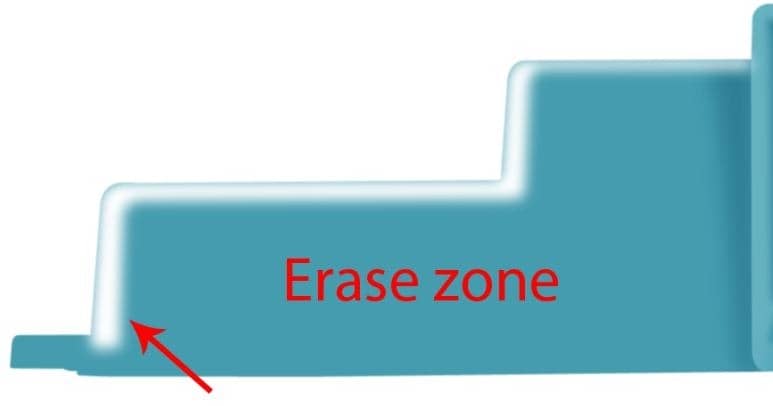
Set layer Blending Mode to Soft Light and Opacity 28%

Step 46
Make new path with Pen Tool (P) like in the photo .

Step 47
Right-click and select Make selection with father 0,5 . Select Brush tool with 120px size and color white and put the color like in the photo .
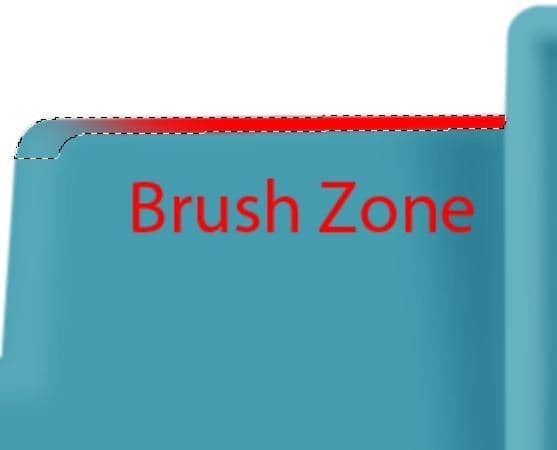
Set layer Blending Mode to Soft Light and Opacity 69%

Step 48
Make new path with Pen Tool (P) like in the photo .

Step 49
Right-click and select Make selection with Father 0,5 . Go to Edit-Fill or press Shift+F5 and select from menu white .
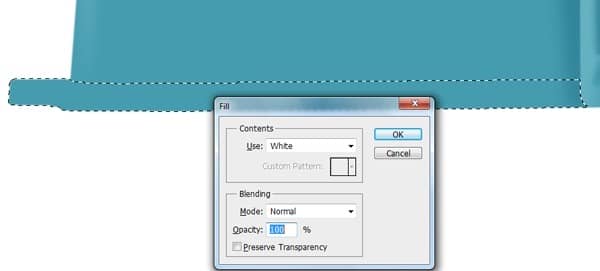
Set layer Blending mode to Soft Light and opacity 37%

Step 50
Make new path with Pen Tool (P) like in the photo .

Step 51
Right-click and select Make selection with Father 0,5 . Go to Edit-Fill or press Shift+F5 and select from menu white .
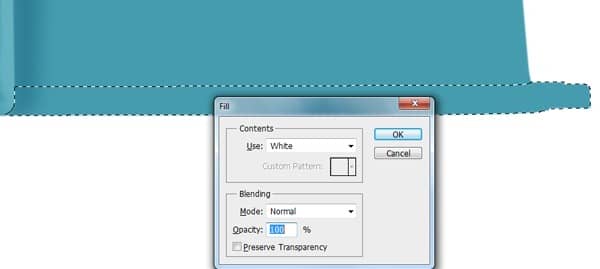
Set layer Blending mode to Soft Light and opacity 37%

Step 52
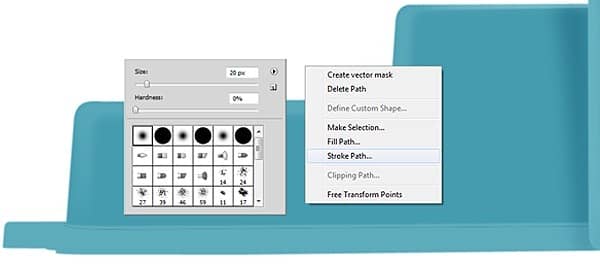
Make new path with Pen Tool(P) like in the photo .

Select Brush tool and set size brush to 20px . Right click and select stroke path and select from menu brush.
Step 53
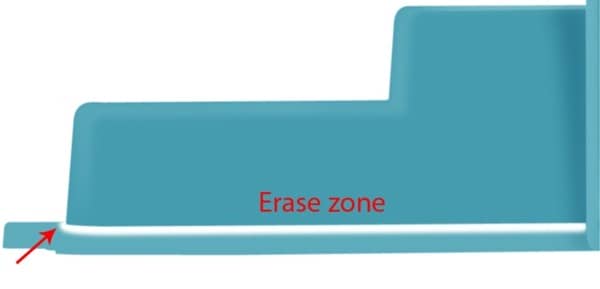
Select the margin like in the photo and press Shift + I to inverse selection and press Delete button .

Step 54
Erase little bit in this corner with Eraser Tool . Set layer Blending mode to Soft light
Step 55
Make new path with Pen Tool(P) like in the photo .


