
This is a combine shape layer, where we will create three separate shapes within a single shape layer. First we will create a shape like the image below. Shape layer is selected, go to Window > Paths to open the Path Panel. Make sure in the Path Panel path is selected. Then in the Option Bar above click on the Path operations button and select Combine Shapes.
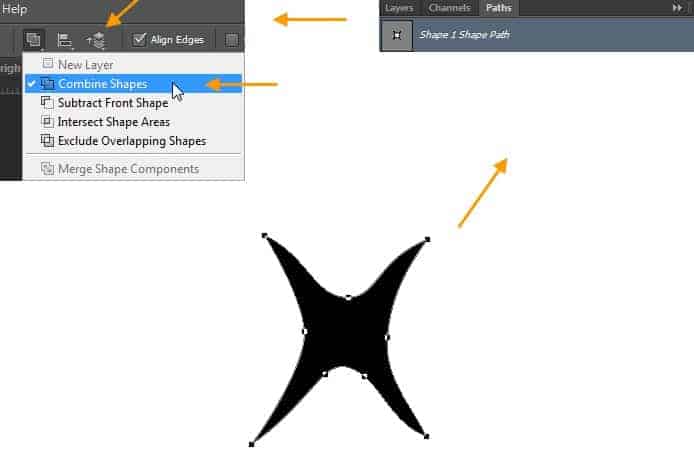
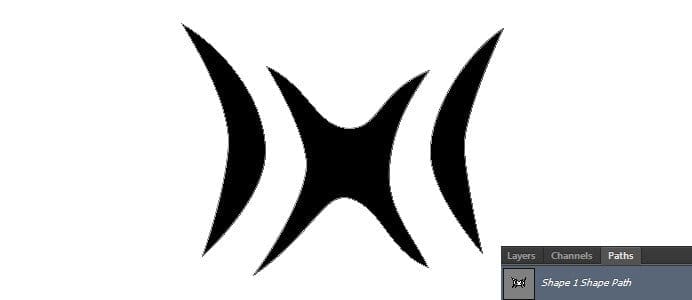
Then create another shape within the same shape layer. This way you can combine multiple shapes. After completing the shape layer Rasterize it and then apply some low radius (2-3 px) Gaussian Blur. Change the layer opacity to 40%.
Step 32
Similarly create the white shape like the below image.

But no need to Gaussian Blur it. Just change the layer opacity to 50%.

Hourglass upper neck area with all the shapes. So upper portion of the hourglass is complete now.

Step 33
RT-click on the group “Glass upr highlights + shadows” and select Duplicate Group. Rename duplicate group to “Glass lwr highlights + shadows” then drag down below the “Glass upr highlights + shadows” group. Then flip this new group from Edit > Transform > Flip Vertical. Position this new group on top the lower portion of the hourglass.
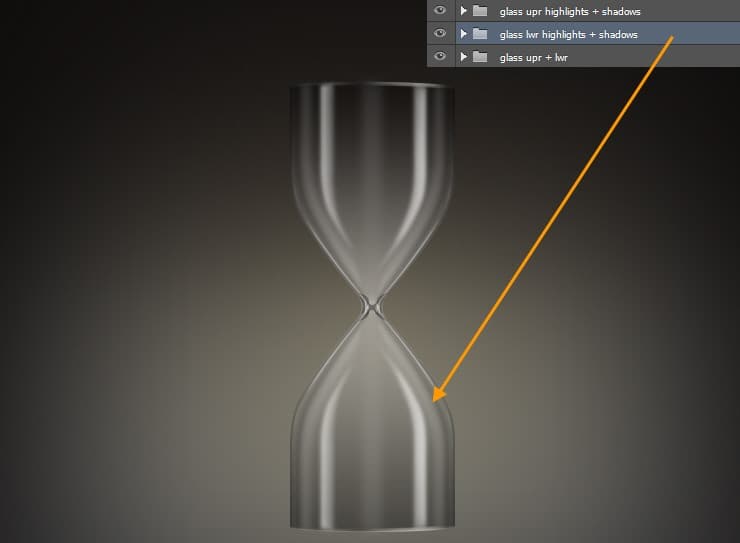
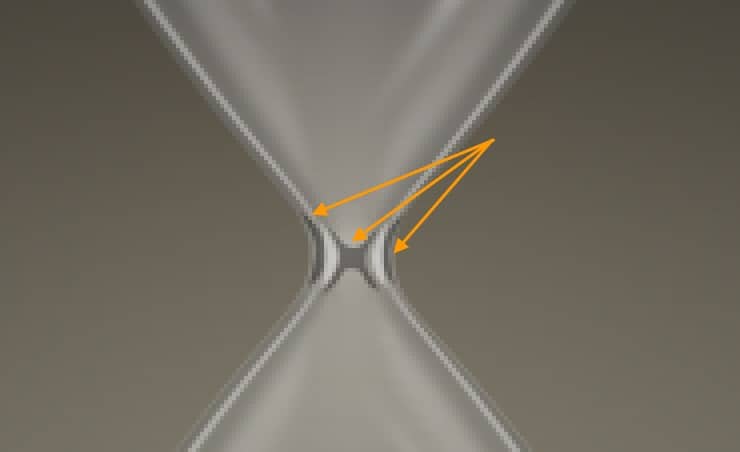
Expand this “Glass lwr highlights + shadows” group and delete those shapes we created in the “Glass upr highlights + shadows” group previously. Those shapes only needed to be in the upper portion as they are overlapping.
Step 34
Create a new gropu named “Base upr + lwr” below the “Glass upr + lwr” group and on top of the “Bg grd” layer. Next we create the upper wooden base. The base is made off an ellipse and a curved rectangle. So we will use the Ellipse and rectangle Shape Tool. Check the image below for construction.

Select the Ellipse Tool and drag an Ellipse. Reduce the height to give it a perspective look. Then create a rectangle matching the width of the ellipse. Then follow the same hourglass process to curve the upper and lower edge. For this use the same Convert Anchor Point Tool and Direct Selection Tool. Shape layer names will be “Base upr large surface” and “Base upr large side”.
20 responses to “Create an Hourglass in Photoshop”
-
Awesome. Thanks for sharing
-
This is terrible.
-
i agree
-
-
Thank You so much for giving such details. I created my hour glass for my upcoming DVD. best wishes to you. I will like to explore more and purchase soon.
-
Interesting :p :)
-
Am unable to download the file.
-
I am stuck with step 11.when i make that new layer ”glass upper shadow edge 1” ,i can’t fill it with black,but i don’t know why . Can anybody help me with that?
-
wow.. Fantastic steps.. I really like it. keep up :-)
-
Awesome… Thanks for sharing..
-
your welcome Hetor
-
-
Amazing, from scratch. Great work!
-
cool
-
fantastic
-
here the same: link doesnt work
-
Problems with website
-
Unable to load with this link.
-
yes! there is also same problem in link….
-
This link doesnt work for me, anyone else having the same trouble?
-
The Link Is Not Working For Me
-


Leave a Reply