

Step 2
Mask off this ;layer from where the bones are to keep them off this color influence.


Step 3
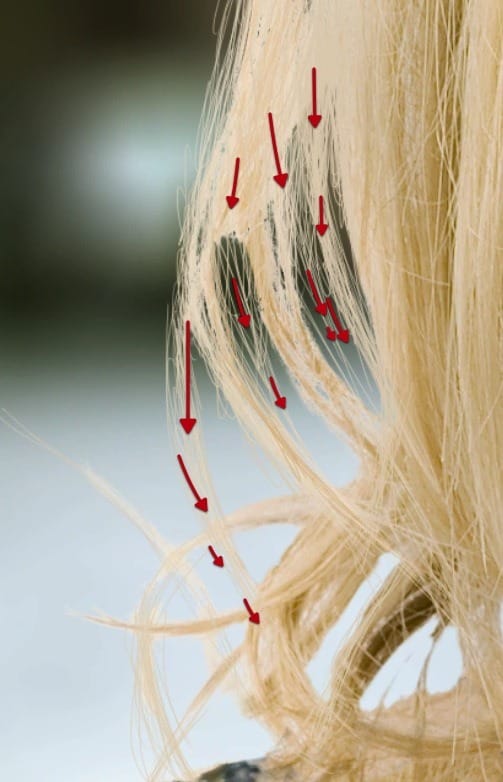
Now at this section here we need to paint in some hair to cover what we painted over the original hair. So grab the brush tool again and reduce the size to just one pixel, with transfer and pen pressure enabled on the brush palette. And start painting in a new layer.


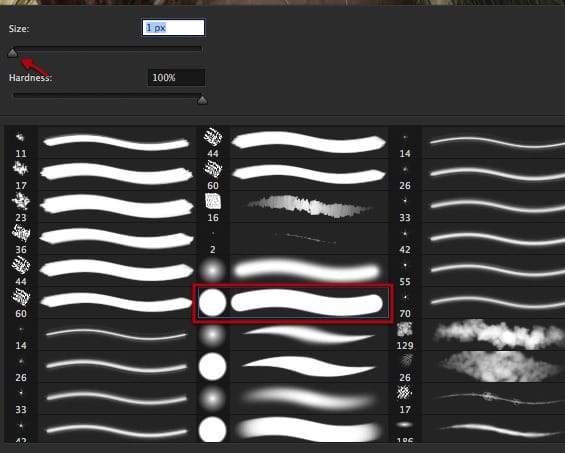
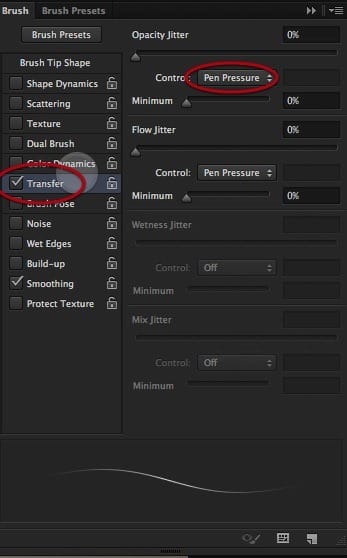
Step 4
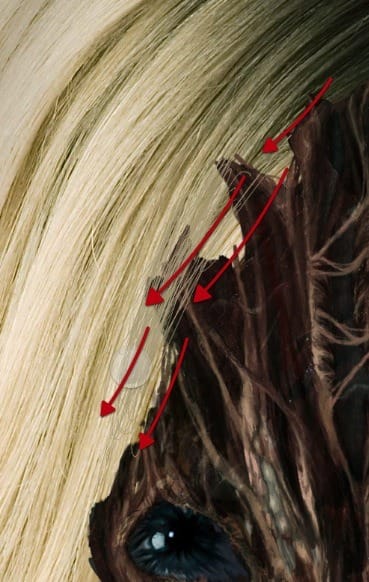
Now sample color from the original hair and start painting in as shown here.

Step 5
Of course there are different shades on the hair so be sure to mimic the original sampling for highlights medium and darker tones.


Step 6
Be also sure to follow how the hair falls yet also you can paint in some out of place hair. as shown.

Step 7
On the top we should also add some hairs out of place as shown here.


Step 8
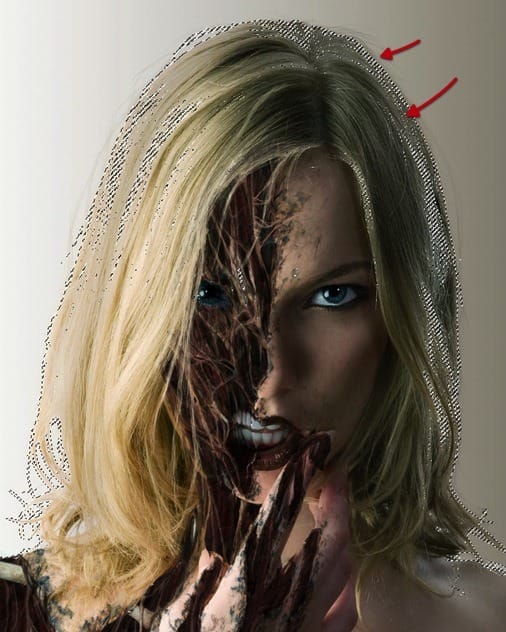
OK great now lets make a duplicate of the base layer, and hide the other one just in case. Then access the color range tool sample the background and adjust it as shown


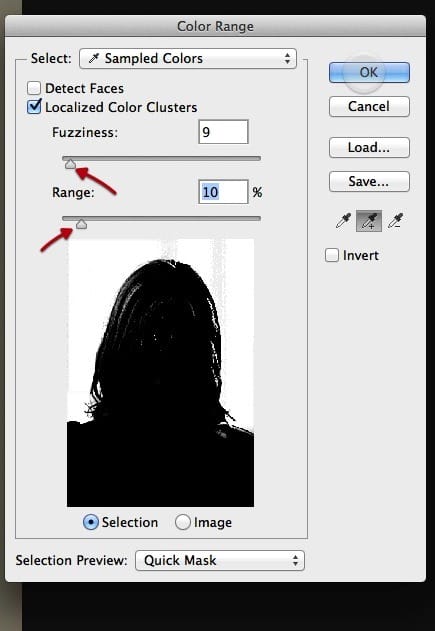
Step 9
The resulting selection wont be perfect, so grab the lasso tool and fix it so there is only the background in the selection.


Step 10
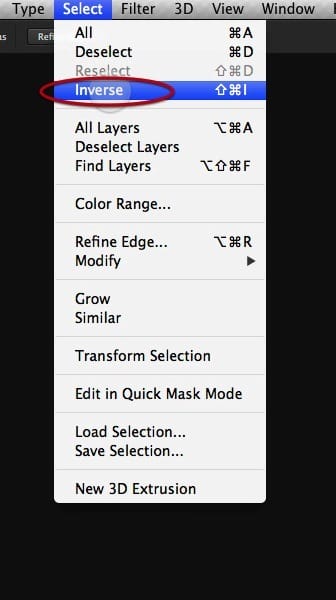
Then inverse the selection and create a mask.

Step 11
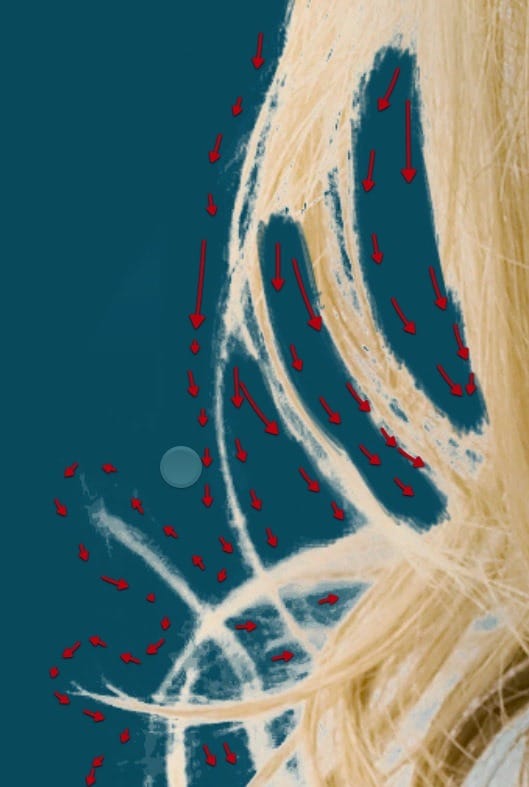
Lets create in the background a layer and fill it with blue so we can see what we are doing. Then select your brush tool and with a small enough brush lets edit the mask to get rid of the noise left behind by the color range tool.


Step 12
Once we have cleaned the mask lets replace the blue back with this image here. So scale it flip it and set it into this position.


Step 13
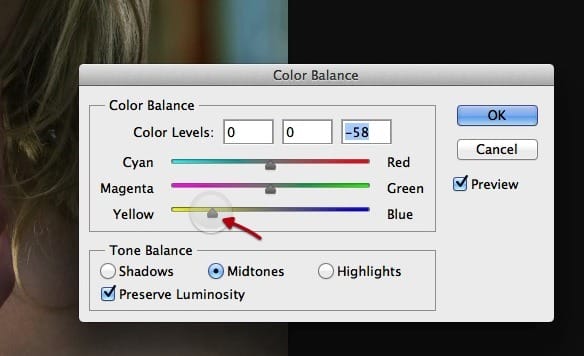
Then we will apply a lens blur to the background adjusted as shown here. And finally adjust the color balance of it as shown here.


Step 14
Then on this section that we cleaned earlier we need to touch up with some hair so go back to the hair layer and paint in as shown.

Step 15
Perfect now lets start defining the final color and shading for our image with a color balance layer on top adjusted as shown.


Step 16
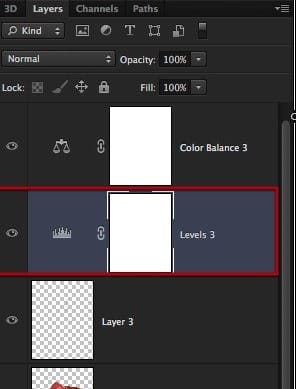
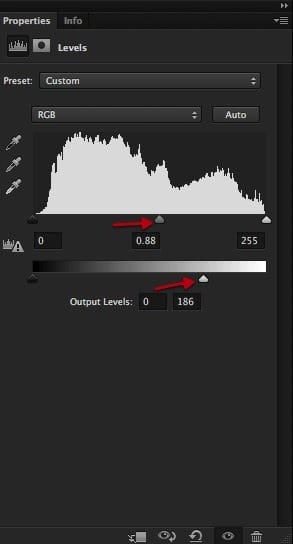
Followed by a levels layer with these settings.
Step 17
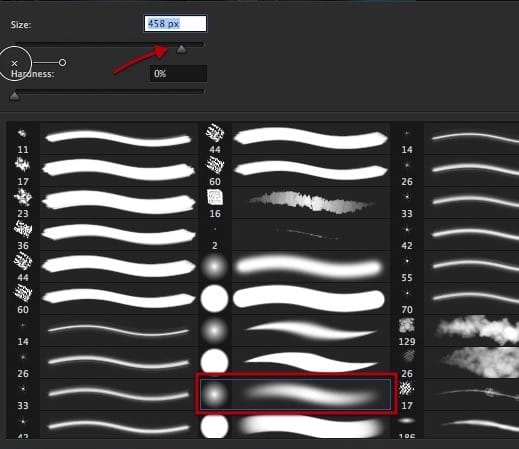
Grab the brush and a big soft tip as shown.

Step 18
Softly mask off the darkening effect of the levels layer as shown here.


Step 19
And now we continue with a curves layer adjusted as indicated here.
18 responses to “Create a Horrific Flesh Eating Movie Poster in Photoshop CS6”
-
how can i get adobe photoshop
-
Great, thanks for all the helpful info!
-
wow,its a nice work.Thanks for sharing such informative post its help me to know deeply Photoshop work step by step.
-
v nice
-
amazing work ever !
-
Cool! I will try this one. Thank you for sharing this tutorial on how to photo manipulate.
-
i burst out laughing here:
https://www.photoshoptutorials.ws/images/stories/Pathogen_C070/ScreenFlow169.jpg
-
Its a good work I’ll try to make this effect with my own gets..
-
I cannot download the brush, anyway anyone could tell me how to set it, so it fades on both sides…
Also the other brush.
Preferebly with sreemshots….
Thank you. -
Looks easy but it is really hard. Need to start all over again.
-
it looks like it should have a hat
-
indeed
-
-
Cool beans
-
Nice tutorial but I feel that after step 17 it looks overdone. Also the zombied area of face could be more dark and reddish that would look more natural. By the way extremely well written tutorial.
-
I’m really liking the tutorials here! But did you really have to use a stock photo of frogs humping each other?
-
They are just sitting on top of each other… I want to believe!!
-
-
good
-
This is amazing! Premium quality tutorial here but the videos should be sped up. You’re not kidding when you say it’s 10 hours!


Leave a Reply