Then type the word ‘STUDIOS’ just below the word ‘AVAIN’ and towards the right ‘Vertical Guide’.

Ok now we can adjust the size of the word and align it precisely. Just click on the ‘STUDIOS’ layer in the layer palate the press ‘V’ to activate the ‘Move’ tool then press Ctrl+t to bring the transform into action. A transform box appears around the word. Using the Control points adjust the width and hieght of the word. You can also use the control point on the bottom side of the transform box to adjust the height.

Now we aligned it in this way…

Then select the ‘Type’ tool from the toolbox, select the word ‘studios’ using the tool, and after the selection is made right click within that selection. A menu opens, from that menu select the option ‘Faux Bold’.

Now you can re-size the word to balance it with the main text. You can use the ‘Move’ tool if you want to move the word. I did some minor changes too.

Yes, we have added the main text and the sub text to our design. Now it is time to give a proper colour to both the texts. We are going to add a nice gradient effect to the main text. But we should create that gradient from scratch. So let’s move to the next step to create a cool gradient.
Step 7 – Create a gradient for the text
In this step we are going to create a gradient for the main text. First select the ‘Gradient Tool’ from the toolbox.

Make the foreground colour white and background colour black.

On the Gradient tool’s option bar click on the gradient box.

Which will open the gradient editor window. We are going to change the values of the two colour stops. Here you can see the gradient from white to black. Click on the white colour stop. On the stops sub section the colour of the current selected colour stop can be seen, in this case ‘white’. Click on the ‘colour’ box.

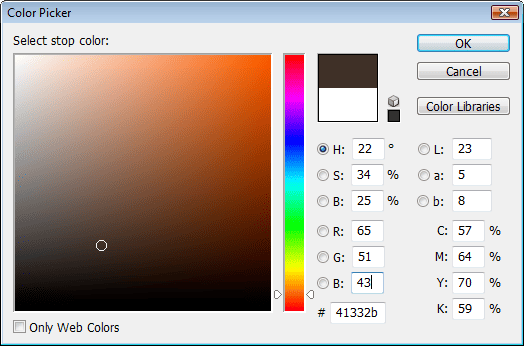
Which will open the ‘colour picker’ window. Change the ‘RGB’ values to R-65,G-51,B-43. Press OK.

Now select the second colour stop.

In the colour picker window change the RGB values to R-157,G-136,B-125

Now we have created a new gradient. Change the name to ‘brown gradient’ and click ‘new’ which will save the new gradient. Then press Ok.
3 responses to “AVIAN Studios Logo”
-
merama ben şaban konak
-
Merciii bcp ; thanks a lot (Y)
-
I think you made some parts harder for yourself then it needs to be. You always have the center tool and low tolerance magic wand. :)


Leave a Reply