
Step 14
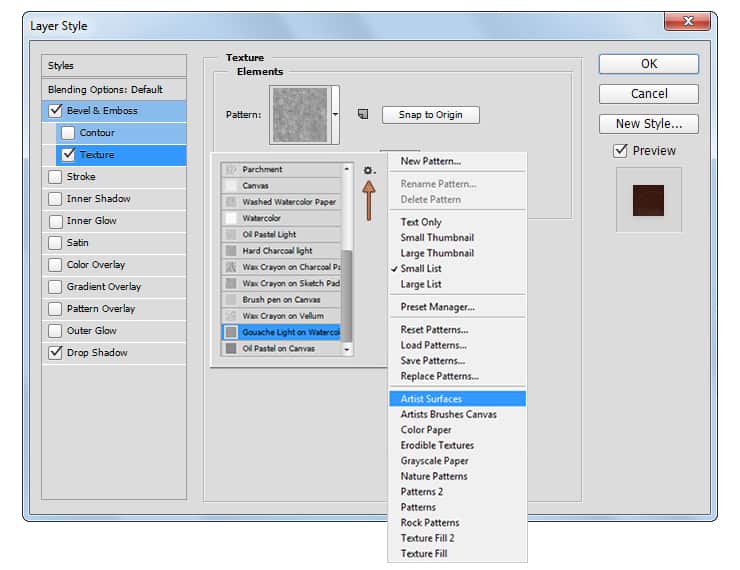
Open the Layer Style window for the vector shape made in the previous step and enter the settings mentioned in the next images. 


Step 15
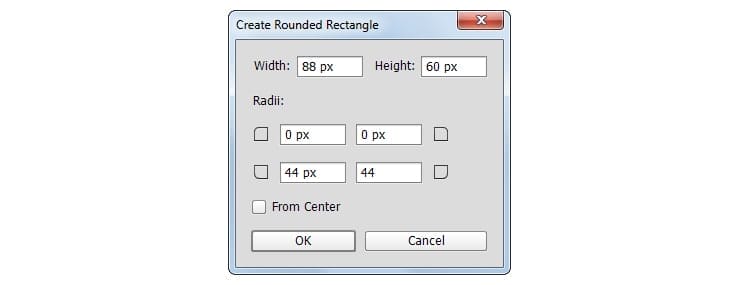
Using the same tool, click again on your canvas to open the “Create Rounded Rectangle” window. Enter the settings shown in next image and then place the new shape as you can see below.


Step 16
Pick the Add Anchor Point Tool and add new anchors points roughly as shown in the next image. Grab the Direct Selection Tool, select the highlighted anchor points one by one and drag them down using the down arrow button from your keyboard as you can see in the second image.


Step 17
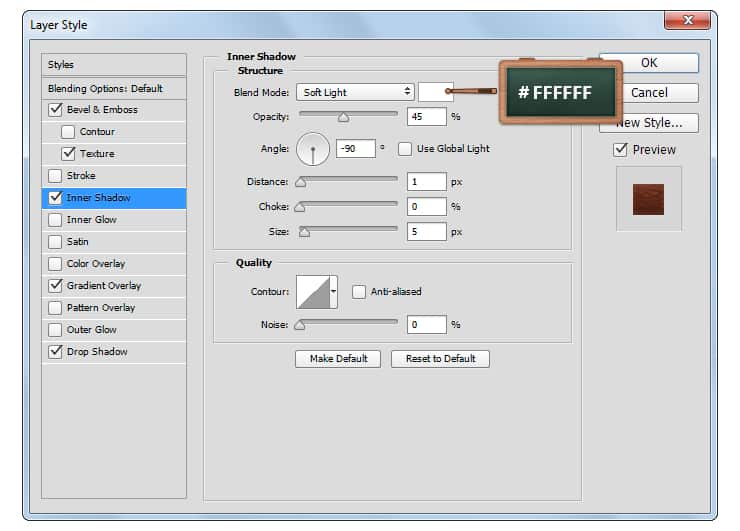
Open the Layer Style window for the vector shape made in the previous step and enter the settings mentioned in the next images.





Step 18
Load a selection around your front piece of text and then go to Select > Modify > Contract. Enter a 25 pxContract and then click the OK button. Move to the Layers panel and create a new layer using the Create a New Layer button. Make sure that the foreground color is set to white, pick the Paint Bucket Tool and simply click inside your selection to fill it as shown in the following image. Once you’re done, hit Control + D to get rid of that selection.


Step 19
Make sure that the layer made in the previous step is still selected, right click on it and go to Convert to Smart Object. Go to Filter > Disort > Zig Zag , set the Amount to 6, Ridges to 7 and Style to Pond Ripples and then click Ok. Focus on the Layers panel and lower the Fill to 25% for your smart subject.


Step 20
Open the Layer Style window for the smart object made in the previous step and enter the settings mentioned below.



Step 21
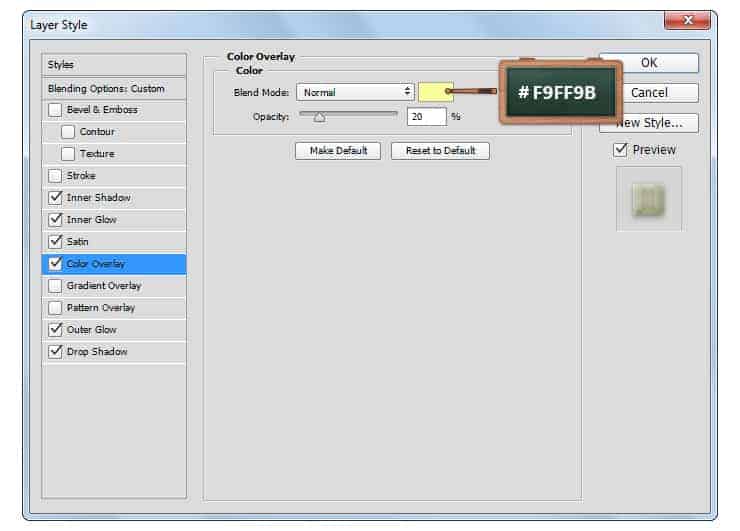
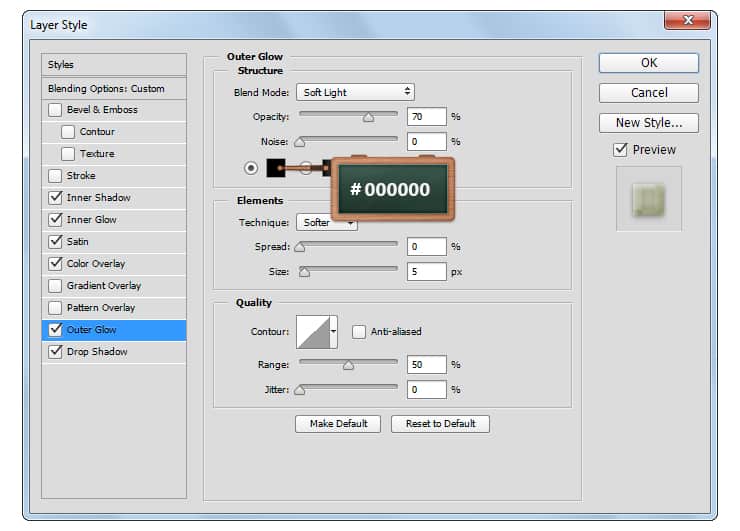
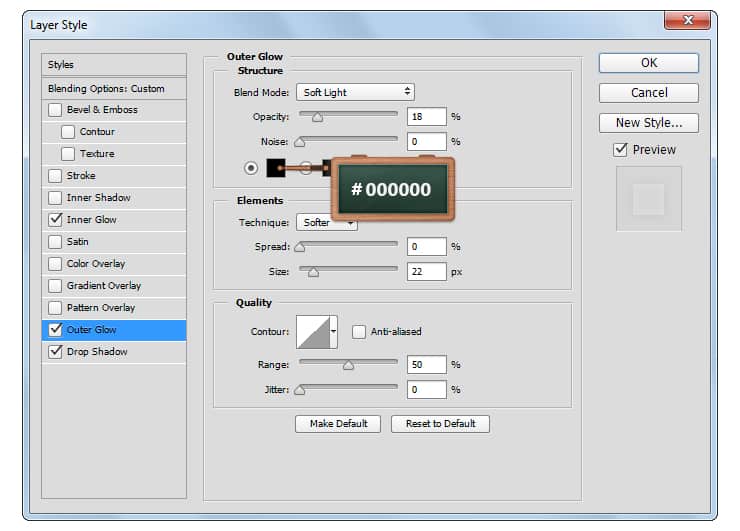
Duplicate ( Control + J ) your smart object, select the copy, right click on it and go to Clear Layer Style. Make sure that the copy made in this step is still selected, lower the Fill to 0%, open the Layer Style window and enter the settings mentioned below.


Step 22
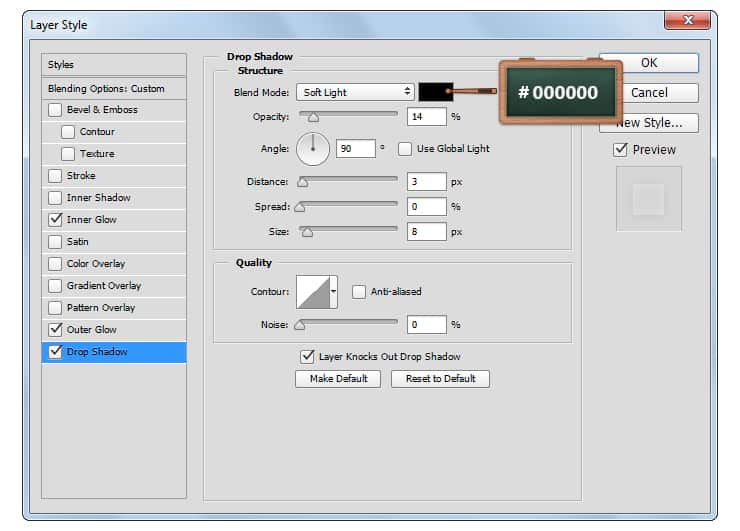
Concentrate on your Layers panel, select all the things made so far and then group them using the Control + Gkeyboard shortcut. Open the Layer Style window for this group and enter the settings mentioned below.
2 responses to “Turn Regular Text into Delicious Wafer Typography”
-
Sweet! Love this tutorial :)
-
Hello, I need a lot of help.
I was in charge of creating uniforms for students of a school in my city, I need editable templantes, to develop these uniform shirts, pants and skirts.
I would greatly appreciate it if you could help me through any link.


Leave a Reply