


Step 7
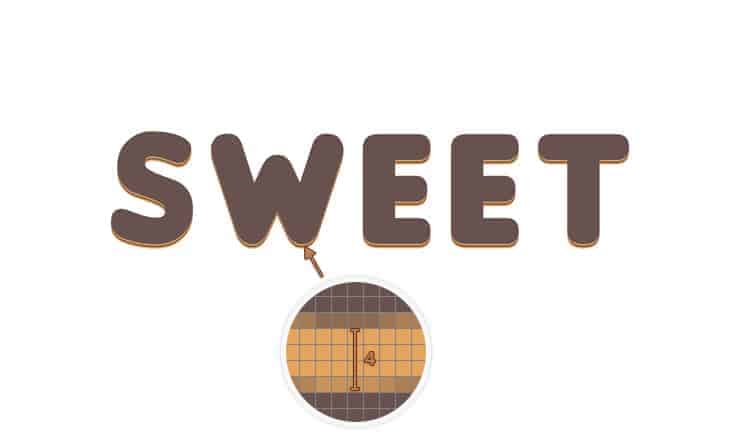
Focus on the Layers panel, select the text made in the previous step and duplicate it using the Control + Jkeyboard shortcut. Select the fresh copy, change its color to #68524F, right click on it and go to Clear Layer Style. Hit the up button from your keyboard four times to move it 4px up.


Step 8
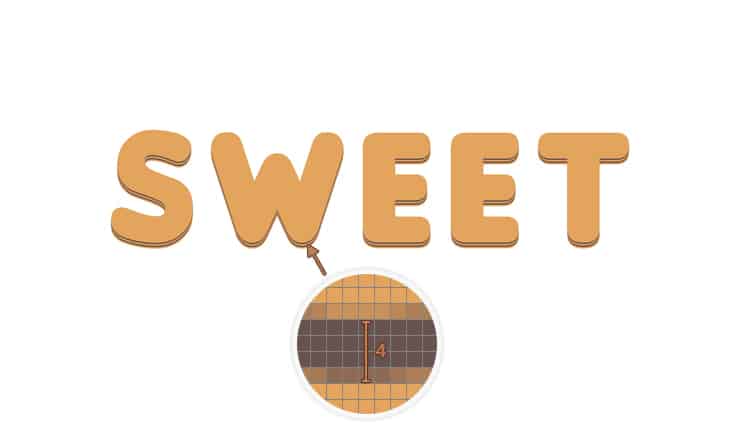
Select the piece of text that lies in front and make a new copy in front ( Control+J ). Select this copy, move it 4 px up using that same up arrow button and change its color to #E3A45D. Make sure that this fresh copy is selected and duplicate it. Select the newly made copy, move it 4 px up and change its color to #68524F. Finally, duplicate this second piece of text. Once again, select the copy, move it 4 px up and replace the existing fill color with that same #E3A45D. In the end things should look like in the following images. 
Step 9
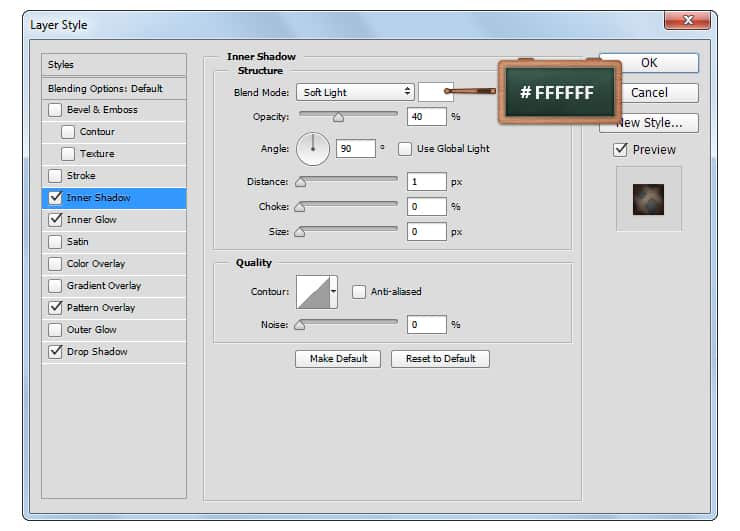
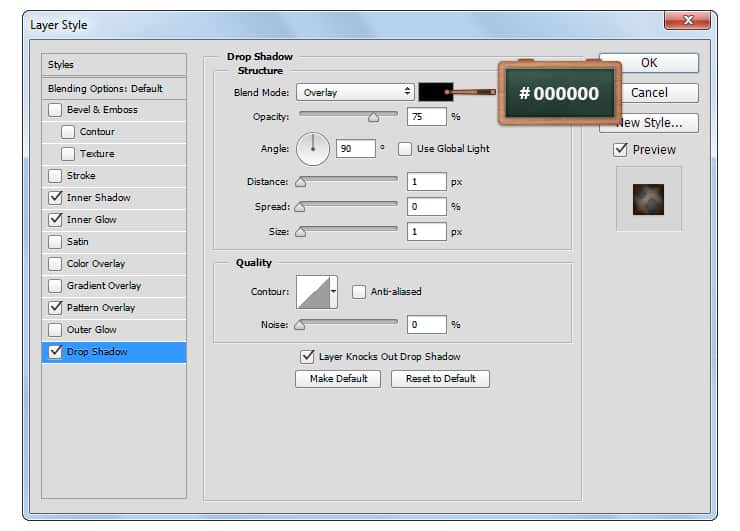
Reselect the piece of text that lies in front and duplicate it ( Control+J ). Select this copy, move it 4 px up and then open the Layer Style window and enter the attributes shown in the following images. For the Pattern Overlay section make sure that you’re using the pattern saved in the beginning of the tutorial. 


Step 10
Duplicate ( Control + J ) the text edited in the previous step, select the fresh copy, right click on it and go toClear Layer Style. Make sure that this copy is still selected, lower the Fill to 0%, open the Layer Style window and enter the settings mentioned below.


Step 11
Set the foreground color to #39180F, pick the Pen Tool and create a vector shape roughly as you can see in the first image. Make sure that this vector shape is still selected and hit Shift + Control + [ to send it in the back and then place it behind the “T” as shown below.


Step 12
Open the Layer Style window for the vector shape made in the previous step and enter the settings mentioned below.



Step 13
Select the Rounded Rectangle Tool and click on your canvas to open the “Create Rounded Rectangle”window. Enter the settings shown in next image and then click the Ok button. Place the newly made shape as shown in the following image.
2 responses to “Turn Regular Text into Delicious Wafer Typography”
-
Sweet! Love this tutorial :)
-
Hello, I need a lot of help.
I was in charge of creating uniforms for students of a school in my city, I need editable templantes, to develop these uniform shirts, pants and skirts.
I would greatly appreciate it if you could help me through any link.


Leave a Reply