Download Lightroom presets and LUTs, absolutely free. Use the presets to add creativity and style to your photos.
4. Blending Modes
Blending Modes are very powerful tool in Photoshop. They have a lot of uses and deserve separate article. But right now I´d like to show you how you can effectively use them for blending hairs.
Step 1 - Selecting Hairs
Grab the Lasso Tool (L). Click on the layer BOY and make selection similar as shown below.
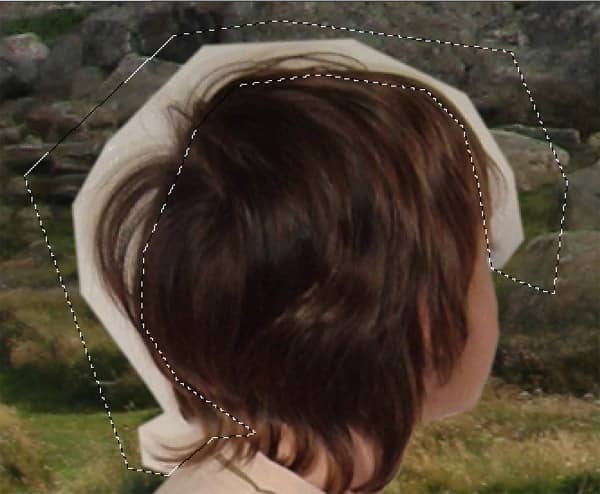
Press Ctrl + C to copy the selection and Ctrl + V to paste it. Name this new layer e.g. HAIR and place it under the layer BOY.
Step 2 - Blending Hair
It would be quite complicated and time consuming to make selection of every hair strand with the Lasso Tool (L). If you want to blend darker hair on lighter background changing the Blending Mode is the right way how to do that.
Make the layer BOY invisible - click on the eye icon on the left.
Now change the Blending Mode on Multiply. You can find the option Set the blending mode for the layer in the upper part of the Layers palette.
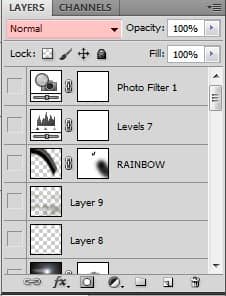
If you click on it you can see a lot of different modes for blending. Each is very useful and I would recommend you to start using them. In this step you will use Multiply Blending Mode and later also Screen.
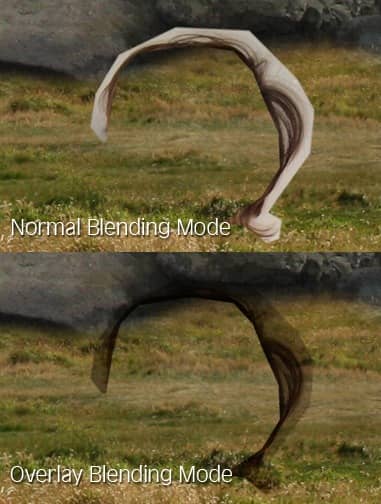
As I said change the Blending Mode of HAIR on Multiply. Below you can see how hair look with Normal and Multiply Blending Mode.
Step 3 - Adjusting Hair
As you may see on the picture above hair are not properly blended yet - the background is still visible and hair are darker than original. You can easily fix that with Levels.
Add new adjustment layer Levels above HAIR and set the Input Levels on 0; 1,95; 147.
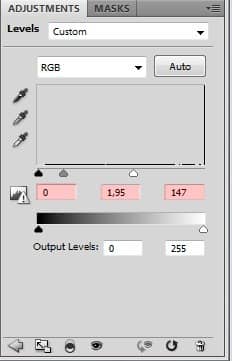
Create clipping mask from this layer to adjusts only HAIR and not all the layers below.
After this step HAIR should look like as shown below.
Step 4 - Blending the Boy
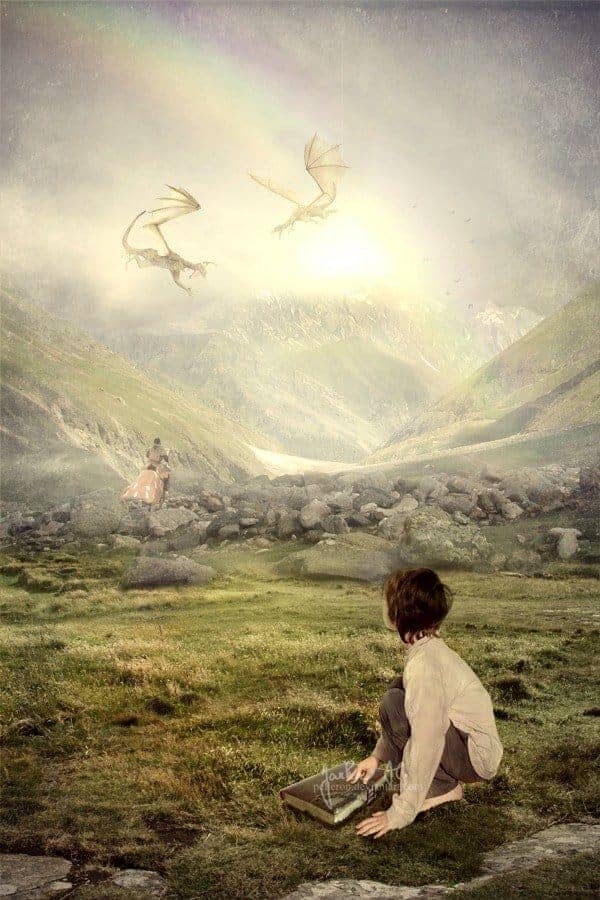
Make BOY visible again. Because it is above the layer HAIR you can´t see the well blended hair from previous steps. To make them visible you need to hide hair of the BOY.
To do that add new layer mask to the layer BOY. Grab the Brush Tool by pressing B on your keyboard or clicking on the icon of the tool. Select some soft round brush, set the Master Diamer on 10 pixels and pick black color. Now paint over the hair you want to hide. The layer BOY (with invisible layer HAIR) shloud look like on the following picture.


3 comments on “A Photo Manipulator's Guide to Blending”
Lol
can you give a video tutorial please :3
110% work, thanx for inpiration