Luminar AI lets you turn your ideas into reality with powerful, intelligent AI. Download the photo editor and see how you can completely transform your photos in a few clicks.
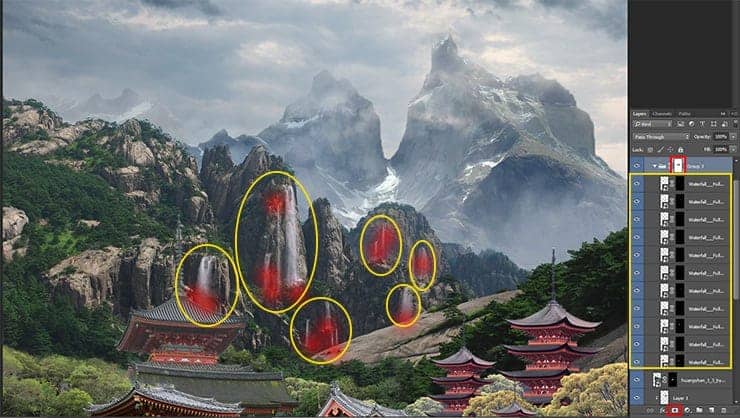
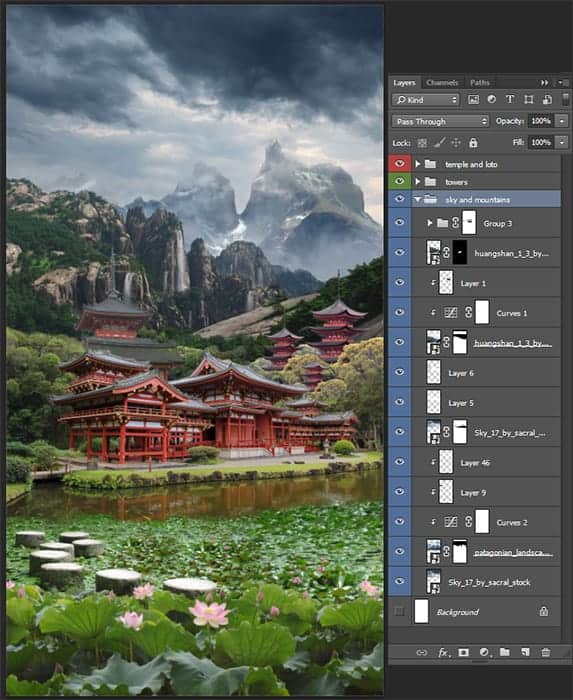
Here is my result. I hope you will not have difficulty. All layers with mountains, sky and waterfall combined in one group "Sky and mountains". The basis of the work ready and now I moved on to adding effects. It's not difficult but you need a lot of new layers :). To achieve a realistic and beautiful colors need to work on each part of the image separately. Each effect, I superimposed on a separate layer, so that I was able to control the color, shape, opacity and location.
Step 30
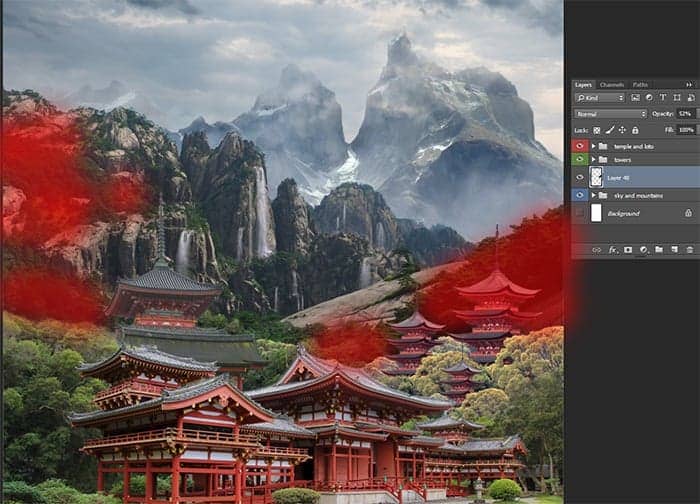
Now that everything is in their groups, then you can start adding clouds and fog. It will be a little tedious, because you need to create a new layer after every one or two strokes and then, when you're happy with the result, merge layers. Before, we were moving down per layers, but now we go up. I let go of the details of creating a new layer but remember about this. Let's start with the most simple. Create a new layer over the group "sky and mountains" and draw shadow from clouds on forest (Soft Round Brush, Size: 300px, Hardness:0% Opacity: 100%, color Black). Set Layer Opacity: 52%.
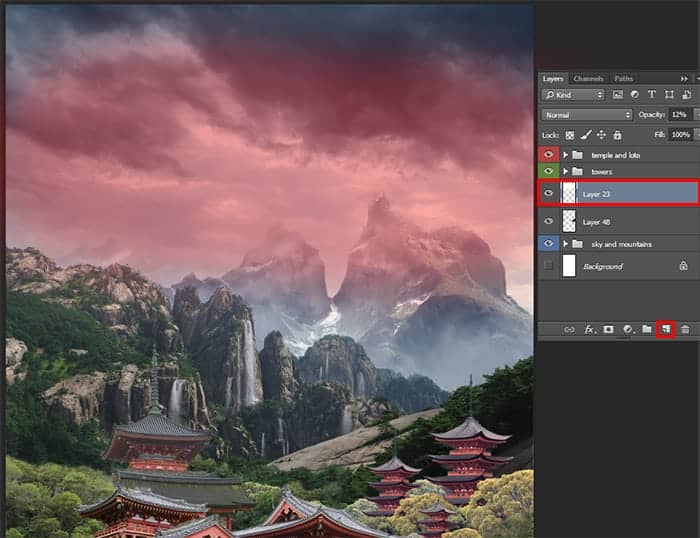
With Big soft round brush (Size: 1000px, Opacity: 100%, color: White) crossing mountains and sky to create the illusion of distance. Layer Opacity: 12%.
Step 31
Here proceed to a little daunting task. We need to draw a volumetric fog between the Huangshan mountains and temple. Layer before group "Temple" (Brush form: "CLOD #2" and "stratus", Size: 300px, Opacity: 15-30%, color: White). As I wrote earlier, create a new layer after every one or two strokes, after completion merge clouds layers (Cmd/Ctrl + E).
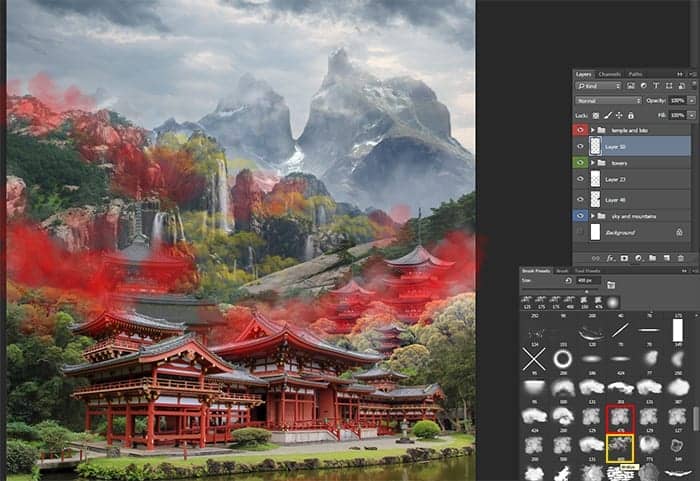
Now over the group "Temple and lotuses" add more fog on the trees and the temple. Brush settings remain the same, but I do not use a brush "stratus".
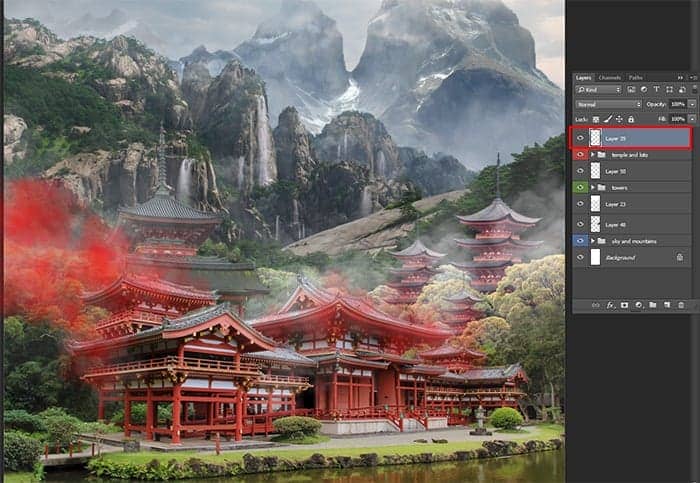
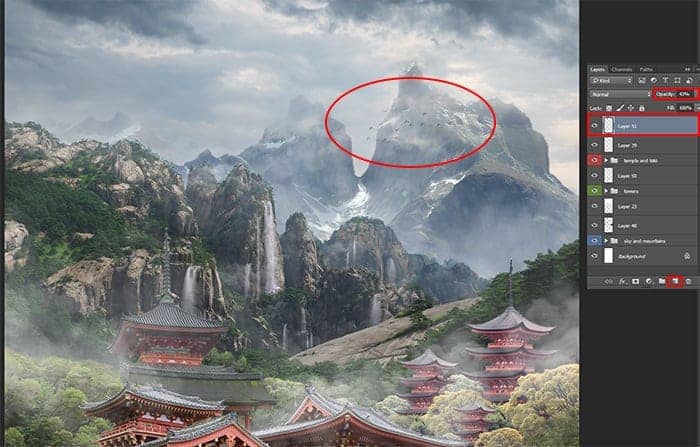
And now make a small detail - flying birds. Use brush "Sampled Brush 1" (Size: 150px, Opacity: 100%). Several times I use this brush to make a flock of birds more. In my opinion, the birds will look good near the peak of the mountain. So the landscape becomes more dynamic.
Step 32
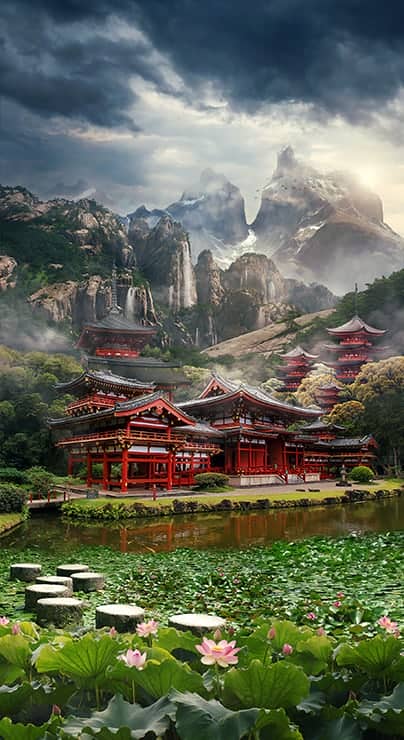
With clouds and fog we understand now and I worked more detailed shadows and create a foundation for the future of lighting. Create a new layer by using Cmd/Ctrl + Shift + N or go to Layer > New > Layer. In the dialog box, specify the following settings for the layer: Mode: Overlay, set checkbox on "Fill with Overlay-neutral color (50% gray)".


30 comments on “How to Create a Mysterious Matte Painting Landscape in Photoshop”
also me
This looks so cool. You know what would make it even better?? ATMOSPHERIC PERSPECTIVE. But that can be a personal job for readers. Nice work
this is good thanks
kms
this actually sucks
this sucks
bro I be watching dr duke all day keep up the amazing vids man
good job!
Great!!
That's the most hideous photo that I have ever seen.
perfect
"an amazing" NOT "a amazing" !
takes to long
Great tutorial! I've learned a lot. Here is my outcome: http://oi66.tinypic.com/2a5gqbr.jpg
Thanks
Possibly the best tutorial I have done. Absolutly awesome image, and I love the way you explain how you see it & why. It is like a noval.
Please do more !
Thanks you! Maria
I had finished this tutorial.
Amazing!!!
Thanks for sharing.... :-)
Nice
Amazing tutorial, now I have to go back and do the rest of your stuff. :D
A tip for Step 38: just select your top layer, go to Edit -> Select all (ctrl/cmd + A)
then Edit -> Copy merged (shift + ctrl/cmd + C)
This will copy all the visible layer (inside your selection), now you just have to paste it,
Edit -> Paste (ctrl/cmd + V) or Paste special -> Paste in place (shift + ctrl/cmd + V).
wow, what a wonderful great tutorial.
Very well explained so even a "beginner" to work with.
Thank you also for the material and links to the trouble to write it all. Once again, simply grandiose.
Kind Regards
Easy to follow. But I have some problems with making it exactly the same you have showed. I would have to search in http://google.com for photoshop basic tools documentation.
However, thanks!
awesome
Absolutely georgeous.
Nice
and AMAZING!
TAKES SO LONG, but the outcome is amazing!
one of the finest...what a refreshing work to see..
Near to natural !
wooow!!!
it's so realistic pic
great work, i like it :)
this is great i love and need turt specially on building back grounds and Invirements