Make your artwork look like they're from an alternate universe. These Cyberpunk presets work with Photoshop (via the Camera Raw filter) and Lightroom. Download all 788 presets for 90% off.
Step 5
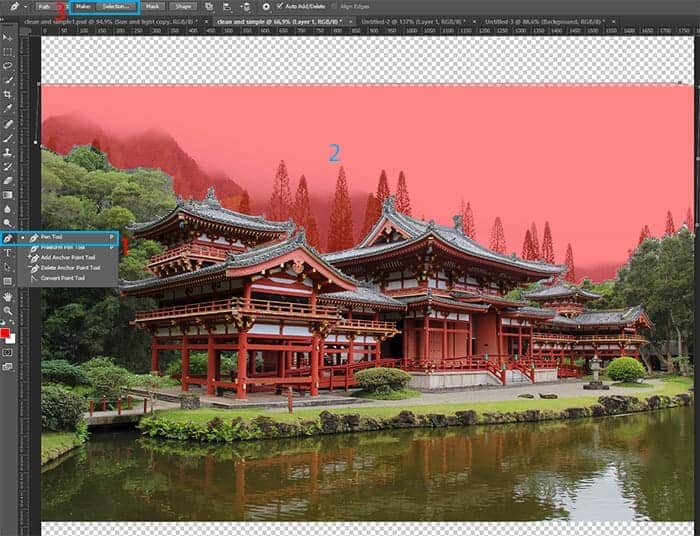
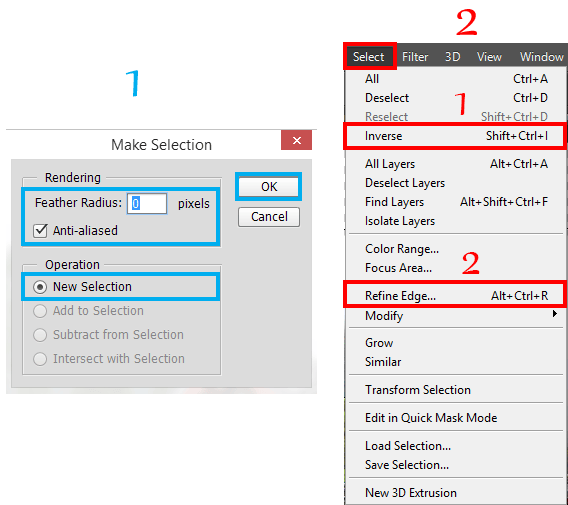
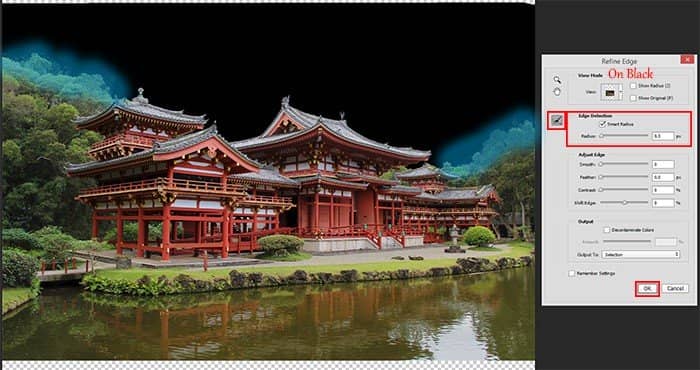
Make Feather: 0px, set checkbox on "New Selection" and click OK. Improve the selection and remove the extra. First inverse Selection (Cmd/Ctrl + Shift + I or Select > Inverse) and go to Refine Edge (Opt/Alt+ Cmd/Ctrl + R or Select Refine Edge). In Refine Edge set checkbox on "Smart Radius" and set Radius: 0.3px. Use brush in this window and several times draw it along the edges of the trees, where stayed background. After all click OK.
It remains to remove background. Add a layer mask by clicking on the Add Layer Mask button in the layers panel or by going to Layer > Layer Mask > Reveal Selection.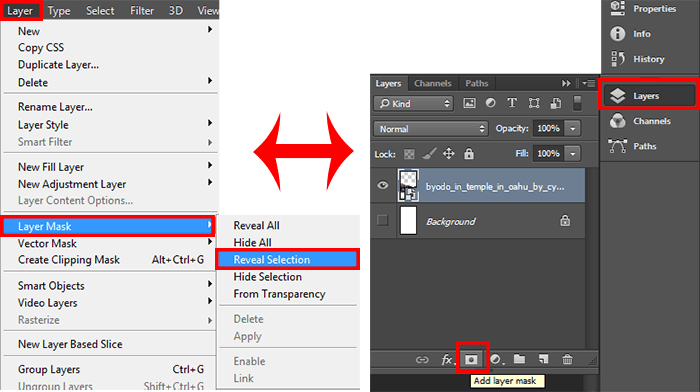
Step 6
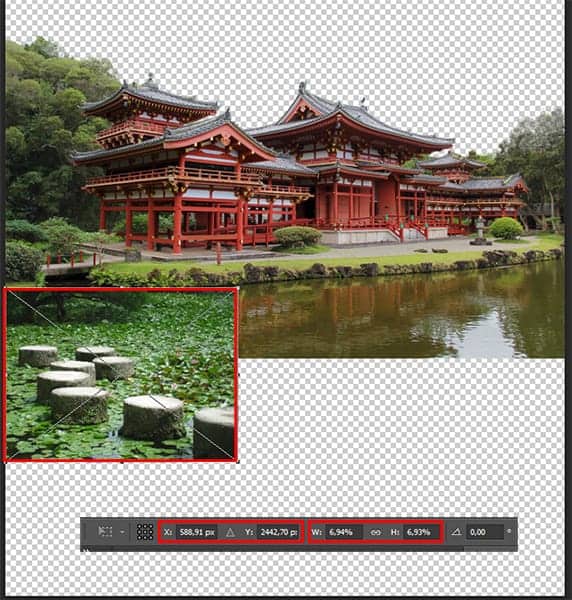
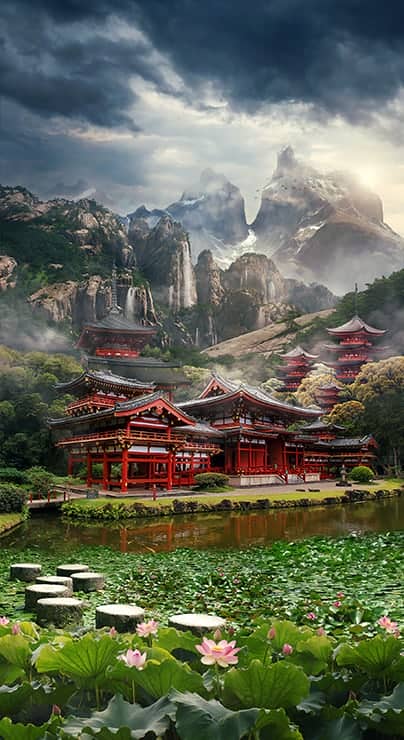
We go further. The next step, I began work on the first plan. I added in working document (File > Place (Place Embedded)) a small lotuses (Stepping stones) image "Stepping_Stones_by_Ekuboryu". Resize it so lotuses be smaller (Ctrl/Cmd+T or Edit > Free Transform) and place them between temple coast and the left edge of the image.
Step 7
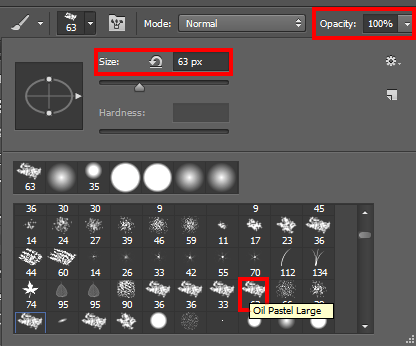
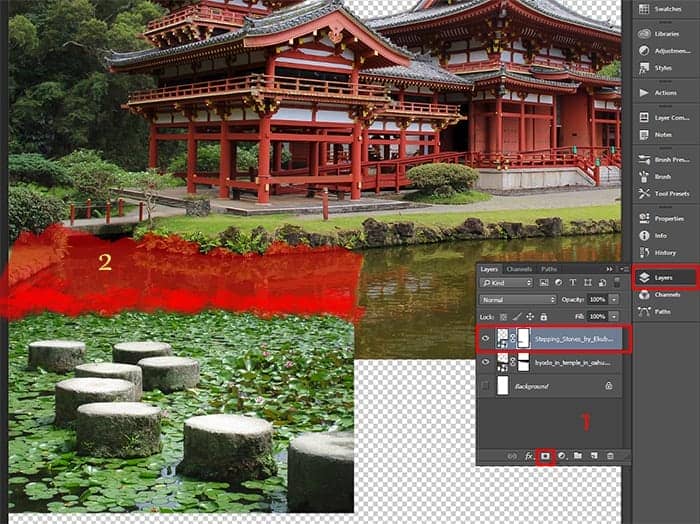
Add a Layer mask to both layers and use Brush Tool (B) (Brush form "Oil Pastel Large", Size: 63, Opacity: 100%) to remove from water part of the plant. Make sure that would have removed part of the image where the plants darkened from tree. Do not make a smooth edge of plants, otherwise you will lose the realism. Play a bit with the form that the plants were dynamic but without sharp conversion.
Step 8
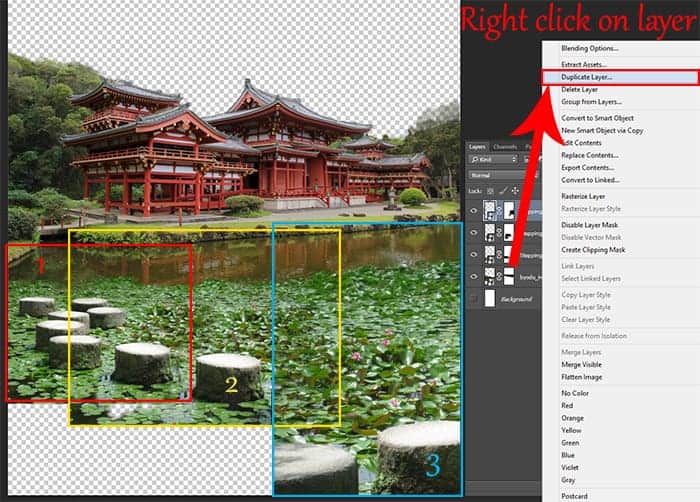
Duplicate two times this layer (to do this, use Cmd/Ctrl + J or go to Layer > Duplicate Layer), because we will need to cover remaining empty space and increase the river and make the transition between the large lotuses, which we then added. Increase second and third layers so that plants have been a little bigger than previous (just a bit), place them in a stepwise manner, but try to observe the type of plant (texture must matched). The third layer I Flip Horizontal (Edit > Transform > Flip Horizontal) to not use a dark area. So I can use the more useful parts of the image and ensure harmony.
Step 9
With a Soft Round brush (Size 70px, Opacity: 100-70%), on a layer masks I lined texture of plants to make the transition between layers. You can not leave it in this form :). Be careful with a big stone on a second layer, it must been not visible. With the same stones, remove unwanted stones, only very gently without damaging texture. For the third layer with water plants use a brush from Step 7 to make the uneven edge for plants.

30 comments on “How to Create a Mysterious Matte Painting Landscape in Photoshop”
also me
This looks so cool. You know what would make it even better?? ATMOSPHERIC PERSPECTIVE. But that can be a personal job for readers. Nice work
this is good thanks
kms
this actually sucks
this sucks
bro I be watching dr duke all day keep up the amazing vids man
good job!
Great!!
That's the most hideous photo that I have ever seen.
perfect
"an amazing" NOT "a amazing" !
takes to long
Great tutorial! I've learned a lot. Here is my outcome: http://oi66.tinypic.com/2a5gqbr.jpg
Thanks
Possibly the best tutorial I have done. Absolutly awesome image, and I love the way you explain how you see it & why. It is like a noval.
Please do more !
Thanks you! Maria
I had finished this tutorial.
Amazing!!!
Thanks for sharing.... :-)
Nice
Amazing tutorial, now I have to go back and do the rest of your stuff. :D
A tip for Step 38: just select your top layer, go to Edit -> Select all (ctrl/cmd + A)
then Edit -> Copy merged (shift + ctrl/cmd + C)
This will copy all the visible layer (inside your selection), now you just have to paste it,
Edit -> Paste (ctrl/cmd + V) or Paste special -> Paste in place (shift + ctrl/cmd + V).
wow, what a wonderful great tutorial.
Very well explained so even a "beginner" to work with.
Thank you also for the material and links to the trouble to write it all. Once again, simply grandiose.
Kind Regards
Easy to follow. But I have some problems with making it exactly the same you have showed. I would have to search in http://google.com for photoshop basic tools documentation.
However, thanks!
awesome
Absolutely georgeous.
Nice
and AMAZING!
TAKES SO LONG, but the outcome is amazing!
one of the finest...what a refreshing work to see..
Near to natural !
wooow!!!
it's so realistic pic
great work, i like it :)
this is great i love and need turt specially on building back grounds and Invirements