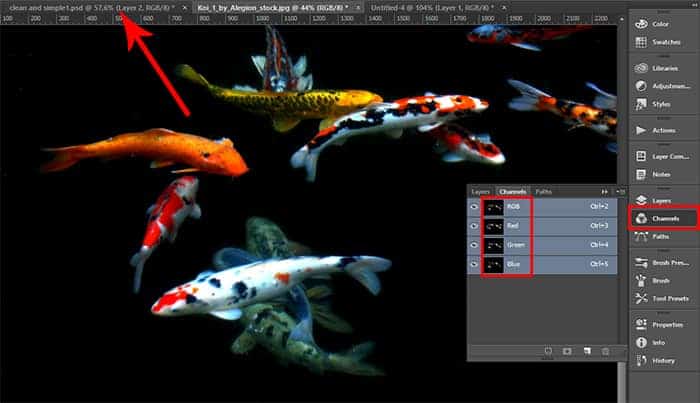
Go to Channels tab, hold Cmd/Ctrl and click on RGB thumbnail to select fishes from background. Use Move Tool (V) or hold Cmd/Ctrl to switch into it and drag a fishes in your working document. This is a very easy way to quickly select the colorful image from the black background. Depending on the different channels, the colors are paler or saturation. In this case, the fish will be slightly transparent, making them realistic in water.

Step 14
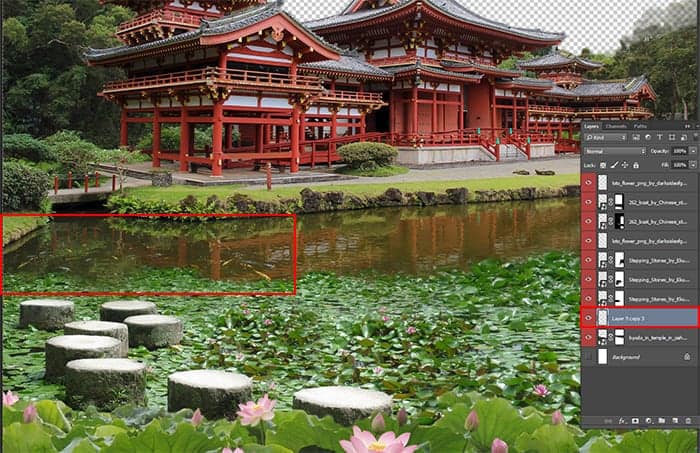
Reduce the size of the fishes to a little less than the distance between the water plants and shore (Ctrl/Cmd+T). To transform the image proportionally hold Shift. Duplicate fishes 4 times (Cmd/Ctrl + J) and change the size of a slightly larger and smaller fishes, flip layers horizontally (Edit > Transform > Flip Horizontal) to make visible the diversity of fishes, arrange some little under water plants. All you want. This is a creative process and you can make your own version. After all the transformations I merge the layers with the fishes in one (Cmd/Ctrl + E). Place the layer with the fishes above layer with the temple to randomly fish have not started to go down the water lilies.

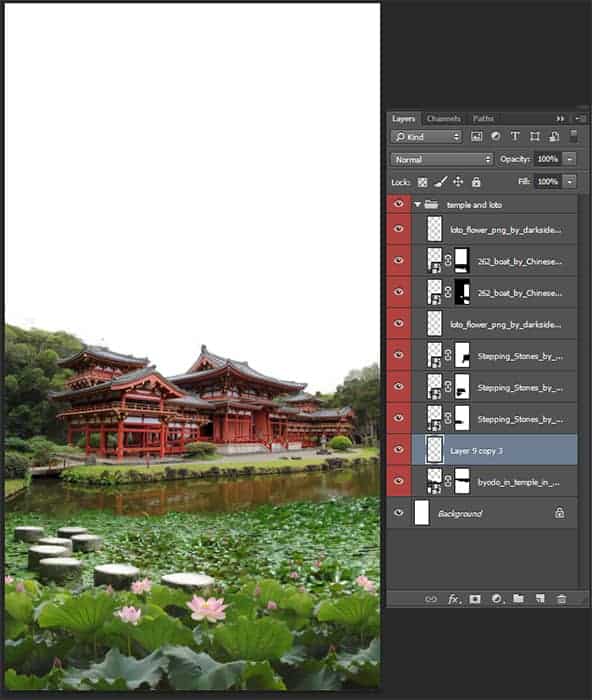
Here is my result. I combined all layers with the first plan and the main temple in one group “Temple and lotuses”. That’s it! In this work on the first plan until finished and you can move on. Be sure that your image does not leave white stripes on the edges of document (this means that the image does not reach the edge of the document). If there is one, use the arrow keys and move the desired layer and if necessary, increase the image. Check it always and use Zoom Tool (Z).

Step 15
Now I start adding towers. I decided to add more buildings to make the transition between the temple and the mountains to landscape change smoothly. Into working document, add image “temple_in_the_trees_by_firenze_design-d4uaozg” (Miyajima Temple) and resize it that trees to become the same size. Place the tower from the right edge of the document to the roof of the main temple. Place this layer under a group “temple and lotuses”. Do not worry that the remaining blank space under the tower. I will add that there is a tower, only smaller.
31 responses to “How to Create a Mysterious Matte Painting Landscape in Photoshop”
-
AAAA Amazing
-
also me
-
This looks so cool. You know what would make it even better?? ATMOSPHERIC PERSPECTIVE. But that can be a personal job for readers. Nice work
-
this is good thanks
-
kms
-
this actually sucks
-
this sucks
-
bro I be watching dr duke all day keep up the amazing vids man
-
-
good job!
-
Great!!
-
That’s the most hideous photo that I have ever seen.
-
perfect
-
“an amazing” NOT “a amazing” !
-
takes to long
-
Great tutorial! I’ve learned a lot. Here is my outcome: http://oi66.tinypic.com/2a5gqbr.jpg
Thanks
-
Possibly the best tutorial I have done. Absolutly awesome image, and I love the way you explain how you see it & why. It is like a noval.
Please do more ! -
Thanks you! Maria
I had finished this tutorial.
Amazing!!! -
Thanks for sharing…. :-)
-
Nice
-
Amazing tutorial, now I have to go back and do the rest of your stuff. :D
A tip for Step 38: just select your top layer, go to Edit -> Select all (ctrl/cmd + A)
then Edit -> Copy merged (shift + ctrl/cmd + C)This will copy all the visible layer (inside your selection), now you just have to paste it,
Edit -> Paste (ctrl/cmd + V) or Paste special -> Paste in place (shift + ctrl/cmd + V).
-
wow, what a wonderful great tutorial.
Very well explained so even a “beginner” to work with.
Thank you also for the material and links to the trouble to write it all. Once again, simply grandiose.
Kind Regards-
Easy to follow. But I have some problems with making it exactly the same you have showed. I would have to search in http://google.com for photoshop basic tools documentation.
However, thanks!
-
-
awesome
-
Absolutely georgeous.
-
Nice
and AMAZING! -
TAKES SO LONG, but the outcome is amazing!
-
one of the finest…what a refreshing work to see..
-
Near to natural !
-
wooow!!!
it’s so realistic pic -
great work, i like it :)
-
this is great i love and need turt specially on building back grounds and Invirements


Leave a Reply