Luminar AI lets you turn your ideas into reality with powerful, intelligent AI. Download the photo editor and see how you can completely transform your photos in a few clicks.
Create this surreal scene of an obscure scene with planets in the background. In this detailed tutorial, you'll learn how to create a surreal landscape, add a mysterious glowing light, and finish it with trees and a family in the foreground.
Preview of Final Results

Tutorial Resources
- Stars – greenaleydis-stock
- Cosmos Package – resurgere-stock
- Field – f3rd4-stock
- People Brush – fiftyfivepixels
- Trees Silhouettes – kuschelirmel-stock
- Trees Silhouettes 2 – winerla-stock
- Bushes - redheadstock
Step 1: Creating a new Photoshop file
Let’s start off by creating a new Photoshop file. Create a new file with the following settings:

Step 2: Adding the field
The first thing we’re going to add to our manipulation is the field. Go to File -> Place (see image below for reference) and place the Field resource into our project.

This is what you should see in your screen now:

Now hold Shift+Alt/Opt, click on the top right corner of the image, and drag the mouse in the direction of the arrow shown in the image below. This will increase the size of the image while maintaining it in its center.

Try to increase the size of the field until it reaches the borders of our project.

To confirm the changes just hit Enter, or click in that little check sign on the top bar:

Now let’s create a layer mask to hide the sky part of this image, because we won’t be needing it. With this layer selected, click on the “Add Layer Mask” button (highlighted in the image below).

This is how your layers panel should be looking like after that:

Now select the brush tool (see the image below). You can also use the shortcut B.

Keep the Opacity and the Flow of the brush at 100% (settings are located on the top panel).

We’re going to paint the sky part of our layer with black, to hide unwanted parts of our image in a non-destructively way. To easily select black while painting a layer mask, press D to reset the colors of your palette, and then press X to swap them and make black as your foreground color.
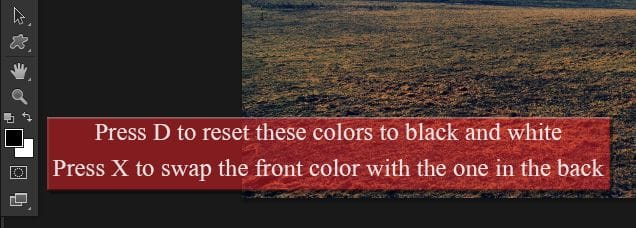
Right click anywhere in the image to change the size and hardness of the brush. Keep the size between 200-400px (you can reduce the size to help paint some parts) and keep the hardness at 0% at all times. Here are some shortcuts to help speed up your work:
· To increase the size of a brush hit ]
· To decrease the size of a brush hit [

Paint the whole sky and some parts of the mountains with black. Check the image below and try to reach a result similar to this one.

And we’re done with the Field. If you have a Background layer like me, delete it by clicking on it and dragging it to the recycle bin (check the image below for reference).


Now your canvas should be transparent instead of white, just like this:

Step 3: Adding the sky
Let’s add some sky to our project. Go to File -> Place again and select the big blue planet (“cosmos1_0009”).

Every time you place an image into your project, you automatically have the control of the Free Transform Tool. This is a really common tool, and basically it lets you move, rotate and scale your image. Here’s how it works:
- To move the image, just click anywhere inside the rectangle and drag it someplace else
- To rotate the image, click anywhere outside the rectangle and drag it around the image
- To resize the image, click in one of the corners of the rectangle and drag it. To maintain the proportion while doing this, just hold the Shift key during this process.
Ok, so we’ll start with a rotation. Rotate the image following the instructions above, and remember to hold Shift while doing it, so the rotations will be multiples of 15º.

Rotate the planet 90º to the right, like this:

Now we have to put this layer behind the field layer. To do that, just click and drag this layer below the other one.

Now we’re going to increase the size of this image so it can fill our whole canvas. Hold Shift, click on the top right corner of the image and drag it on the direction of the arrow:

After scaling the image, drag it down by clicking anywhere inside the rectangle and dragging everything down. Check the image below for reference.

So here’s the result of this step:

And this is how your layers panel should be looking like:

Step 4:Adding the first planet
In this step we’re going to add the big planet into our project. Because we are working with smart objects, we can easily do this by creating a copy of our cosmos layer. Drag the cosmos layer into the button highlighted in the image below to create a copy of it.


Now hit Ctrl/Cmd+T to bring up the Free Transform Tool (or go to Edit->Free Transform). To reveal the planet, all we have to do is drag this layer up, like this:

Let’s select the only part of the layer we want to work with (the planet itself) and delete the rest of it. To do that, select the Elliptical Marquee Tool (Shortcut: M).

Now we have to make a perfect round selection of the planet. Take a look at the instructions in the image below and try to make the selection as accurate as possible.

With the selection made, create a new layer mask in the image by clicking on the “Add Layer Mask” button.

Here’s the result:

And here’s how your layers panel should be right now:

Step 5: Adding the second planet
To add our second planet into the project, follow the same process we did before. Go to File -> Place and select the “cosmos1_0001.jpeg” image.

Drag the image up a little bit so we can make a selection around this new planet.

Select the Elliptical Marquee Tool again (Shortcut M) and repeat the same steps we did with the other planet to select this one.
![image030[1] image030[1]](https://cdn.photoshoptutorials.ws/wp-content/uploads/2013/07/image03011-1.jpg?strip=all&lossy=1&quality=70&webp=70&avif=70&w=1920&ssl=1)

With the selection made, create a new layer mask in this layer by clicking on the “Add Layer Mask” button.


Here’s the result:

Now we’re going to have to resize, move and rotate the planet. To do that, use the Free Transform Tool (Ctrl/Cmd+T) and check the images below:
· Remember to always hold Shift while scaling to maintain the proportions

After resizing it, drag the planet to this position:

The final step is to rotate the planet. With the Free Transform Tool still activated, rotate the planet (click and drag outside the rectangle) based on the instructions in the image below:
· You don’t have to hold Shift while rotating this time

Here’s the final result in our image and in our layers panel:


Step 6: Improving our layers
Before we continue let’s arrange our layer in a better way. To start off, change the names of all ours layers to something that represent them (so we don’t get lost in the future). To change the name of a layer simply double click on its name. Here’s how I renamed my layers:

After you’ve renamed all of your layers, select all of them (click on the first one, hold Shift and click on the last one) and drag them to the “Create new Group” button.

Name this new group Images (or anything else you want) and we’re good to go.

Step 7: Adding the forest
We’re done with the photo manipulation part of our project, we are now only going to work with brushes. Let’s start off by adding the forest to the right part of our image. If you’re not familiar with installing and using Photoshop brushes, I suggest you take a look at this video on how to install Photoshop brushes. So now that you know how to install new brushes into Photoshop, you can go ahead and download and install the four brush packs that we are going to need for the next steps. It’s two tree packs, one bushes pack, and one people pack. After all done, create a new layer in our project by clicking in the “Add new layer” button (or use the shortcut Ctrl/Cmd+Shift+Alt/Opt+N). Rename this new layer Forest.


Now load the 2 trees silhouettes pack we downloaded into our brush panel (check the beginning of that video to see how).

Make sure black is your foreground color (press D), leave the opacity at 100% and let’s start creating the forest!
· Try to achieve a fade away effect (taller trees in the front, smaller trees behind)
· Do not overcrowd the image, try to keep a nice balance where the viewer can identify the trees
· You can use any type of tree you want to, but make sure that you maintain a certain pattern with them (if you start with trees with no leaves, keep all of them like that)
· You can use the same brush more than once, but make sure you use it with different sizes and place them in different places
Here’s the step-by-step of how I did mine:


Step 8: Adding the bushes
Now we’re going to do the same thing we did in the previous step, but this time with bushes. First, load up the bushes brush pack into Photoshop.

Create a new layer by clicking on the “Add new layer” button (or the shortcut Ctrl/Cmd+Shift+Alt/Opt+N) and name it Bushes.


Place this new layer behind the forest layer.

Set your foreground color to black (press D), make sure the opacity of your brush is at 100%, and go crazy with the bushes!
Try to follow the same idea we used with the trees, bigger bushes in the front, smaller on the back, and try to create a nice little grass for our trees. Here’s my step-by-step:


Remember: there’s no right or wrong in these two last steps, just be creative!
Step 9: Painting the field
Ok, so let’s start the painting part with the field. First, click on the “Create a new group” button (Shortcut: Ctrl/Cmd+G) and name it Field.


Then click on the “Create a new layer” button (Shortcut: Ctrl/Cmd+Shift+Alt/Opt+N) and place this new layer inside the Field group we just created.

We are going to add some shadows into our field now. With black as your foreground color (Shortcut: D), use a 0% hardness brush (Shortcut: B) to paint the areas indicated below:
Here is the result you should get:

Create a new layer again (Shortcut: Ctrl/Cmd+Shift+Alt/Opt+N) and place it above the layer we created before.

Again with black as your foreground color (Shortcut: D) paint the are indicated in the image below:

Your result should be something like this:

To make it look better, add a Gaussian Blur to it (Filter -> Blur -> Gaussian Blur).

Set the radius to 80px.

And this is the result:

Now we’re going to start adding some colors to our image. The process will be a little bit tedious and repetitive, but the bright side is that is really easy to do, and is basically what we just did above. We’re going to create a new layer, add some color to it, soften the effect with a Gaussian Blur, and do it all over again for the next layer.
To speed up this process make sure you try to use these shortcuts:
- Ctrl/Cmd+Shift+Alt/Opt+N to create a new layer
- Ctrl/Cmd+G to create a new group
Also, if you have a tablet make sure you use it, because it will make your life a lot more easy thanks to the ability to control the opacity of the brush in real time while painting. If you don’t have a tablet don’t worry, follow these tips to help you with this part:
- Always use a brush wih 0% hardness
- Leave the opacity low (20~50%)
- Don’t do long strokes with the brush, try to do lots of short ones
- Ctrl/Cmd+Z will undo the last stroke
- Use Ctrl/Cmd+Alt/Opt+Z to undo more than one stroke
- When applying the Gaussian blur, feel free to try new values for the radius
- If you think the effect is too strong even after applying the Gaussian Blur, reduce the opacity of the layer to around 50~75%
- And last but not least: DO NOT RUSH and have fun!

To change your foreground color double click the little color square on the left panel. The easiest way to change your color is to type the hex code (highlighted below) on your color picker.

With that color selected, and using the layer we just created, try to paint something like this in your image:

Apply a Gaussian blur of 80px.

And this is the result:

Now just keep following the same pattern for the rest of this step


![image076[1] image076[1]](https://cdn.photoshoptutorials.ws/wp-content/uploads/2013/07/image07611-1.jpg?strip=all&lossy=1&quality=70&webp=70&avif=70&w=1920&ssl=1)


We’re going to paint with pure white in this step. To quickly access white press D and then X.


Don’t worry about the darkening of the image, I did that in some of the steps to make it easier for you to see where I’ve painted.


And by the end of this step, your image should be similar to this one. Remember: your image doesn’t need to be exactly like mine, just similar.
Step 10: Painting the forest
Now we’re going to paint the right side of our image, the forest. The colors will be similar to the ones we used on the left part of it, and the process will be exactly the same. Before we start, just for organization sake, create a new group and name it Forest.

Create a new layer, place it inside the group we just created and you’re good to go.

![image076[2] image076[2]](https://cdn.photoshoptutorials.ws/wp-content/uploads/2013/07/image0762-1.jpg?strip=all&lossy=1&quality=70&webp=70&avif=70&w=1920&ssl=1)


To create the effect of lighting travelling between the trees, let’s use a Motion Blur instead of a Gaussian Blur. Go to Filter->Blur->Motion Blur.

Set the angle to -28º and the Distance to 300px.

And here’s our nice little effect:


Again, don’t worry about the darkening of the image, it’s just to help you see where I’ve painted.


To finish off this step, let’s create a layer mask in this group so we can correct some parts of the image. Select the Forest group, and click on the “Add layer mask” button.

Now paint with black the areas that we don’t want to be affected by the lighting, like the tree trunks of the trees in the front. Check the image below, where I highlighted with red the areas that I painted.

This is the result:

And this is how your layers panel should be looking like right now:

Step 11: Painting the big planet
I told you it was going to be tedious, but we’re heading towards the end now. Create a new group, name it Big Planet and add a new layer to it.

Now open the Images group and drag the layer “Small Planet” to the top of our layer stack.

Also, bring the Big Planet group we just created to the bottom of our layer stack, right above the Images group.

Now select the layer we just created inside the Big Planet group and stat painting!


We’re going to paint most of the planet with pure black in this step. Press D to quickly access black as your foreground color.


As you can see in the image above, we need to fix the lighting on the top of the trees. To do that, select the layer mask we created on the previous step (layer mask of the Forest group), and paint with pure black the areas highlighted on the image below:


Here is the result:

And now we can go back to our Big Planet group, create a new layer and continue with the painting.


The black we added to the sky is a little bit too dark now, so open the Field group and look for that layer. In my case it was the Layer 2.

After you find it, reduce its opacity to 75%.

And the result should be a softer black like this:

Now go back to our Big Planet group and let’s finish the painting of the first planet.

In this step we’ll be painting with pure white. To quickly access white as your foreground color press D and then X.


Step 12: Painting the small planet
This is the last part of our painting process. Create a new group called Small Planet and place the Small Planet layer (the actual small planet) inside it.

Now create a new layer and place it on the top of our Small Planet group.

Now hold Alt/Opt and click in the space between the layer we just created and the Small Planet layer. If you did this right, you should see a sign (highlighted in the image below) next to the layer, which means that that layer is now clipped to the layer underneath it, so all the painting we do in that layer will only affect the layer underneath it.

Finally, change your foreground color, and let’s paint!


Create a new layer, place it on the top of the layer stack inside the Small Planet group, and clip it to the previous layers (Hold Alt/Opt and click between the layers).


Create a new layer inside this group, but this time drag it underneath the Small Planet layer.


Create a new layer and place it anywhere beneath the Small Planet layer, but still inside the Small Planet group.


Create a new layer and place it on the top of the layer stack inside the Small Planet group.

We’re going to use pure white to paint again. Press D and X to quickly change your foreground color to white.


Create a new layer and place it anywhere underneath the Small Planet layer.


It’s kind of hard to see, but just draw a straight line on the left corner of the screen (shown with the arrow).

We’re going to add a Motion Blur again. Go to Filter -> Blur -> Motion Blur and chose an angle of 0º and a Distance of 2000px.


Then, with the same layer still active, add a Gaussian Blur with a radius of 75px.

And this is the result:

Create a new layer and place it on the top of the layer stack inside the Small Planet group.

This next step it’s kind of hard to see but it makes a huge difference in the end. Select white as your foreground color (Press D and then X to quickly access white) and paint a vertical line on the corner of the image (same place we painted above).
Create a new layer and place it anywhere underneath the Small Planet layer.


And this is how your image should be looking like after all this painting:

Step 13: Adding the family
We’re going to draw the family in a new layer so start by adding a new layer to the top of our layer stack.

Load the people silhouette brushes we downloaded into Photoshop and select the family brush (highlighted below).

Set the brush size to 50px and draw a small family on the left side of our image.

Make a copy of this layer by dragging it to the “Create a new layer” button (or selecting the layer and pressing Ctrl/Cmd+J).

With the copy of the family layer selected, go to Transform->Flip Vertical.

Now use the Move Tool (Shortcut: V) to drag the shadow underneath the family.

Hit Ctrl/Cmd+T or go to Edit->Free Transform to use the Free Transform Tool. Right click inside the highlighted rectangle and chose Distort.

Now drag the bottom left and right corners a little bit to the left like shown in the image below:

Reduce the opacity of this layer to 50%.

And we have some shadows!

Now create a layer mask in the shadow layer by clicking on the “Add layer mask” button.

Using the brush tool (shortcut: B) with 0% hardness and opacity around 50%, paint with black the areas highlighted below:

The result should be a smoother shadow (more realistic).

And this is how your image should be looking like right now:

Step 14: Final Adjustments
Last step of our manipulation, let’s add some adjustments to improve the final result of our image. Start by merging all our previous layers using the shortcut Ctrl/Cmd+Shift+Alt/Opt+E. Remember to select the first layer in your layer stack before merging the layers.

Now apply a Gaussian Blur (Filter->Blur->Gaussian Blur – you should know that by now) in it, with a Radius of 60px.

Change the blending mode of this layer to Screen and reduce the opacity to around 20%.

Make a copy of this layer by dragging it to the “Create a new layer” button or using the shortcut Ctrl/Cmd+J.

Change the blending mode of this new layer to Multiply, and reduce the opacity to 10%.

The result should be similar to this one:

Select the first layer in our layer stack and merge all the previous layers again by using the shortcut Ctrl/Cmd+Shift+Alt/Opt+E.

With this new layer selected, go to Filter-> Render->Lens Flare.

Change the mid point of the effect to the place highlighted below, and reduce the Brightness of it to around 50%.

This is the result:

With that same layer still selected, go to Filter->Render->Lighting Effects.

Use the image below as reference and change the mid point of the effect, increase the width, and set the Intensity of it to 45. Leave the rest of the settings as default.


And this is our final result:
![image002[1] image002[1]](https://cdn.photoshoptutorials.ws/wp-content/uploads/2013/07/image00211-1.jpg?strip=all&lossy=1&quality=70&webp=70&avif=70&w=1920&ssl=1)
Final Results
![image002[2] image002[2]](https://cdn.photoshoptutorials.ws/wp-content/uploads/2013/07/image00221-1.jpg?strip=all&lossy=1&quality=70&webp=70&avif=70&w=1920&ssl=1)
16 comments on “Create a Mysterious Scene with Planets”
wow this is so emotionally amazing
How can I get the video tutorail
Very great job..............keep it up :)
Hey great tutorial it help me a lot make this http://beauduval.deviantart.com/art/Clocks-425499015 thank you
HOW CAN I GET THE BIG BLUE PLANET AND THE BUSHES? I'M PRESSING ON THE RESOURCES BUT I CAN'T FIND THEM? KINDLY, REPLY FAST.
There's no lighting effects for 64 bit systems :(
great stuff, thank you for sharing.
It says I have to buy the field image from the website. Is there anyway I could get it without a purchase?
When you are making custom brush, before you press define brush preset, do this - ( your shape will be automatically changed to grayscale mode when you'll define it as brush preset) so go to black and white and adjust object cause you won't have that opportunity after brush is created.
Hi, nice tutorial, but... I have one question.
How do you make the brush like you use in this tutorial?
it is almost without shape, some kind of transparency. Perfect to work with, especially this type of pictures.
U open picture then go to Edit -> Define Brush
If its grayed out then image size it to 2500px max width & height
Play with the opacity and brush shape. Make sure the hardness is at 0%. He is using a tablet I think, so unless you have a tablet also you will not be able to get the brushstrokes that perfect (at least, I couldn't).
Very clear tutorial with some great techniques to learn from. Thank you.
good work
nice
Either the trees are too big or the humans are too small. Layers are messy too.