Now, activate the Brush tool (B) but before we proceed on setting the right settings, make sure that your brushes are the default brushes.

To make sure that you’re using that, simply right click the canvas while a layer is selected and while the Brush tool (B) is activated and then click on the button highlighted below:

Then click on “Reset Brushes” from the contextual menu.

Now that the brushes are the default ones, input the following:
- Brush size: 250px
- Hardness: 0%
- Opacity: 25%
- Flow: 100%
- #: 000000
Note: #: 000000 is the Brush’s color. To set that, simply follow the instructions below:
The #: 000000 is the color of the Brush tool (B), so this means it is colored black. To set the brush color, follow the instructions below:


When you’re ready apply black paint through the “Darken” layer as shown on the image below:

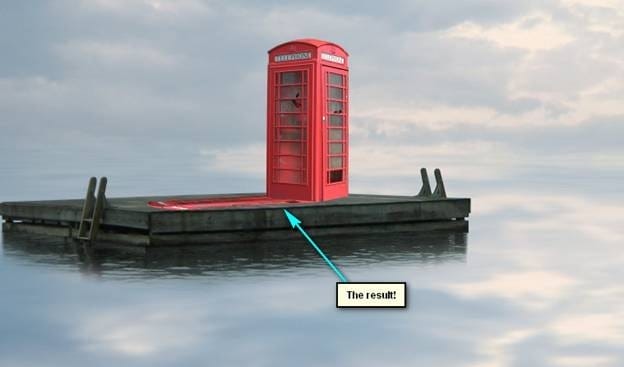
Now, let’s make the phone booth look more realistic by adding a shadow. Start by selecting the “phone booth” layer and duplicate it (Ctrl/Cmd + J) and then activate the Transform tool (Ctrl/Cmd + T) and the right click on the canvas and then click on Flip Vertical. When you’re done, activate the Transform tool (Ctrl/Cmd + T) once again and right click on the canvas and then click on Distort and then just follow the instructions below:
Drag the encircled squares to the direction of the cyan arrows:


Now, let’s convert this distorted phone booth to a shadow! Click on this duplicated layer and go to Image > Adjustments > Brightness/Contrast and input the following:
- Brightness/Contrast:
- Brightness: -100
- Contrast: -100
- Use Legacy: Check
Change the opacity of the duplicated phone booth’s layer to 95%.
The result should be like this:

Now that we’re done, group all the layers and name the group – “Phone Booth”.
Step 6: Add the Woman with an Old Trunk
In this step, we will be adding the woman who in our image is trying to get a ride from the flying boats. To start, open “Old trunk17” by sd_stock, once open activate the Polygonal Lasso Tool (L) and create a selection area around the woman. See image below:

Activate the Move tool (V) and drag the woman to our canvas. Once on the canvas, rename this layer to “woman”. Now, activate the Transform tool (Ctrl/Cmd + T) and right click the canvas and then click on Flip Horizontal. After that, resize the woman as shown on the image below:
3 responses to “How to Create a Traditional Painting-Like Surreal Image using Photoshop”
-
boy
-
cool
-
swag


Leave a Reply