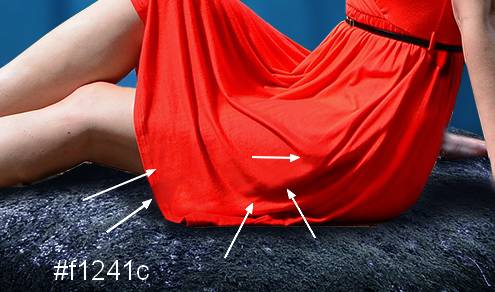

Step 31
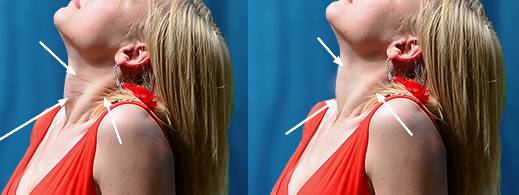
Make another layer and use a soft brush with the color #efe0d0, the opacity and flow about 26-30% to reduce the wrinkles on the model’s neck.
Step 32
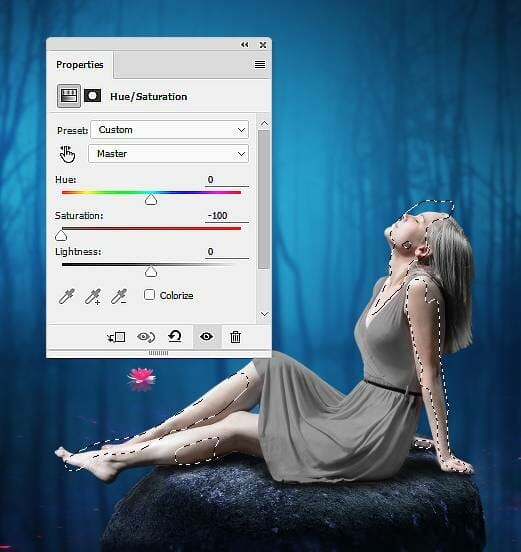
Create a group the model layer, the shadow, reflection and the other relative ones and change the group’s mode to Normal 100%. Make a Hue/Saturation adjustment layer within this group and bring the Saturation values down to the maximum. On this layer mask, use a soft black brush with the opacity about 20% to paint on the skin areas to keep some floridness of the skin.
Step 33
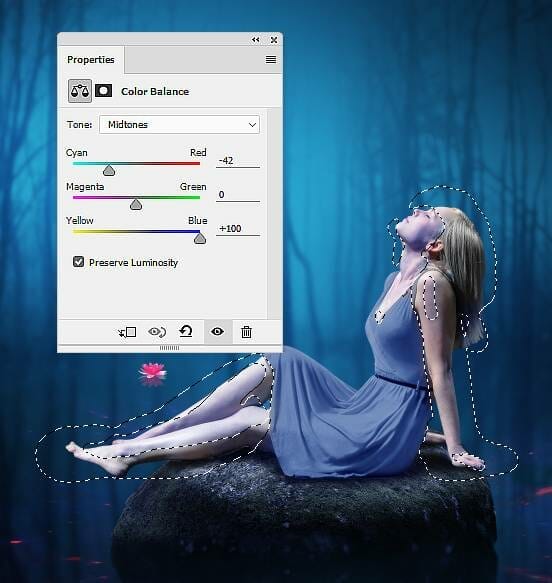
Make a Color Balance adjustment layer and change the Midtones settings. On this layer mask, use a soft black brush with the opacity about 25% to reduce the color effect on the skin and head.
Step 34
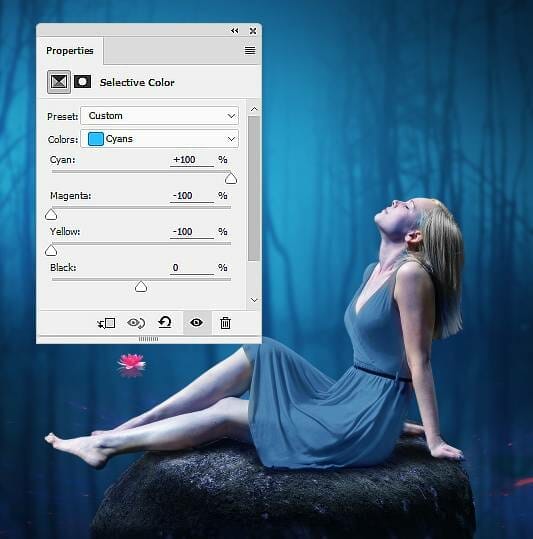
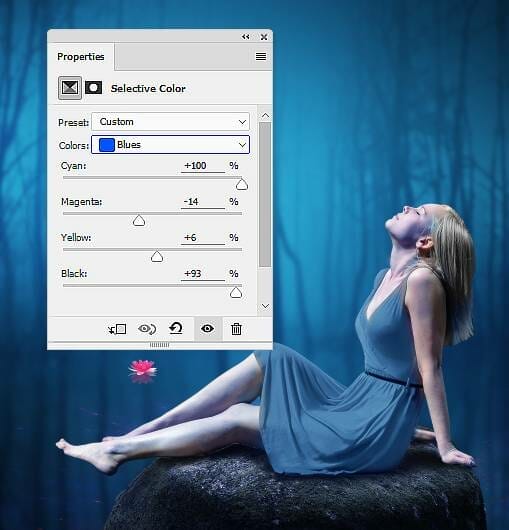
Add a Selective Color adjustment layer to change the color of the dress and skin.
Step 35
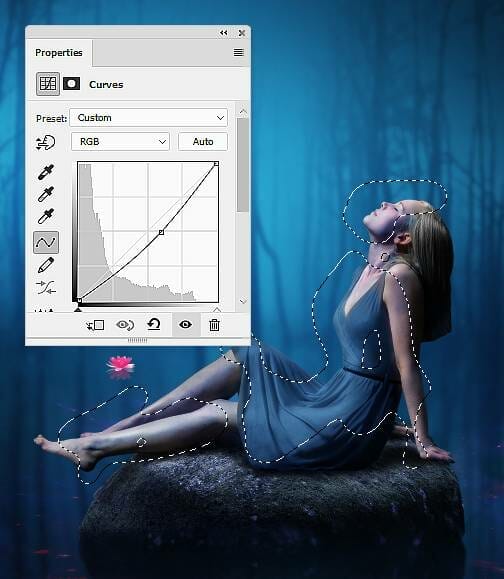
Create a Curves adjustment layer and decrease the lightness. On this layer mask, paint on the bright side and details of the model, leaving the dark effect visible on the shadow side.

Step 36
Make another Curves adjustment layer with the same purpose. The selected areas show where to paint on the layer mask.
Step 37
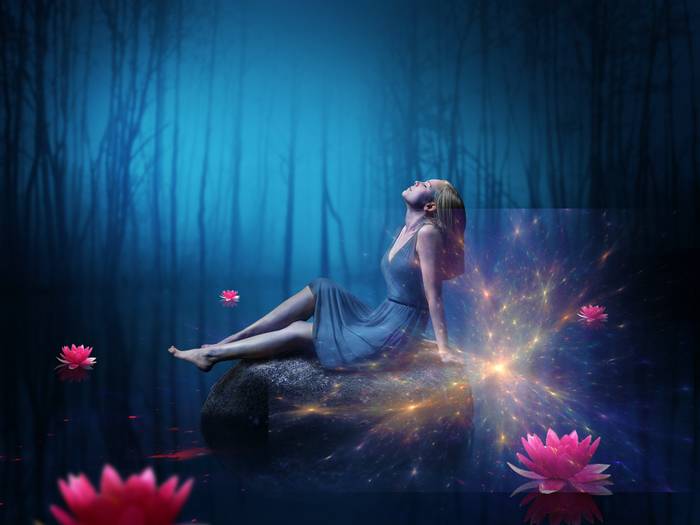
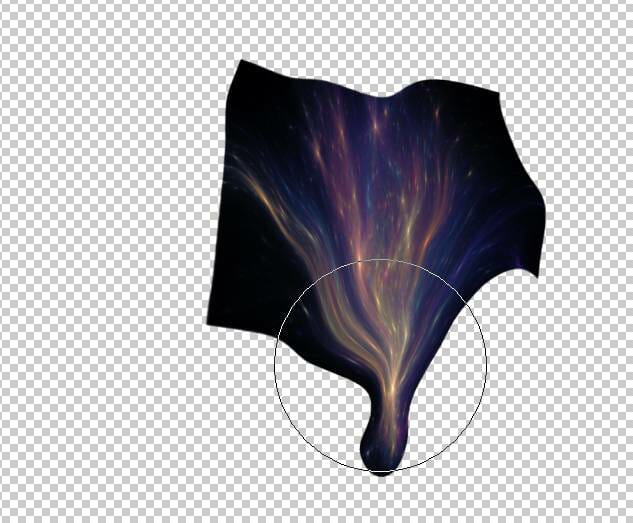
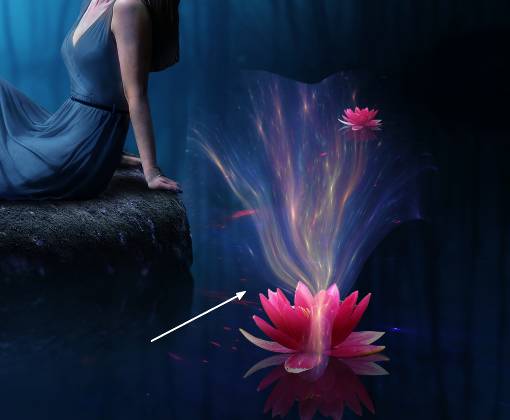
Move the light image into the main document and change the mode to Screen 100%. Go to Filter > Liquify and use the Forward Warp Tool (W) to tweak the form of the light as shown below. Move this part onto the water lily beside the rock.
Step 38
Use Ctrl+T with the Warp mode to tweak the form of this part to fit the pose of the flower. Add a mask to this layer to remove the bottom of this effect.


Step 39
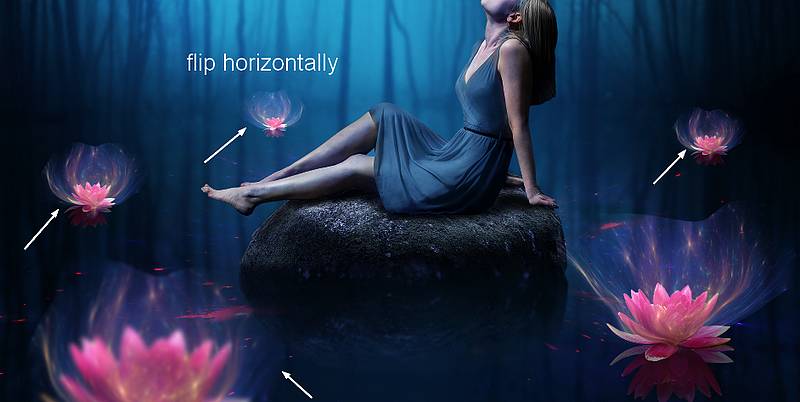
Use the Liquify Tool to tweak the light image into a different form and place it onto one of the water lilies. Duplicate this layer three times and place them onto the rest of the flowers. Apply a Gaussian Blur of 3 px to the effect part which are on the biggest lily. Flip one of these layers horizontally (Edit > Transform > Flip Horizontal) to add to the smallest lily.
Step 40
Select the different parts from the original light image to tweak using the Liquify Tool. Change their layer mode to Screen 100% and move them onto the head of the model to make a fantasy hair for her.
4 responses to “How to Create a Fantasy Lake Scene with Adobe Photoshop”
-
I tried and failed
-
All images, (girl, brightness, Lotus everything) added so that we can easily find and work
-
Please rock image add.
-
Sorry about that, the rock image has been added. https://pixabay.com/photos/stone-forest-nature-landscape-3962/
-


Leave a Reply