
In this tutorial, I’ll show you how to create a fantasy scene featuring a lady with magical water lilies. First, we’ll build the base scene of the lake using a forest image. After that, we’ll add the rock, make some water effect and add the water lilies. Later, we’ll retouch the model and use a light image to create some fantasy effect for her and the water lilies. We’ll paint the lighting effect, make the magical dots, and use several adjustment layers to enhance the final effect.
Preview of the Final Result

Tutorial Resources
Step 1
Create a new 2000×1500 px document and fill it with white. Open the forest image and drag it into the white canvas using the Move Tool (V). Convert this layer to a Smart Object.

Step 2
Go to Filter > Blur > Gaussian Blur and set the radius to 4 px. Press Ctrl+J to duplicate this layer and flip it vertically (Edit > Transform > Flip Vertical) . Use the Move Tool to drag it down a bit.


Step 3
Click the second icon at the bottom of the Layers panel to add a mask to this layer. Select a soft round brush with black color and use it to erase the ground. Now the background looks like a lake.

Step 4
Go to Layer > New Adjustment Layer > Gradient Map and pick the colors #01102b and #166491.

Step 5
Make a Curves adjustment layer and decrease the lightness. On this layer mask, use a soft black brush to erase the middle as we aim to add some light there.

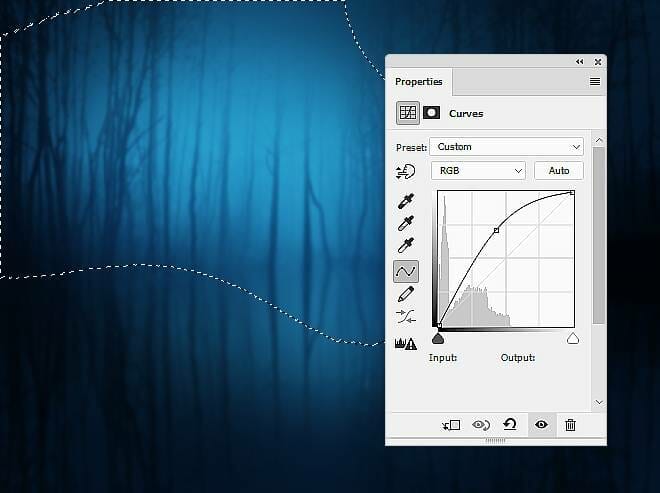
Step 6
Add another Curves adjustment layer and increase the lightness for the area near the middle. On this layer mask, use a soft black brush to erase the rest to keep the shadow and contrast of this area.
Step 7
Make a new layer on top of the layers and use a small brush with the color #04070e to paint more details behind the trees. Apply a Gaussian Blur of 5 px to this layer to make these details soft and blur to fit the background.


Step 8
Create a new layer and use a soft brush with the color #cadef9 to paint on the area near the middle of the background. Change this layer mode to Overlay 70% and add a mask to this layer. Use a soft black brush to reduce the light effect on this part , making it more subtle.
4 responses to “How to Create a Fantasy Lake Scene with Adobe Photoshop”
-

I tried and failed
-
All images, (girl, brightness, Lotus everything) added so that we can easily find and work
-
Please rock image add.
-
Sorry about that, the rock image has been added. https://pixabay.com/photos/stone-forest-nature-landscape-3962/
-
Leave a Reply to anonymousCancel reply