On the following picture you can see where you should paint, these parts are highlighted with red color.
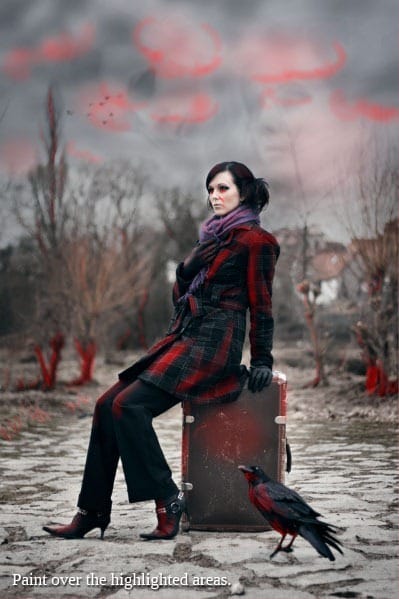
If you look carefully on the picture above you’ll notice that you should paint on:
- parts of the clouds to add them more drama,
- parts of the trunks to add them plasticity,
- on clothes where sun hits to increase contrast,
- on the highlights of crow from the same reason as above.
Take your time with this step. The more careful and patient you are the more interesting and realistic result you get. The whole point is to paint with small brush with low opacity to get very gentle and thus realistic looking adjustment.
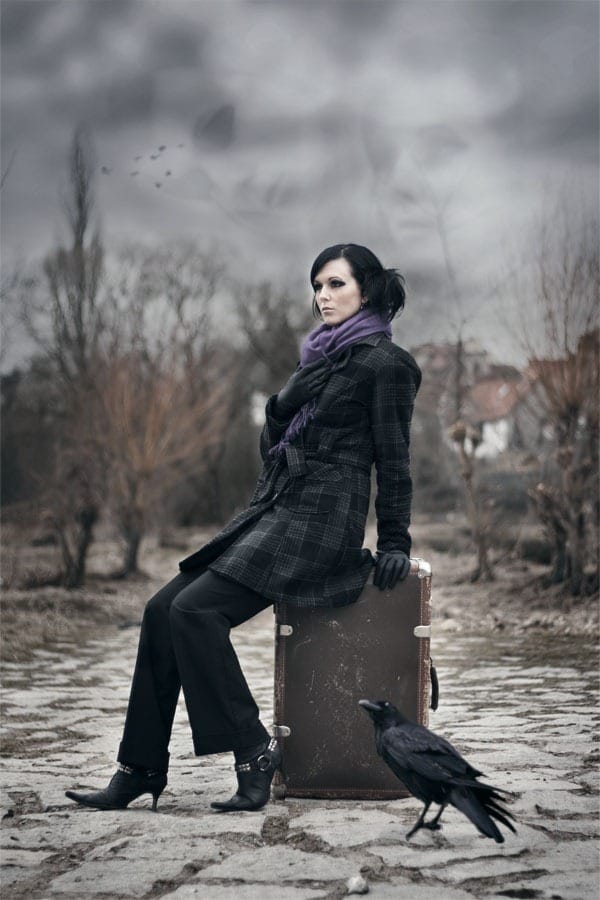
On the picture below you can see how the photo manipulation should look like after all these steps.
Step 18 – More Contrast
Yes, another step about adding contrast. But you want to have dramatic photo manipulation, right? First you’re going to darken vignette little bit more and second you make center of the image lighter.
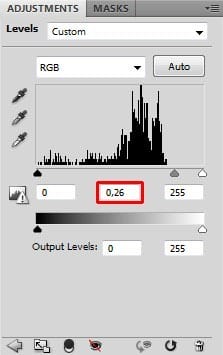
To darken vignette add new adjustment layer Levels and set the Input Levels on 0; 0,26; 255.
Change the Blending Mode of this adjustment layer from Normal to Luminosity. Grab the Paint Bucket Tool (G) and fill the layer mask with solid black color.
Grab the Brush Tool (B), select some soft round brush and set Master Diameter on about 300 pixels. Lower the Opacity of the brush on 10% and pick white color. Paint around the edges of the picture to darken the vignette.
Then change Master Diameter on 5 – 10 pixels and make shadow under raven darker same as part of its back. Also make darker white house in the background, it catches too many attention on itself and you want to have all viewer’s attention on woman.
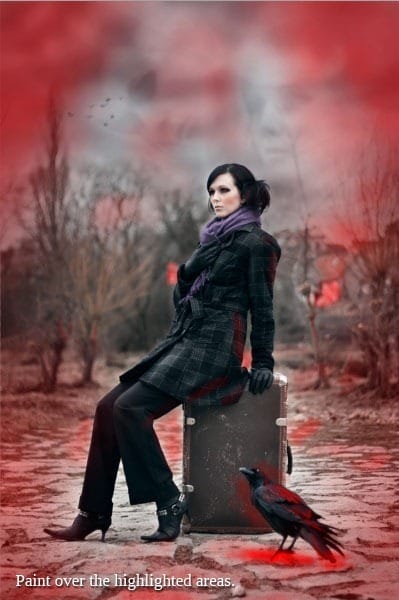
On the following picture you can see where you should paint, that areas are highlighted with red color.
Second part of this step is to make center of the image lighter. Add new adjustment layer Levels and set the Input Levels on 0; 1,22; 230.
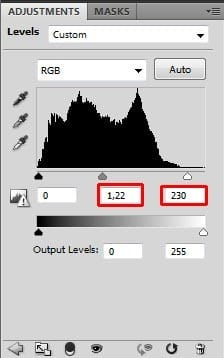
Because you want to make lighter only the center of the image and not the edges with vignette grab the Brush Tool (B), select soft round brush and set the Master Diameter on 300 pixels. Pick black color and paint around the edges to make the adjustment disappear there.
If you’re not sure where to paint with the black brush take a look at following image.
9 responses to “How to Use Light and Shadow to Create a Dramatic Photo Effect with Photoshop”
-
Thank you so much for this tutorial. I’ve read many tutorials about all of the tools you mentioned in this article, but I was never able to really grasp or truly understand the concept behind the tool. You have explained them in a way that really make sense to me!! And that is very much appreciated!
-
thanks a lot
-
thanks very nice.
-
Woow! I am very very impressed about your tutorial. With all your stuffs, i have no doubt am gonna be a pro in photoshop!
-
thats a wonderfull tutorial….thank u….
-
thanks wow nice
-
plz post a video tutorial….
-
Yes girl, nice job. Thanx
-
What a fantastic tutorial, covering so many aspects of photoshop. I’m now even more excited to learn the program. . Thank you! thank you! thank you!


Leave a Reply