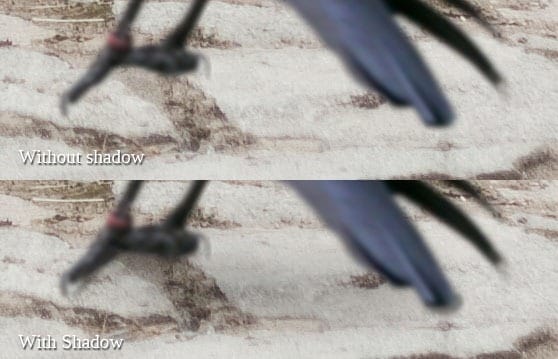
Pure white and pure black are too harsh and tend to not to look much realistic in your pictures so I recommend to try to avoid them and use colors I named above instead.
After you’ve picked some dark shade look at how shadow between woman and path looks like and try to paint similar under the raven.

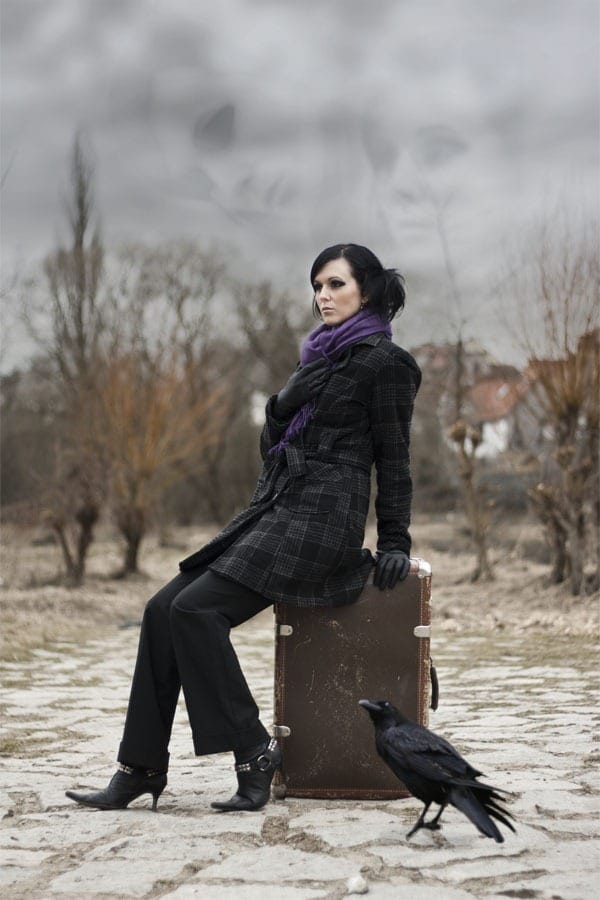
With raven your picture should be similar to the following one.

Step 13 – Darkening the Background
In previous 12 steps you’ve added all main elements to the scene. Now it’s time on second part of this tutorial – light adjustment. Right now the picture is flat and kind of boring. In this and following steps you’re going to add more contrasted light, darken some part of the image and lighten others.
In this particular step you’re going to make the path darker to increase contrast between it and the woman in foreground. Let’s do it!
Add new adjustment layer Levels and set the Input Levels on 0; 0,47, 255.

You want to adjust only path and not the whole picture. Because of that grab the Paint Bucket Tool (G) and pick black color. Click on the thumbnail of layer mask of this adjustment layer and fill it with black. Adjustments disappears and you can let it appear only in that areas you actually want.

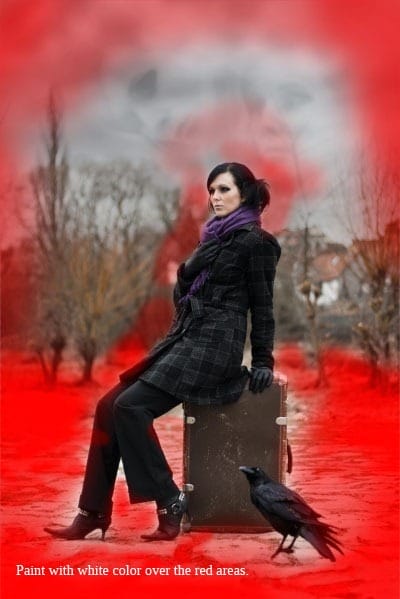
Grab the Brush Tool (B), select some soft round brush and set Master Diameter on about 300 pixels. Lower the Opacity of the brush on 20% and pick white color. Paint over the areas you want to make darker.
On the following picture you can get inspiration where to paint. I highlighted the areas with red so you can see it better.

As you can see I painted not only on the path but also around the woman and edges. I recommend you to do the same because a) painting around the edges creates nice vignette which adds more depth to the picture, and b) darkening area around woman makes her more pops up.
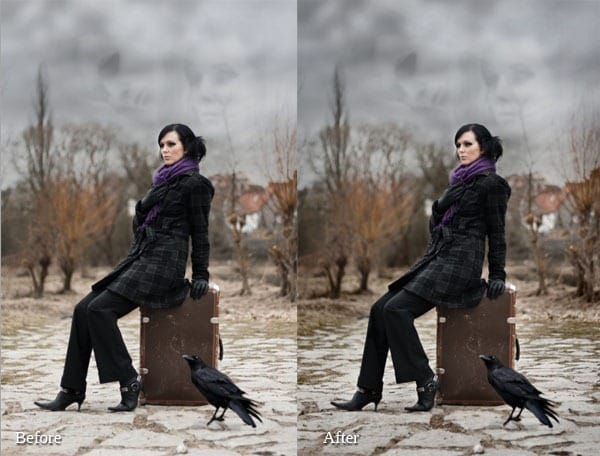
Let’s take a look at the following picture to compare how the picture looks before and after this adjustment.

Step 14 – Lightening the Woman
To increase the contrast between woman and the rest of the image it would be good to make her bit lighter. You’re going to focus on it in this step.
9 responses to “How to Use Light and Shadow to Create a Dramatic Photo Effect with Photoshop”
-
Thank you so much for this tutorial. I’ve read many tutorials about all of the tools you mentioned in this article, but I was never able to really grasp or truly understand the concept behind the tool. You have explained them in a way that really make sense to me!! And that is very much appreciated!
-
thanks a lot
-
thanks very nice.
-
Woow! I am very very impressed about your tutorial. With all your stuffs, i have no doubt am gonna be a pro in photoshop!
-
thats a wonderfull tutorial….thank u….
-
thanks wow nice
-
plz post a video tutorial….
-
Yes girl, nice job. Thanx
-
What a fantastic tutorial, covering so many aspects of photoshop. I’m now even more excited to learn the program. . Thank you! thank you! thank you!


Leave a Reply