Luminar AI lets you turn your ideas into reality with powerful, intelligent AI. Download the photo editor and see how you can completely transform your photos in a few clicks.
The process is quite similar as in the previous step with only one difference - you set Levels to lighten the image instead of darken it.
Add new adjustment layer Levels on the top of all layers and set the Input Levels on 0; 0,86; 230.
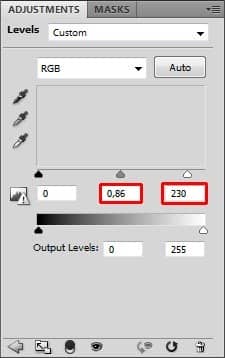
You want to make this adjustment visible only on few selected parts again. Because of that grab the Paint Bucket Tool (G), pick black color and fill the layer mask with it.
Then grab the Brush Tool (B), use the same setting as in the previous step, pick white color and paint over the areas which you think should be bit lighter. On the following picture you can get inspiration where to paint.
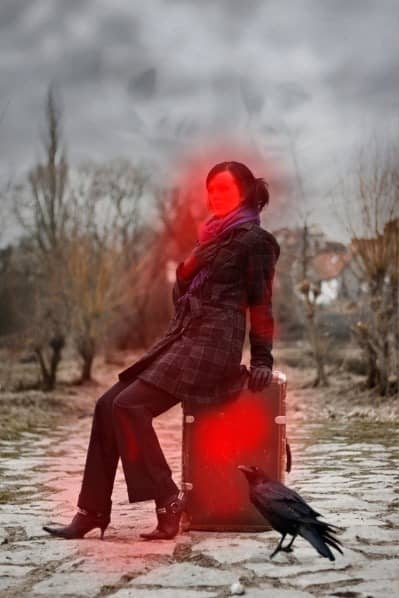
While lightening focus on woman's face to make her bit paler. Make glow on glows lighter same as upper part of the suitcase. You can also make very gentle light aura around her to increase contrast.
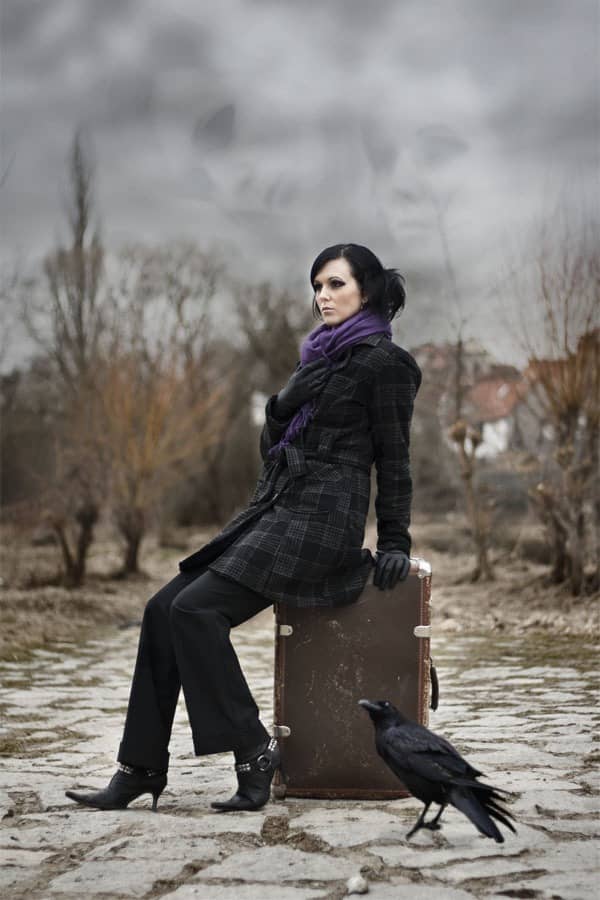
On the following picture you can see how the photo manipulation looks after last two steps.
Step 15 - Adding Vignette
You've already created gentle vignette in step 13. In this step you're going to make it even more visible. Add new adjustment layer Levels on the top of all layers and set the Input Levels on 0; 0,62; 255.
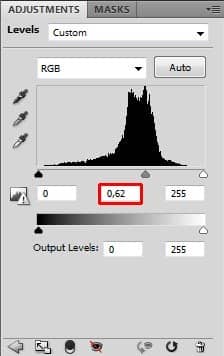
Grab the Paint Bucket Tool (G), pick black color and fill the layer mask with it. The adjustment disappears and you're able to make it visible only on the areas where you want.
Grab the Brush Tool (B), select some soft round brush and set Master Diameter on 250 - 300 pixels. Set the Opacity on 20% and pick white color. Now paint around the edges of picture to create vignette and add depth because of it.
You can get inspiration of where to paint on the following picture. The areas where I painted are highlighted with red color.
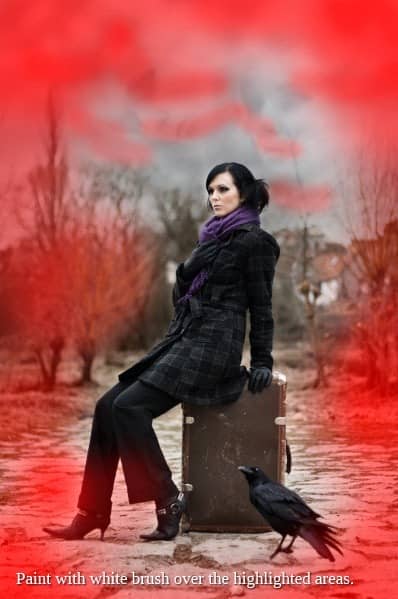
After you paint around the edges make also some part of clouds bit darker to add contrast and volume to that part of the image too.
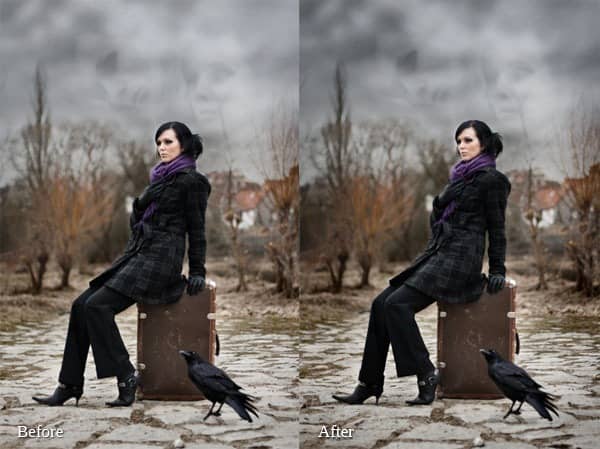
On the following picture you can compare how photo manipulation looks with and without this adjustment. Nice change, isn't it?
Step 16 - Adding Birds
This will be very quick step in which you'll add some flying birds on horizon.
Download the bird brushes listed in the beginning of this tutorial and install them into Photoshop. If you don't know how to install brushes into Photoshop you can take a look at this tutorial.

9 comments on “How to Use Light and Shadow to Create a Dramatic Photo Effect with Photoshop”
Thank you so much for this tutorial. I've read many tutorials about all of the tools you mentioned in this article, but I was never able to really grasp or truly understand the concept behind the tool. You have explained them in a way that really make sense to me!! And that is very much appreciated!
thanks a lot
thanks very nice.
Woow! I am very very impressed about your tutorial. With all your stuffs, i have no doubt am gonna be a pro in photoshop!
thats a wonderfull tutorial....thank u....
thanks wow nice
plz post a video tutorial....
Yes girl, nice job. Thanx
What a fantastic tutorial, covering so many aspects of photoshop. I'm now even more excited to learn the program. . Thank you! thank you! thank you!