Step 21 – Adding Motion Blur
As I mentioned in the description of this tutorial I’ll show you how you can achieve dreamy effect with Photoshop filters, with Radial Blur to be specific.
First you need the layer with your photo manipulation merged. To do that press Ctrl + A on your keyboard to select the whole picture and then go to Edit > Copy Merged or press Ctrl + Shift + C on your keyboard. Press Ctrl + V to paste it. Place this new layer on the top of all layers and name it BLURRED EDGES.
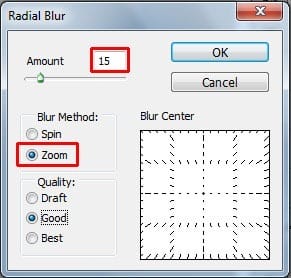
Go to Filter > Blur > Radial Blur and set the dialogue window as on the following picture. Then press OK.

You really don’t want to have the whole image blurred this way. Who could look at it for longer time without dizziness?
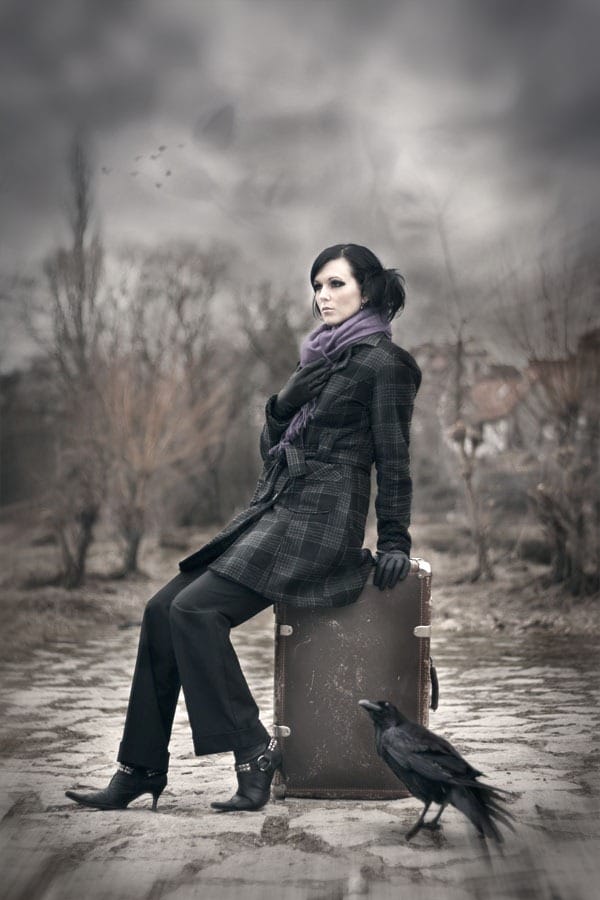
Add new layer mask to BLURRED EDGES. Grab the Paint Bucket Tool (G), pick black color and fill the layer mask with it. Then grab the Brush Tool (B), select some soft round brush, set Master Diameter on about 300 pixels and Opacity on 70%. Pick white color and paint around the edges to make the blur visible again.
On the picture shown below you can see how the photo manipulation looks so far.

Step 22 – Adding Texture
It would look more interesting if you’ll add some texture on the edges of the photo manipulation. To do that download grunge textures listed in the beginning of the tutorial. Choose one of them and drag them into your photo manipulation. Place it on the top of all layers and name it TEXTURE.
To blend it properly with the rest of the picture you need to do two things. First change its Blending Mode from Normal to Soft Light and lower Opacity of the layer on 75%.
It would look better if the texture is only around the edges and not on the whole picture. To achieve that add layer mask to this layer. Grab the Brush Tool (B), leave the same setting as you used in previous step, only pick black color instead of white. Paint in the center of the image to make the texture disappear.
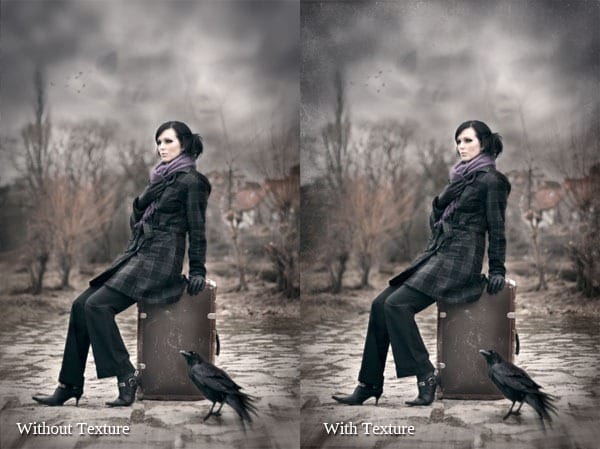
On the following picture you can compare how the photo manipulation looks with and without texture.

As you may notice texture makes the edges bit more darker which is good because it creates more depth.
9 responses to “How to Use Light and Shadow to Create a Dramatic Photo Effect with Photoshop”
-
Thank you so much for this tutorial. I’ve read many tutorials about all of the tools you mentioned in this article, but I was never able to really grasp or truly understand the concept behind the tool. You have explained them in a way that really make sense to me!! And that is very much appreciated!
-
thanks a lot
-
thanks very nice.
-
Woow! I am very very impressed about your tutorial. With all your stuffs, i have no doubt am gonna be a pro in photoshop!
-
thats a wonderfull tutorial….thank u….
-
thanks wow nice
-
plz post a video tutorial….
-
Yes girl, nice job. Thanx
-
What a fantastic tutorial, covering so many aspects of photoshop. I’m now even more excited to learn the program. . Thank you! thank you! thank you!


Leave a Reply