Step 19 – Color Adjustment
Another quick step where you lower the saturation of image and add Photo Filter.
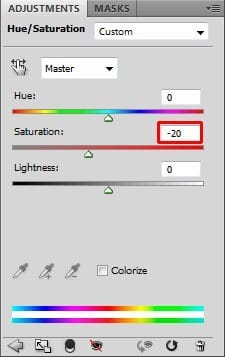
Add new adjustment layer Hue/Saturation on the top of all layers and set the value Saturation on -20.
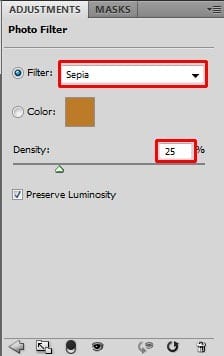
Add new adjustment layer Photo Filter on the top of all layers. Choose Sepia Filter and set Density on 25%. It makes the colors darker. I know that at the end the picture has much colder color palette but at this time you used Photo Filter to unite colors.
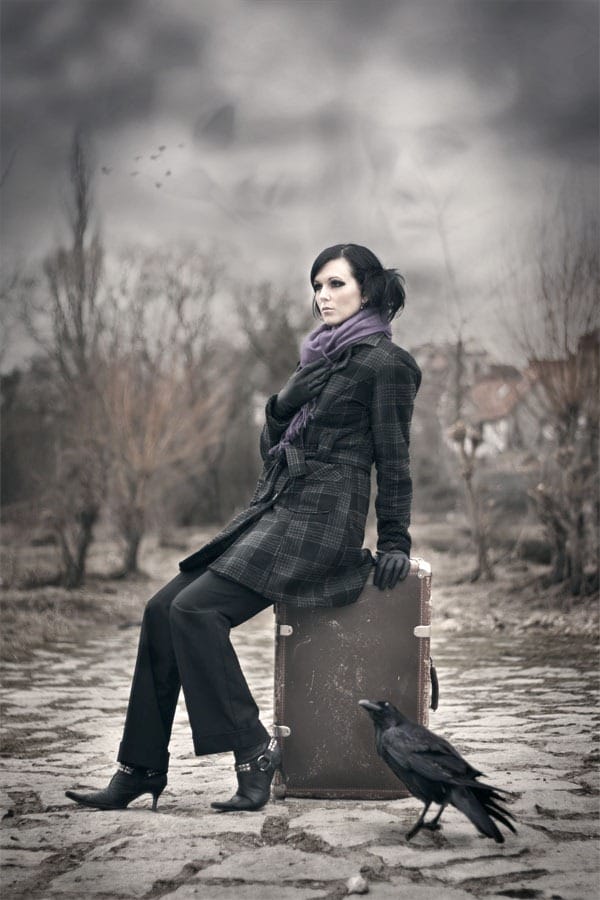
Let’s take a look at how the picture looks so far.
Step 20 – More Details for Clouds
I’m still not happy with the look of clouds, they’re too flat and with very few details. It’s not how proper stormy sky should look like. To fix it add new adjustment layer Levels on the top of all layers and set the Input Levels on 0; 0,18; 255.
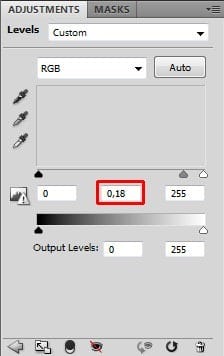
Because you want to adjust only parts of clouds and not the whole picture grab the Paint Bucket Tool (G), pick black color and fill the layer mask with it.
Now grab the Brush Tool (B), select some soft round brush with small Master Diameter (about 10 – 20 pixels) and low Opacity (10%). Pick white color and start painting into clouds to add them details.
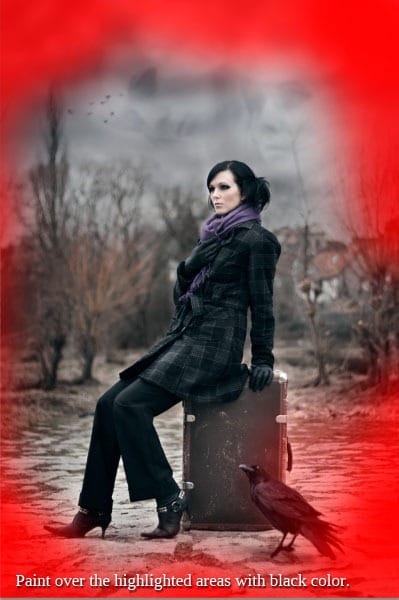
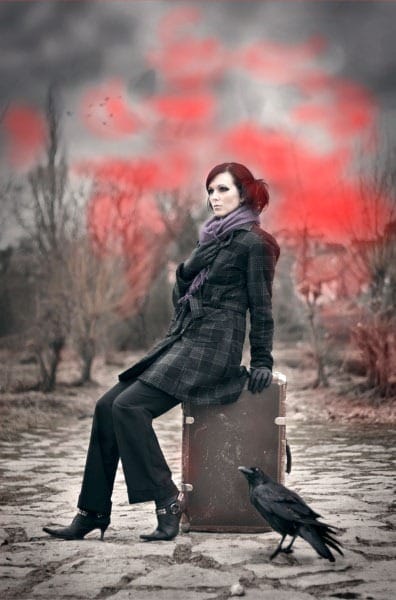
Do not paint around the whole cloud. Just make its bottom part darker to create impression of space or plasticity. If you would just paint around the whole cloud it will look weird and not realistic. On the following picture you can get the idea where to paint, I highlighted these parts with black.
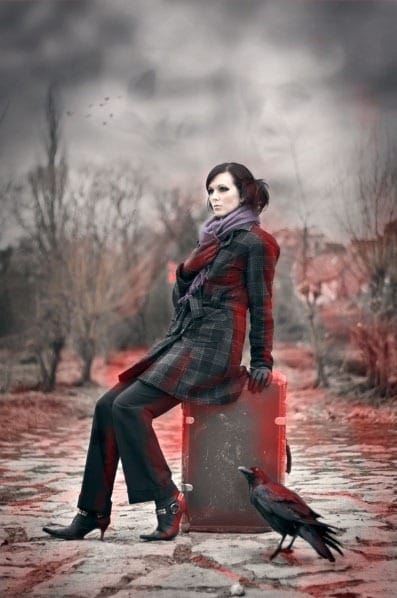
Not completely cloud related but now make shadows on the woman and crow darker. I didn’t want to make separate step for it because you’ll use the same Levels adjustment layer.
Just make the Master Diameter of the brush you’ve used few minutes ago, smaller and paint over the shadows. Let me give you an example where to paint.
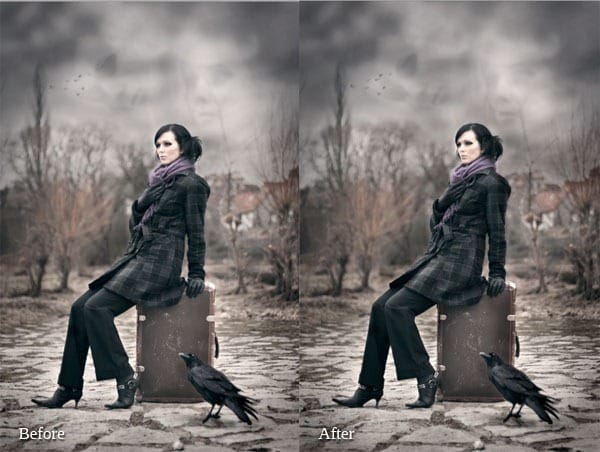
Both changes are rather gentle but add more depth to the picture. You can compare how the image looks before and after this adjustment.
It’s always better to continue gradually with post processing and use more smaller changes instead of one radical. You’ll get much realistic result and your work will simply look better. Like everything if you want to do something well, it just needs more time. There is no shortcut or secret trick, just patience.
9 responses to “How to Use Light and Shadow to Create a Dramatic Photo Effect with Photoshop”
-
Thank you so much for this tutorial. I’ve read many tutorials about all of the tools you mentioned in this article, but I was never able to really grasp or truly understand the concept behind the tool. You have explained them in a way that really make sense to me!! And that is very much appreciated!
-
thanks a lot
-
thanks very nice.
-
Woow! I am very very impressed about your tutorial. With all your stuffs, i have no doubt am gonna be a pro in photoshop!
-
thats a wonderfull tutorial….thank u….
-
thanks wow nice
-
plz post a video tutorial….
-
Yes girl, nice job. Thanx
-
What a fantastic tutorial, covering so many aspects of photoshop. I’m now even more excited to learn the program. . Thank you! thank you! thank you!


Leave a Reply