Download Lightroom presets and LUTs, absolutely free. Use the presets to add creativity and style to your photos.
Click on the RAVEN layer. Grab the Lasso Tool (L) and quickly select raven's tale.
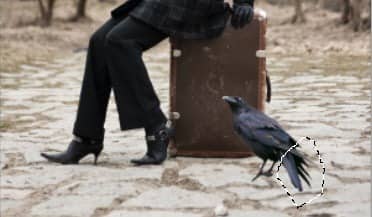
Go to Select > Modify > Feather (path may vary in different versions of Photoshop) or press Shift + F6 on your keyboard. Select the value Feather Radius on 10 pixels and press OK.
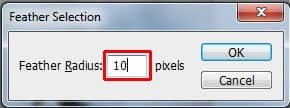
Feather makes edges of your selection softer.
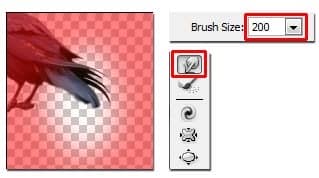
With mask still activated go to Filter > Liquidfy or press Shift + Ctrl + X on your keyboard. Grab the Forward Warp Tool (W) and set the Brush size on about 200 pixels.
Because of the active mask you've done you're able to adjust only the tale and not the rest of raven's body which makes the whole adjustment easier.
With the Forward Warp Tool (W) activated move the tale up. Then press OK.
On the following picture you can compare how the tale looks before and after using Liquidfy filter.
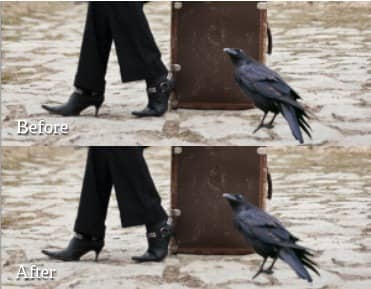
Step 11 - Adjusting Raven
To fit to the picture properly raven should be less saturated and darker. You'll fix it in this step.
Add new adjustment layer Hue/Saturation on the top of all layers and set the value Saturation on -40.
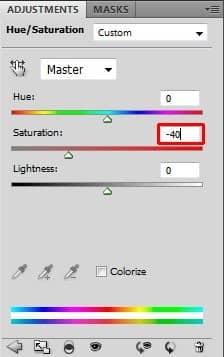
To adjust only raven and not the rest of the image don't forget to create clipping mask from it.
To make it darker add new adjustment layer Levels and set the Input Levels on 0; 0,66; 255.
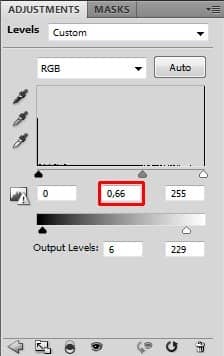
Create clipping mask from this adjustment layer too.
Step 12 - Raven's Shadow
When you're doing photo manipulations it's important to keep in mind that you need to add shadow between subject and place where it stands (in this case between raven and path). Otherwise it will look like object is flying above the surface and not actually stands on it.
So in this step you'll surprisingly add this thin shadow. It's very quick and easy but it has big impact on how realistic your work will look.
Add new layer under the layer RAVEN and name it e.g. RAVEN'S SHADOW. Grab the Brush Tool (B). Hold Alt on your keyboard to activate Eyedropper Tool (I) and select some dark brown color from your picture.
Another useful thing to keep in mind is that in nature you can see very few examples of pure white or pure black, most likely they're e.g. dark brown or dark green instead of black and light yellow or light blue instead of white.


9 comments on “How to Use Light and Shadow to Create a Dramatic Photo Effect with Photoshop”
Thank you so much for this tutorial. I've read many tutorials about all of the tools you mentioned in this article, but I was never able to really grasp or truly understand the concept behind the tool. You have explained them in a way that really make sense to me!! And that is very much appreciated!
thanks a lot
thanks very nice.
Woow! I am very very impressed about your tutorial. With all your stuffs, i have no doubt am gonna be a pro in photoshop!
thats a wonderfull tutorial....thank u....
thanks wow nice
plz post a video tutorial....
Yes girl, nice job. Thanx
What a fantastic tutorial, covering so many aspects of photoshop. I'm now even more excited to learn the program. . Thank you! thank you! thank you!