Turn any photo into a dot grid artwork with these Photoshop actions. You'll get great results with dots that change size. They get larger in brighter areas and smaller in darker areas. Free download available.
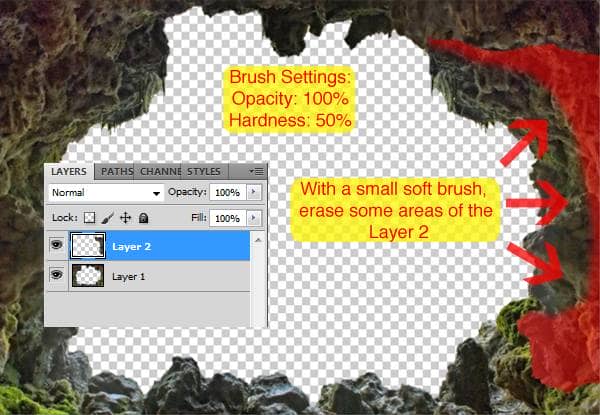
Your result should be similar to this:
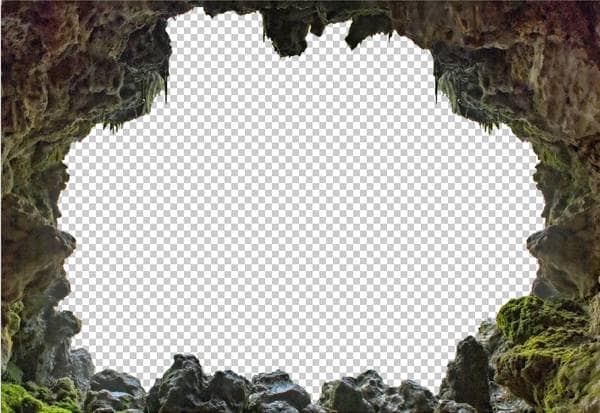
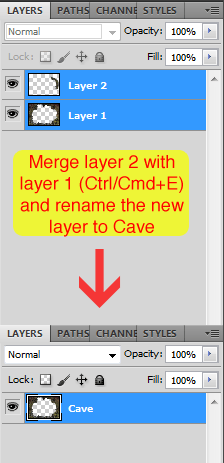
Select both cave layers (Hold Shift and left click on them) and merge them in one layer (Ctrl/Cmd+E). Then, double click the name of the new layer and change it to Cave.
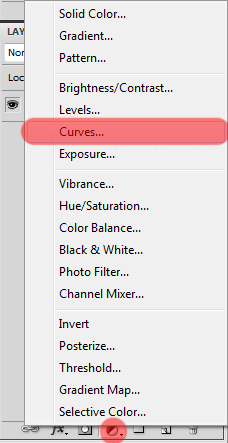
Let’s fix the colors of our cave now. In the Layers pannel, click in ‘Create a new Fill or Adjustment Layer’ and select Curves.
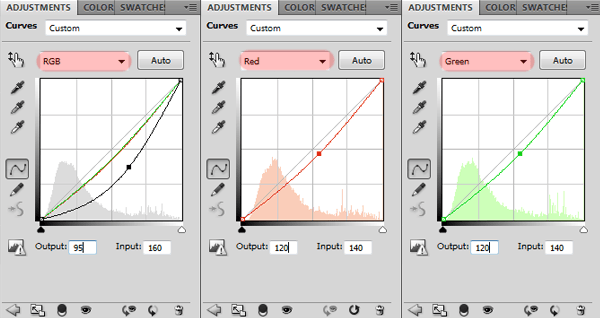
Adjust the curves like this:
You can also use the Output values in the image below as reference while adjusting the curves
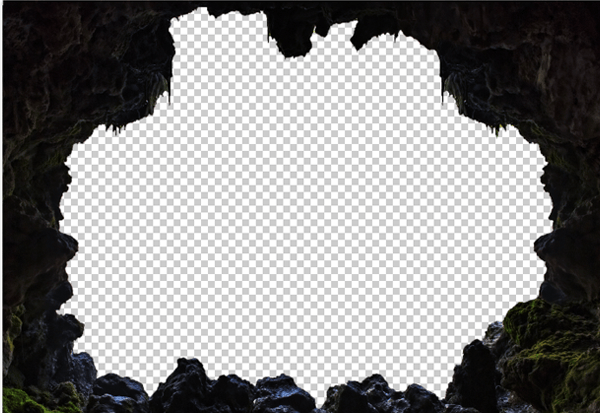
And the cave is done! It should look like this now:
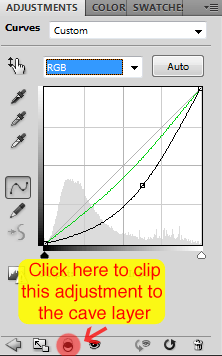
Everytime you add an adjustment layer that you don’t want to affect all of your layers (just the first layer below it), you need to clip it to the that layer, like this:
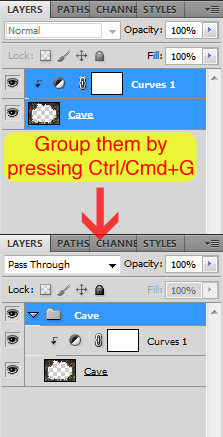
Now to clean our workspace a little bit, select the Cave and the Curves layer and add them to a new group by pressing Ctrl/Cmd+G. Name the new group Cave.
Step 3: Add the Desert
Open the Desert stock and use the Quick Selection Tool (Shortcut: W) to select it.
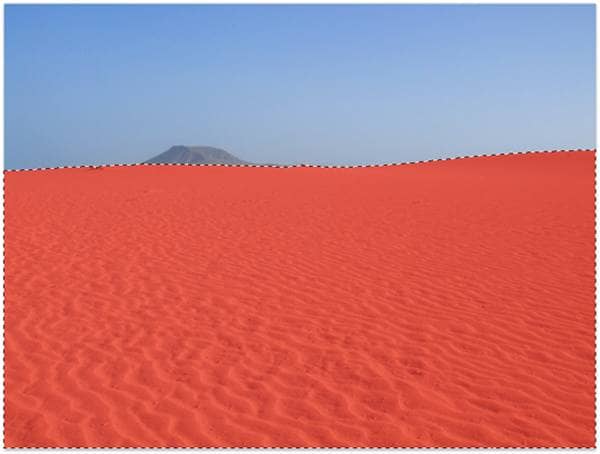
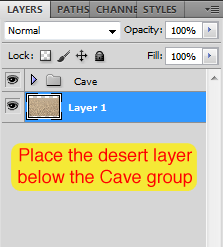
Copy (Ctrl/Cmd+C) and paste (Ctrl/Cmd+V) the desert into our project and place its layer below the Cave group.
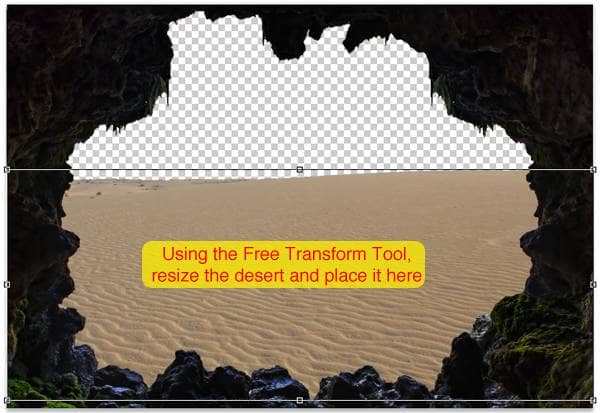
Use the Free Transform Tool (Ctrl/Cmd+T) to resize the desert without losing the proportion. Here are some tips for this tool:
- To increase or decrease the size, click and drag one of those little squares on the edges
- To increase or decrease the size of the image maintaining proportion, hold the Shift key while doing it
- To see your entire selection, press Ctrl/Cmd+0 and the zoom will be adjusted automatically
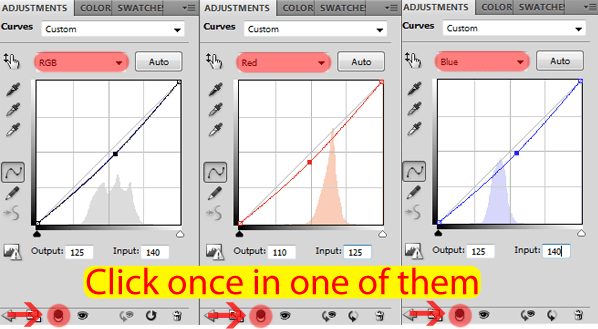
Add a Curves adjustment layer like we did with the cave and see the image below for the input values. Like we did before, clip this adjustment to the layer below (the desert layer).
Always remember to clip an adjustment layer to the layer below it (if you don’t want it to affect any other layer)
Here is the result of this curves adjustment:
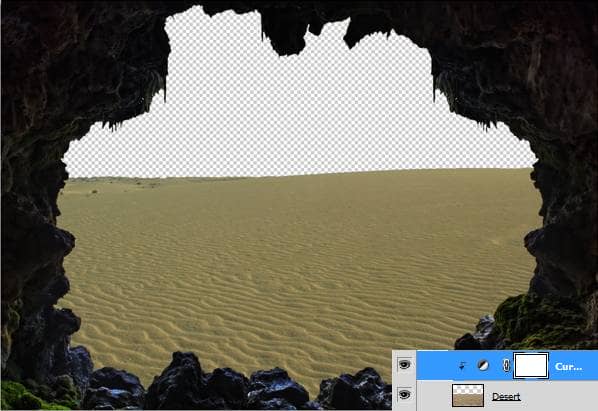
Add a Color Balance Adjustment Layer and see the image below for the input values. Remember to also clip it to the desert layer.
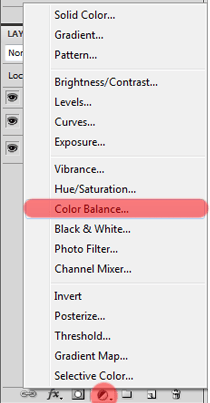
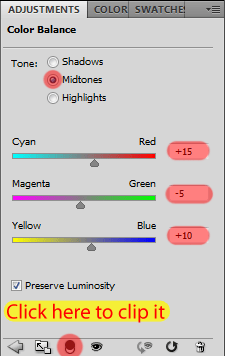
Your image should look like this now:
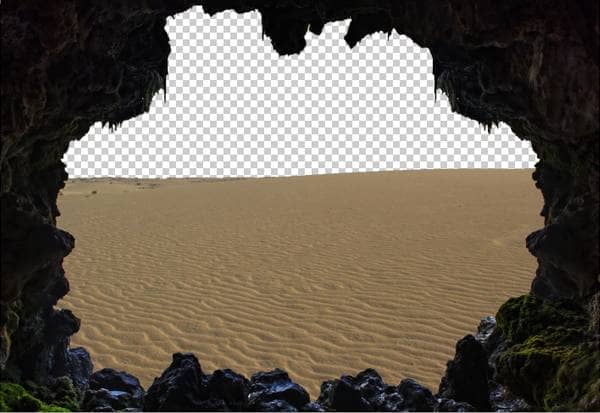
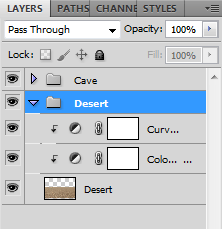
Select the desert layer and its adjustment layers and add them to a new group called Desert (Ctrl/Cmd +G).
- You can also rename the desert layer (Layer 1) to Desert if you want to
Step 4: Add the first underwater stock
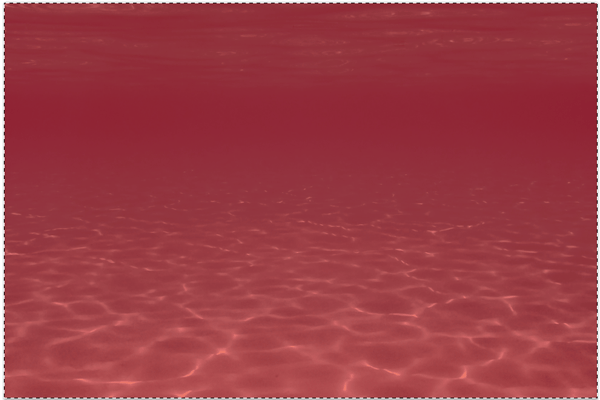
Open the Underwater stock (first one on the list), press Ctrl/Cmd+A to select the whole image and copy (Ctrl/Cmd+C) and paste it (Ctrl/Cmd+V) into our project.
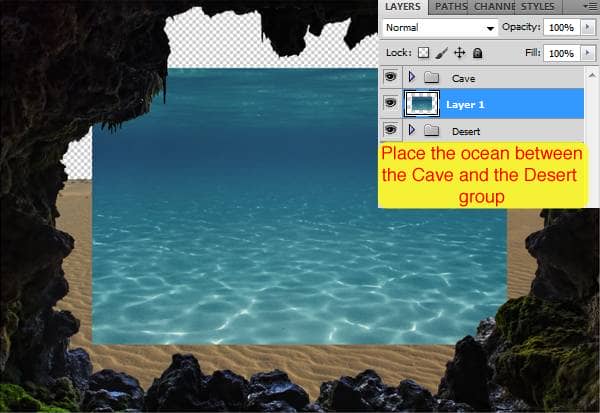
Use the Free Transform Tool (Ctrl/Cmd+T) to resize and stretch the ocean. Just click and drag the squares in the edges (you don’t have to hold Shift this time) until you have something like this:


10 comments on “How to Create a Surreal Scene with an Invisible Man Inside a Mystic Cave”
Some of these tutorials are extremely good, magazine like. Thanks for sharing!
Excellent tutorial. Easy to follow and very, very informative. Thanks for the knowledge.
I did thank you. It took a while but after a while I got the hang of it.
excellent work
buen trabajo amigo
good work
nice
Cool tutorial...got to learn a lot of things... Thanks a lot... :)
thanks, glad you like it =D