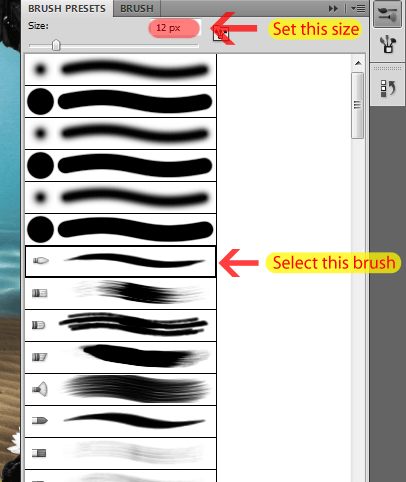
Make sure the opacity of your brush is at 100%
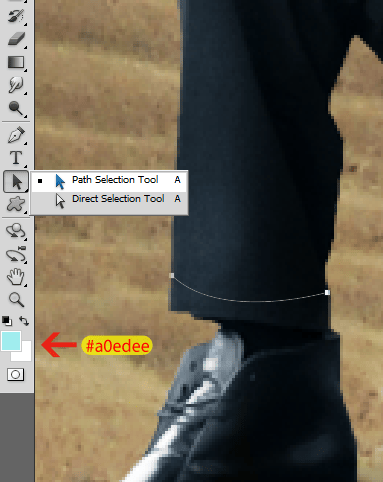
Select a light blue for the color (#a0edee) and hit A to select the Path/Direct Selection Tool. Then right click the path we made and select Stroke Path.

Check Simulate Pressure and click OK.

Here is the result:
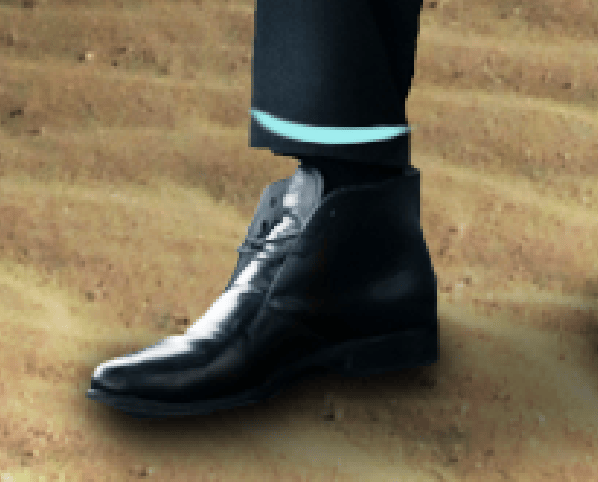
You can accept the path now (just click the check button on the upper toolbar). This will make the path go away. Now duplicate this layer two times (Shortcut: Ctrl/Cmd+J) and use the Move Tool (Shortcut: V) to place them like this:
If you’re not happy with the results you can use the Free Transform Tool (Ctrl/Cmd+T) to stretch them a little bit

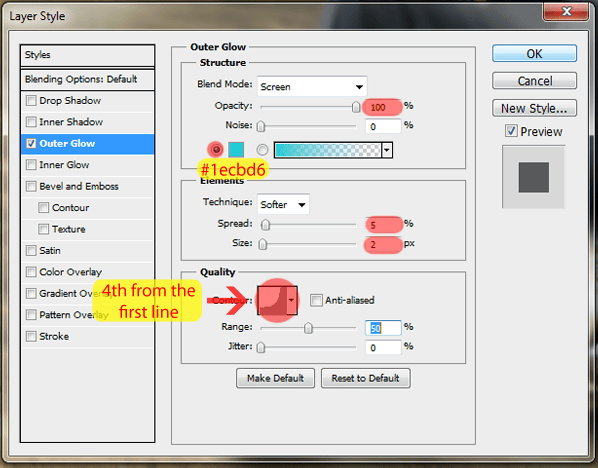
Double click the Chain layer and add an Outter Glow with these settings:
Now right click the Chain layer and click in ‘Copy Layer Style’.
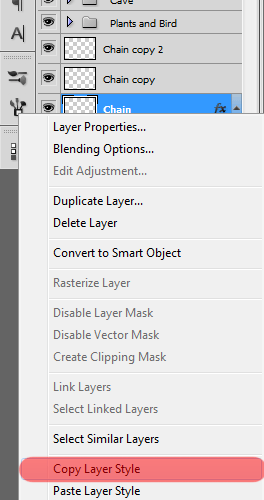
Then right click ‘Chain copy’ and ‘Chain copy 2’ and click in ‘Paste Layer Style’. You should have something like this now:

Create a new layer pressing the button in the Layers panel or using the shortcut Ctrl/Cmd+Shift+Alt/Opt+N. Name this new layer ‘Middle Chain’ and place it below the other Chain layers.

With the same type of brush, the same color and opacity, draw the path (Pen Tool shortcut: P) shown below and stroke it (Press A > Right Click the path > Stroke Path) without checking the ‘Simulate Pressure’ box this time.
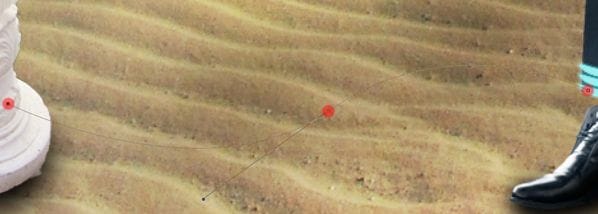


Like we did before, right click in one of the three chain layers we created before and click in ‘Copy Layer Style’. Right click the Middle Chain layer and select ‘Paste Layer Style’. You should have something like this now:
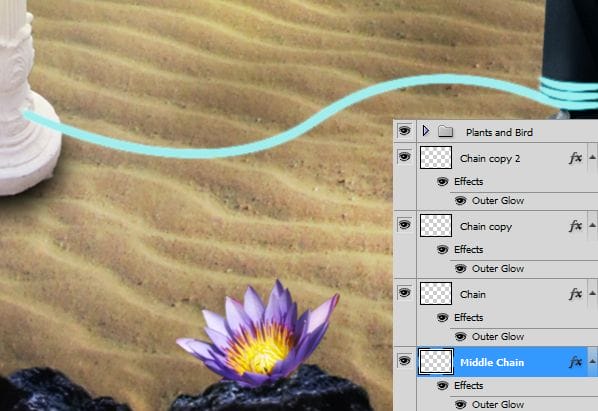
Now create a new group with the layers ‘Chain’, ‘Chain copy’ and ‘Chain copy 2’. Name this new group ‘Right Chains’.
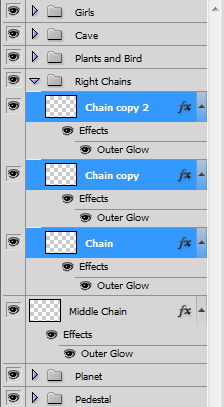
Create a new group called ‘Left Chains’ and create a new layer inside it called ‘Chain’. Place this new group above the Right Chains group.
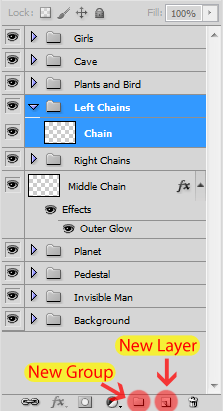
We’re going to repeat the exact same steps we did with the chains in the leg of the invisible man, so I’m just going to add all the images of the process and you can follow along.
- Copy the Layer Style of any of those chains we already did
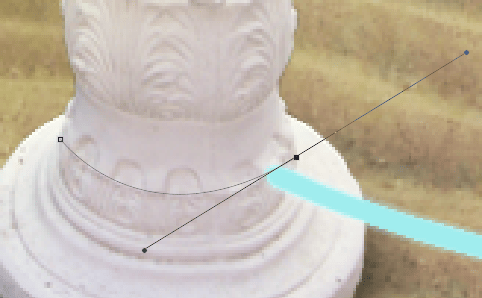
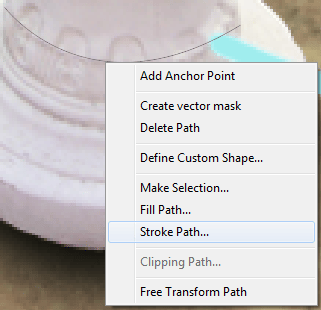

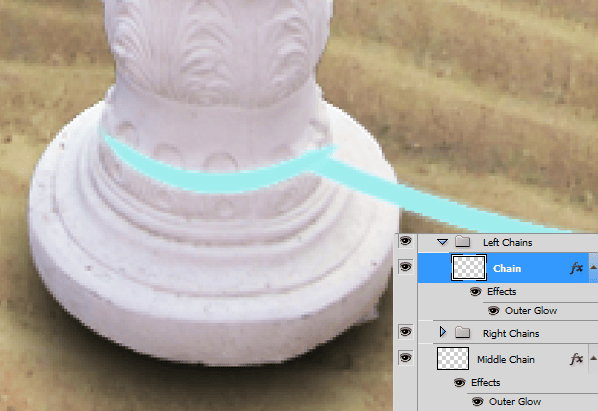
After I created ‘Chain copy 3’ and ‘Chain copy 4’ I resized them with the Free Transform Tool (Ctrl/Cmd+T) to fit the body of the pedestal right.
10 responses to “How to Create a Surreal Scene with an Invisible Man Inside a Mystic Cave”
-
Some of these tutorials are extremely good, magazine like. Thanks for sharing!
-
Excellent tutorial. Easy to follow and very, very informative. Thanks for the knowledge.
-
I did thank you. It took a while but after a while I got the hang of it.
-
excellent work
-
buen trabajo amigo
-
good work
-
nice
-
Cool tutorial…got to learn a lot of things… Thanks a lot… :)
-
thanks, glad you like it =D
-


Leave a Reply