Luminar AI lets you turn your ideas into reality with powerful, intelligent AI. Download the photo editor and see how you can completely transform your photos in a few clicks.
Don’t worry too much about little details over the hair because she will be really small in our final image
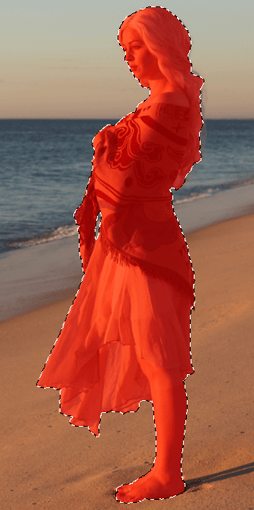
Copy and paste her into our project.
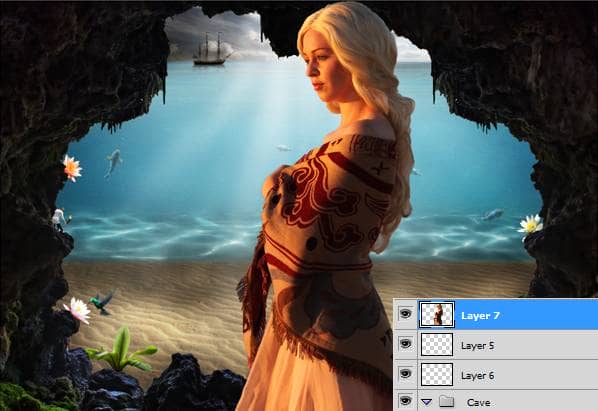
Now resize her using the Free Transform Tool (holding Shift) and place her on the right side of our image.
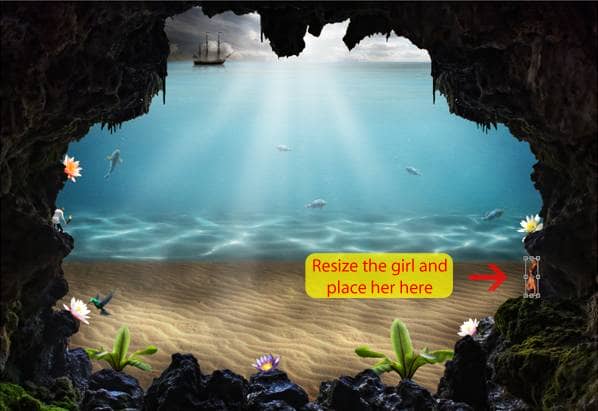
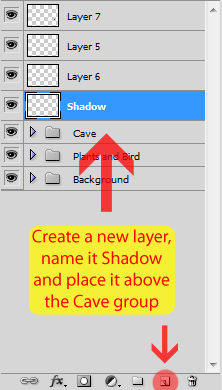
Now that the girls are in place, let’s add their shadows in the cave. Create a new layer, name it Shadow and place it above the Cave group.
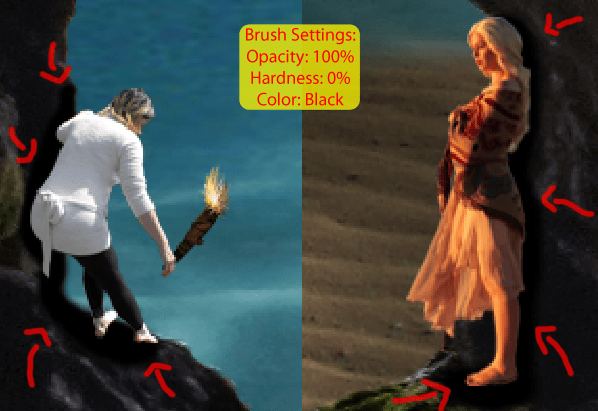
Now grab a soft brush and start painting this layer with black following the image below:
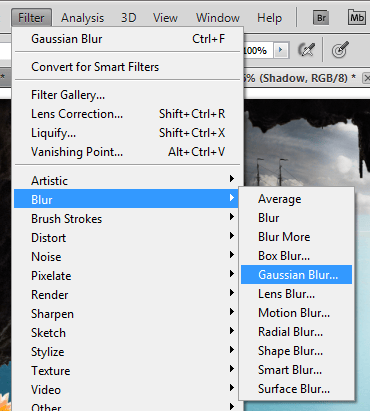
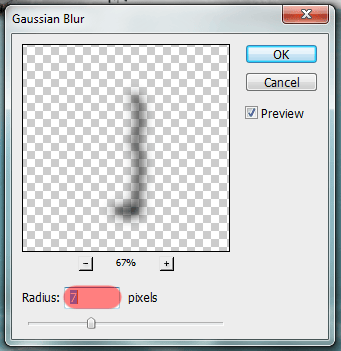
To give the shadows a more natural look, go to Filter > Blur > Gaussian blur and set the radius to 7px.
And here is the result:

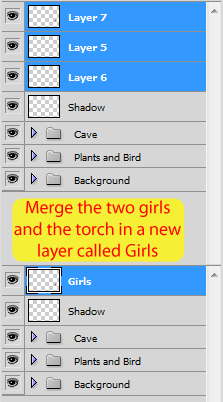
Let’s add some lighting to the girls. First, merge (Ctrl/Cmd+E) the girls and the torch into a new layer called Girls.
Now create a new layer pressing Ctrl/Cmd+Shift+N and set the values below:
![clip_image154[1] clip_image154[1]](https://cdn.photoshoptutorials.ws/images/stories/57a99763c51b_12E3C/clip_image1541.png?strip=all&lossy=1&quality=70&webp=70&avif=70&w=1920&ssl=1)
Select the Dodge Tool (Shortcut: O), set the Range to Midtones, the Exposure to 50%, and start painting the Lighting layer.
- Make it look like the sun is affecting the girls
- Make the torch brighter
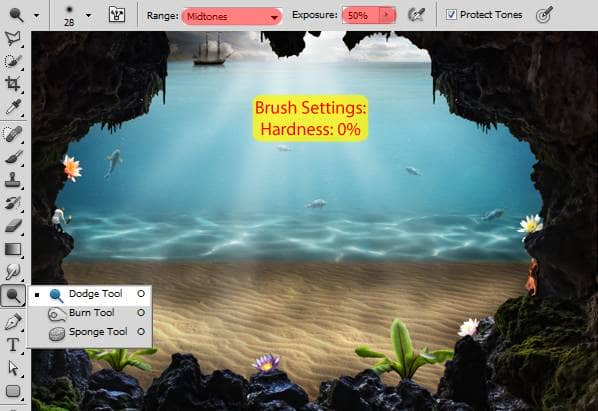
Here is my lighting layer in normal blending mode for reference.
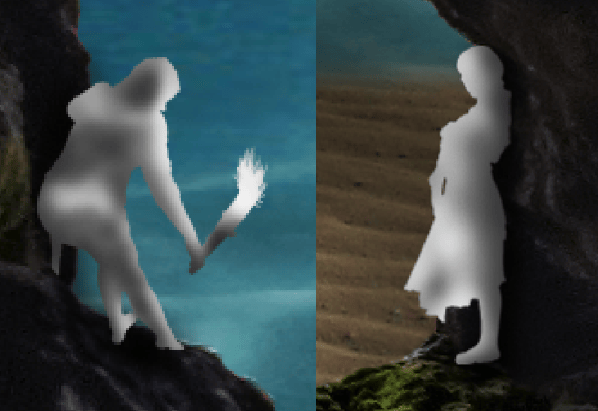
And here is the result:

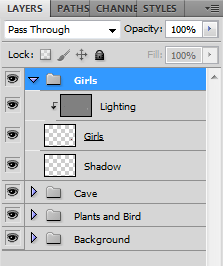
To finish this step, select these three layers we just created and add them to a new group called Girls.
Step 14: Add the invisible man
Let’s start the main part of our image. Open the tree stump stock and select it using the Quick Selection Tool.
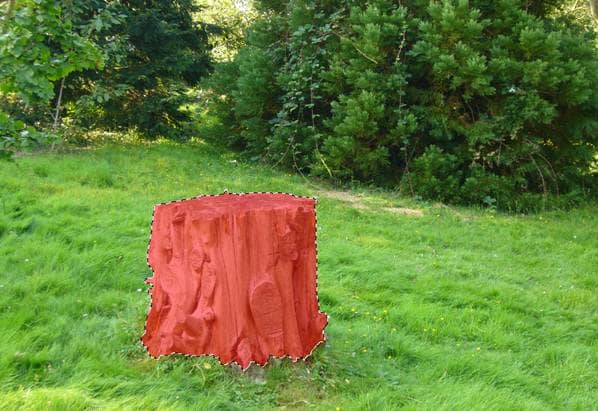
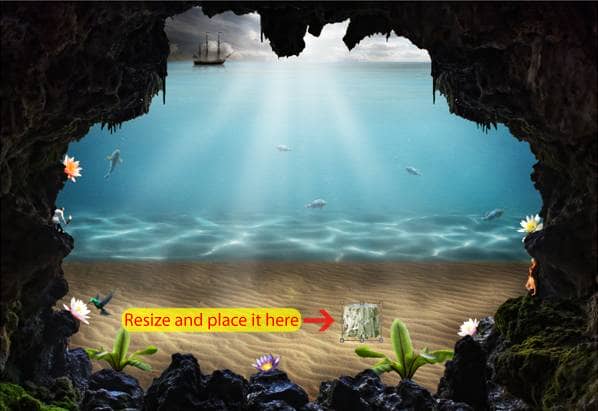
Copy and paste the stump into our project and place its layer between the ‘Plants and Bird’ and the ‘Background’ group.
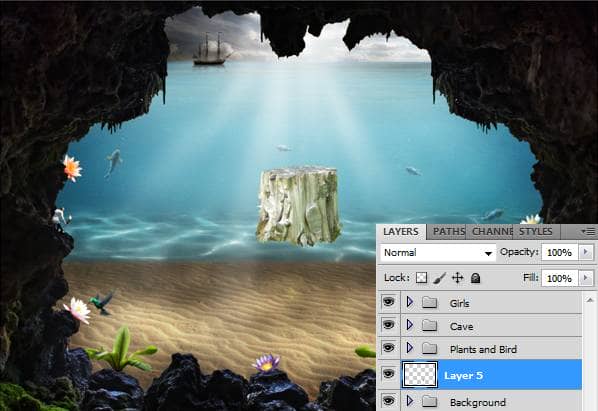
With the Free Transform Tool (Ctrl/Cmd+T) , hold the Shift key and resize the stump. Place it on the bottom of our image.
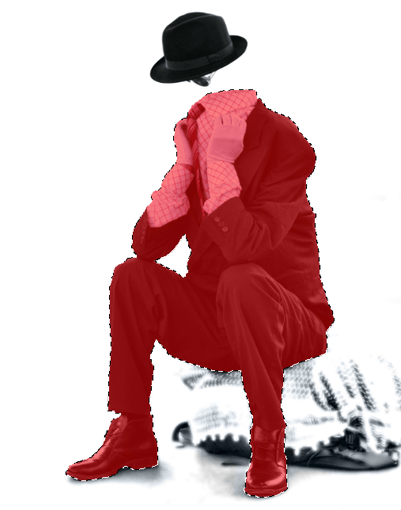
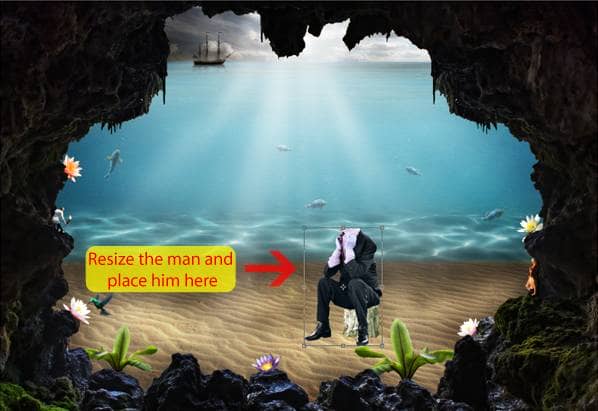
Now open the invisible man and use the Quick Selection Tool to select only his body. We’ll come back for the hat later.
Copy and paste it into our image. Make sure his layer is above the stump layer.
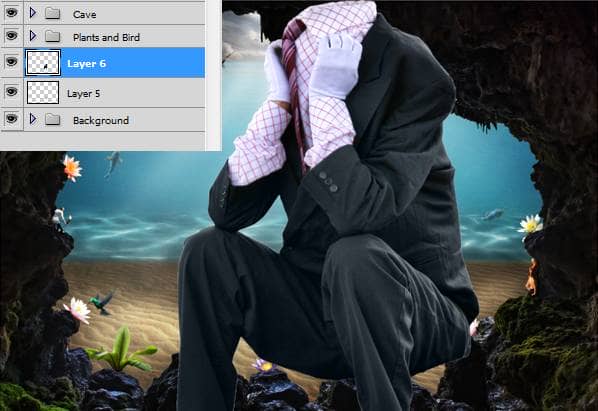
Now use the Free Transform Tool (holding Shift) to make him smaller and place him above the stump.
Go back to the invisible man image and use the Quick Selection Tool to select his hat this time (we don’t want the glasses).
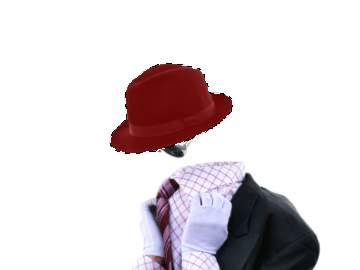
Copy and paste the hat into our project and use the Free Transform Tool (Ctrl/Cmd+T) as usual to resize (holding Shift) and position it.


10 comments on “How to Create a Surreal Scene with an Invisible Man Inside a Mystic Cave”
Some of these tutorials are extremely good, magazine like. Thanks for sharing!
Excellent tutorial. Easy to follow and very, very informative. Thanks for the knowledge.
I did thank you. It took a while but after a while I got the hang of it.
excellent work
buen trabajo amigo
good work
nice
Cool tutorial...got to learn a lot of things... Thanks a lot... :)
thanks, glad you like it =D