
Don’t change your brush yet cause we’re going to use it again right now. Create a new layer using Ctrl/Cmd+Shift+Alt/Opt+N and name it ‘Chain Sparks’. Place it above the Chains group.
 .
.
Like we did before, let’s start with the Layer Style. Double click this layer and add these two styles:

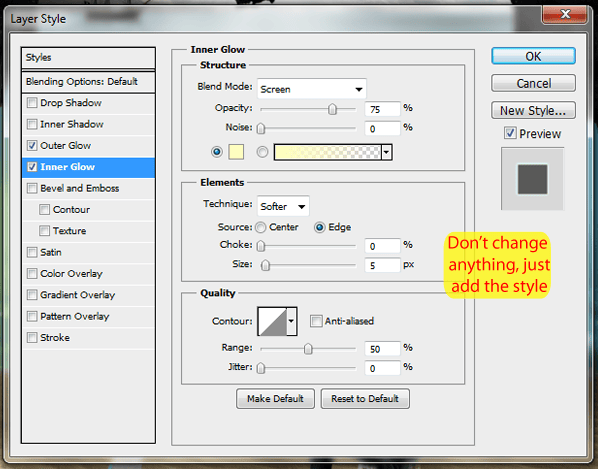
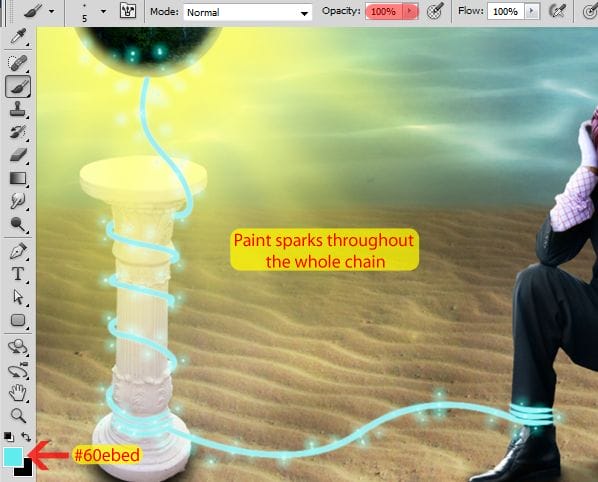
Now that the layer style is ready, just grab the brush we created before and start painting the chains with a light blue (#60ebed). Like this:
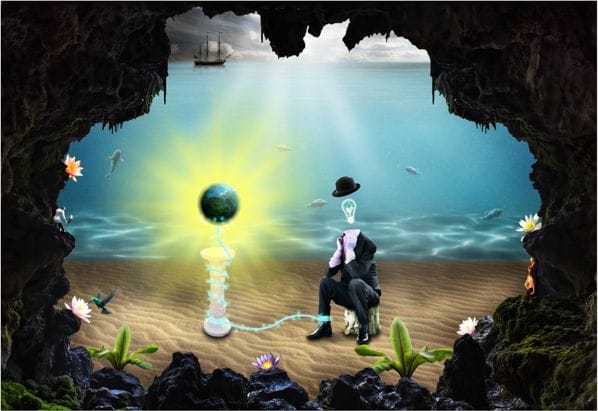
With the sparks added, your image should be looking like this:
And your layers should be like this:
- The layer styles are still there, I just collapsed them (clicking in that arrow next to “fx”) to clean the workspace

Step 19: Adding some lighting to the pedestal
We didn’t added the lighting layer to the pedestal before because we didn’t had the chains done. Now that we have them we can go back to the pedestal group and add it.
Open the pedestal group, select the pedestal layer (in my case it’s Layer 5) and hit Ctrl/Cmd+Shift+N to add a new layer.


Select the Dodge Tool (Shortcut: O) and start painting the pedestal.
- Think about the light of the planet, the light of the chain and the light of the sun

Here is my pedestal with the blending mode set to Normal to be used as reference.
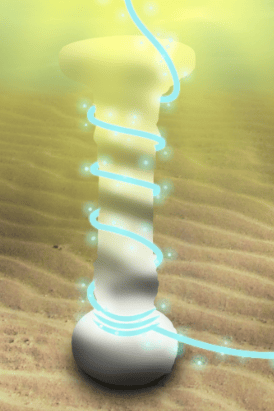
And with the Overlay blending mode:
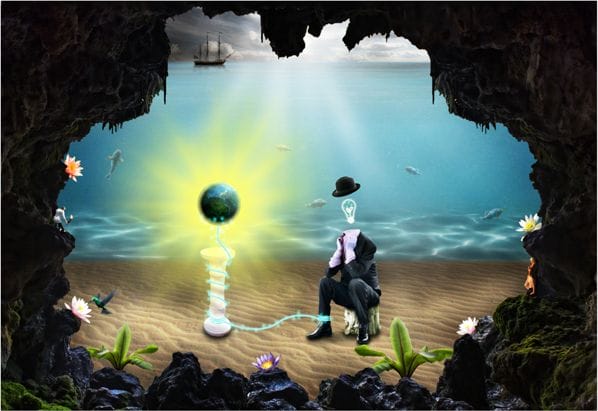
Step 20: Painting the Image
There are a lot of different colors in our image, all sorts of glows, but right now there’s no reflection of them in the elements of the image. To fix that, we’re going to paint our image.
Let’s begin creating a new group called ‘Colors’ and adding a new layer to it called ‘Yellow’. Place the group with this layer above all the other groups of our image.

You can use any brush you want to paint the image (try the brushes at the Brush Presets). I’m going to use a simple round brush with 0% hardness. One thing that you have to remember while painting is to leave the painting blending mode set to Color, like this:

Since we added a layer called Yellow, we’re going to start painting with yellow. Use the Eyedropper Tool (hold Alt/Opt while using the Brush Tool) on the yellow of the planet and start painting. Here are some tips to get you started:
- The opacity of the brush will change a lot during the painting. Usually the opacity will be higher when painting closer to the edges (I paint with 3~25% opacity)
- The size of the brush will also change a lot during the painting, don’t be afraid to pick a small brush and zoom in a lot to do some details
- If it doesn’t look natural after you painted, add a Gaussian Blur (Filter > Blur > Gaussian Blur). You’ll do that a lot
- You can also use the Eyedropper Tool by pressing I on your keyboard
- You can press CAPSLOCK to view the center of your brush instead of seeing the size of your brush (this might help while painting)
- Not every place will need the same amount of Gaussian Blur, so you’ll need to make selections of each part of the painting and apply the right amount of Gaussian Blur in that area
- You can use any tool you want to make the selections (Quick Selection Tool, Rectangular Marquee Tool and even the Pen Tool). Just remember that the Gaussian Blur will never go out of the selected area, so you have to let some room for it
- Try not to paint really close to the edges because the Gaussian Blur will affect the painting in all the directions (You can also paint the edges, apply the Gaussian Blur and then use the Move Tool (Shortcut: V) to move it to the right place if you want)
Here is my yellow layer against a black background so you can see it and use it for reference:

And here is the result of my yellow layer:
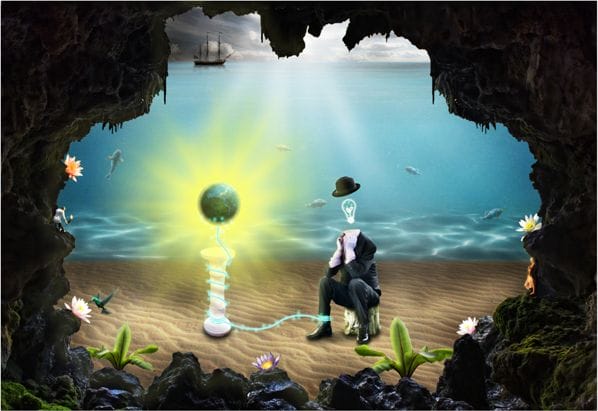
Following the steps we did to paint with the yellow color, we’re going to paint now with other colors like Blue, Orange and Red. I’m going to repeat the steps we just did for each one of the colors and show you the results below.
10 responses to “How to Create a Surreal Scene with an Invisible Man Inside a Mystic Cave”
-
Some of these tutorials are extremely good, magazine like. Thanks for sharing!
-
Excellent tutorial. Easy to follow and very, very informative. Thanks for the knowledge.
-
I did thank you. It took a while but after a while I got the hang of it.
-
excellent work
-
buen trabajo amigo
-
good work
-
nice
-
Cool tutorial…got to learn a lot of things… Thanks a lot… :)
-
thanks, glad you like it =D
-


Leave a Reply