


Step 4
Open the Mountain 1 background stock and copy it (C) and paste it (P) over the skies backgrounds.
Apply a Free Transform tool (Cmd/Ctrl+T), flip horizontally and transform it into the scene. Then apply a layer mask to it and using a low opacity brush of around 30-40%, mask the sky part as shown in the section below:
Add a levels adjustment layer in clipping mask. Go to Layer > New Adjustment Layer > Levels and apply the following values:


Step 5
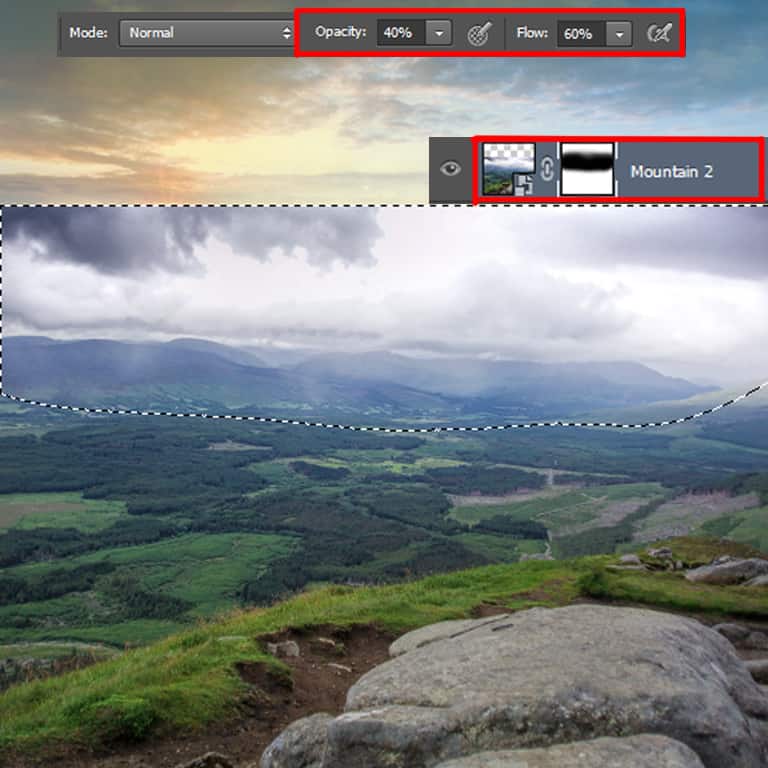
Now open the second mountain stock and copy (C) it over the main document as a top most layer. Apply a free transform tool (Cmd/Ctrl+T) and scale it to fit into the main scene.
Add a layer mask to it and mask the area using a soft brush (B) with a low opacity brush of around 40-45% as shown in the selection below:
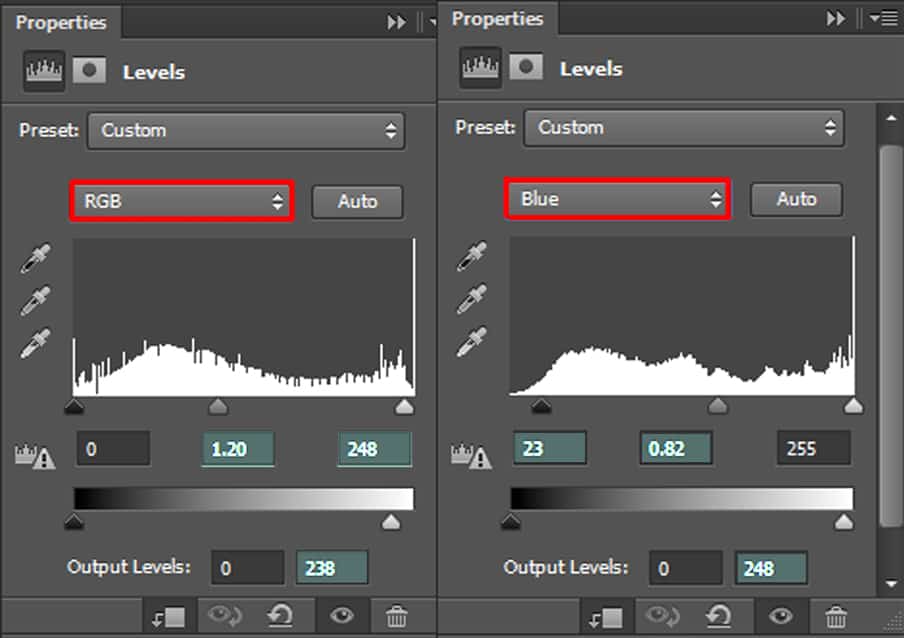
Create a Levels adjustment layer using a clipping mask to brighten and change the colour of the mountain background. Apply the following values shown below:
Then create a curves adjustment layer again in clipping mask to further enhance and brighten the scene.
After that apply a Hue/Saturation adjustment layer to desaturate the mountains slightly and blend in with the whole scene:

Step 6
Now open Landscape stock, we will make that as our ground. Activate the free transform tool (Cmd/Ctrl+T) and enlarge it to fit it into the whole scene. Then give it a layer mask and mask away the part using a soft, low opacity brush (35-45%) as shown in the section below:
In clipping mask, create a Brightness/Contrast adjustment layer and set the brightness to +7 and contrast to +8 to brighten the ground and add a bit of contrast.
Then create a Vibrance adjustment layer, in clipping mask and set the vibrance to -22 to decrease it’s vibrancy and make it a bit desaturated.
We will add a bit of shadow and lighting by applying Curves adjustment layers. Create the first Curves adjustment to darken the ground. Fill this layer mask with black by hitting Cmd/Ctrl+Backspace on the keyboard. Then using a soft brush 100% opacity, and with your foreground colour set to white and background colour to black as shown in the image below, reveal back the effects of the curves layer:
17 responses to “Create a Surreal and Magical Dream Bottle Landscape”
-

I have to say, this may be long but it is the most complete tutorial I have ever seen and I have been looking at tutorials for 20 years. Thank you for the assets, your time and your expertise. It’s wonderful. Don’t worry about people with short attention spans! XOX
-
I try but as a French speaker, it is realy hard and I couldn’t find some translation…
Thanks anyway.
Regards.
Françoise Labio -
really long, really tireing, but good tutorial, but its really really long
-
Really love it but i think a video Tut is better :D
-
its very long please make it short :(
-
Awesome tutorial. I always wonder how much patience these guys have to write such a long and detailed article.
-
It means that the .exe file is missing. Sometimes it happens because you have had a previous version of it and accidentally deleted it. But maybe you are installing it from a CD-ROM and it doesn’t have the file or it is located in another folder. Try to open the folder ahead i.e.: C:users-AppDataLocalAdobeOOBEPDAppDECore and see if there is any exe file. Another reason could be the path’s name.
-
???
-
Cool post this is really good
-
Hell yeah!
-
Yeah!:D
-
wonderful
-
Awesome tutorial. I like the way these tutorials explain the things… specially the screenshots.
-
Thank you for sharing this I have learned a lot and will use some of it in my own compositions.
-
Osm
-
yep:)
-
-
Excelente
Leave a Reply