
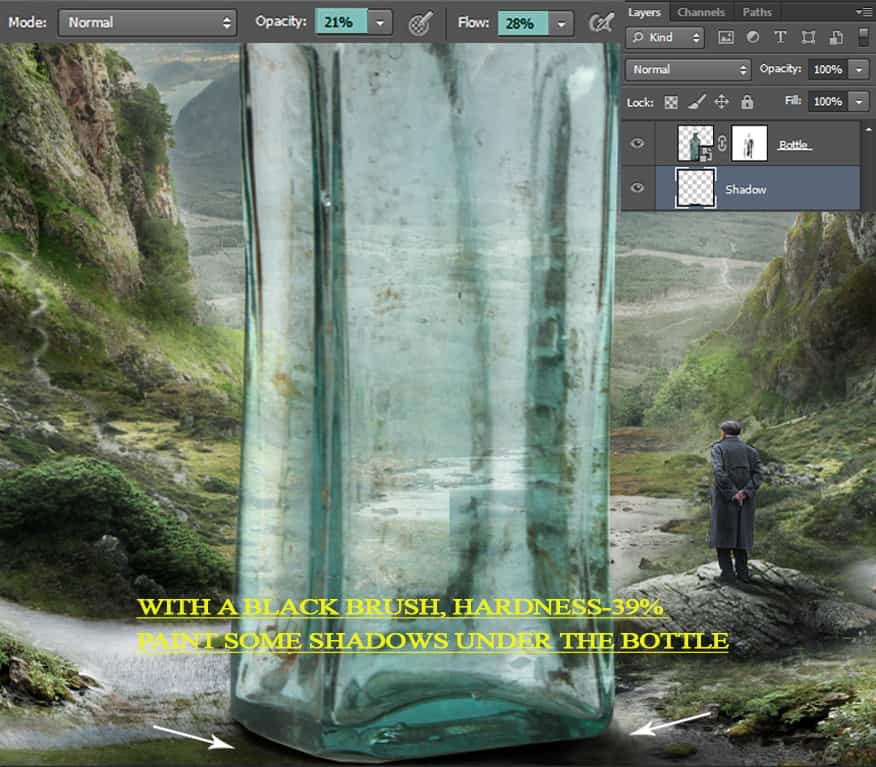
Pick the brush (B) tool, colour black and hardness- 39%. Opacity and Flow between 21-28%, paint some shadows like this:
Step 55
I found the black line along the center of the bottle very distracting. So picking the Clone Stamp Tool (S), create a new layer above the ‘bottle copy’ layer, in clipping mask and then clone the parts shown in the selection:
Make sure to select the “Current & Below” option when cloning.

Step 56
Make another new layer above the clone tool one and name it lighting. We will now paint some lighting effects on the bottle.
Using a soft brush with opacity -38%, Flow – 41% and varying between these two colours #ebe2ae, # b2a278, paint along the edges of the bottle where light is falling on it.
Change the blend mode to Overlay — 100% Opacity.


Step 57
Create a new layer again (set as clipping mask) and name it ‘lighting 2’. And then with a soft brush, colour #4e796f, paint inside the bottle. Brush opacity and flow should be around 35-40%.
Change the blend mode to Screen-69%.


Step 58
Make another new layer in clipping mask and name it shadows. Using the same brush settings as you did for the previous layer, paint with the same colour #4e796f as shown in the selection:
Change the blend mode to Multiply and reduce the opacity to 63%.


Step 59
Create a new layer again, name it ‘lighting 3’.
I wanted to make the lighting more intense on the bottle so taking a soft brush (opacity & flow 28-30%) and choosing the colour #f1b57a, paint over the part of the bottle indicated by the arrows shown in the image below:
Change the blend mode to Screen – 100%.


Step 60
Now picking the colour #43756c, paint some slight shadows on the bottle. So create a new layer (in clipping mask) above the ‘lighting 3’ one with a soft brush of opacity about 16%, paint over the selected part of the bottle as shown below:
Then change its blend mode to Multiply – 100%.


Step 61
Create a Curves adjustment layer to darken some part of the bottle. On this layer mask, use a soft black brush to erase around the areas selected:


Step 62
Create another Curves layer this one for brightening the bottle. Fill its layer mask with black and with a soft brush (foreground colour set to white), reveal back the effect of the Curves layer around the parts of the bottle indicated by the selection below:
17 responses to “Create a Surreal and Magical Dream Bottle Landscape”
-

I have to say, this may be long but it is the most complete tutorial I have ever seen and I have been looking at tutorials for 20 years. Thank you for the assets, your time and your expertise. It’s wonderful. Don’t worry about people with short attention spans! XOX
-
I try but as a French speaker, it is realy hard and I couldn’t find some translation…
Thanks anyway.
Regards.
Françoise Labio -
really long, really tireing, but good tutorial, but its really really long
-
Really love it but i think a video Tut is better :D
-
its very long please make it short :(
-
Awesome tutorial. I always wonder how much patience these guys have to write such a long and detailed article.
-
It means that the .exe file is missing. Sometimes it happens because you have had a previous version of it and accidentally deleted it. But maybe you are installing it from a CD-ROM and it doesn’t have the file or it is located in another folder. Try to open the folder ahead i.e.: C:users-AppDataLocalAdobeOOBEPDAppDECore and see if there is any exe file. Another reason could be the path’s name.
-
???
-
Cool post this is really good
-
Hell yeah!
-
Yeah!:D
-
wonderful
-
Awesome tutorial. I like the way these tutorials explain the things… specially the screenshots.
-
Thank you for sharing this I have learned a lot and will use some of it in my own compositions.
-
Osm
-
yep:)
-
-
Excelente
Leave a Reply