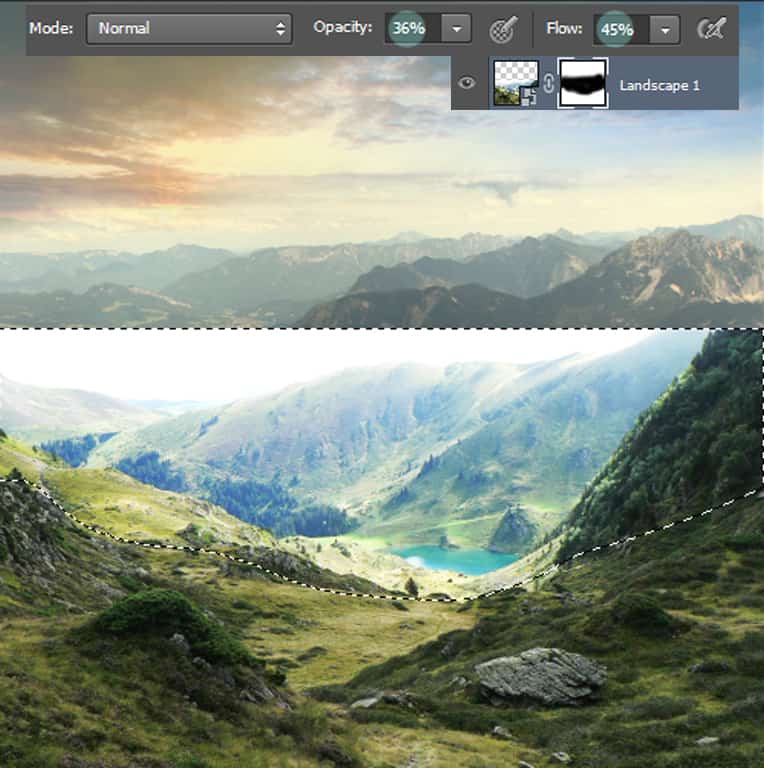
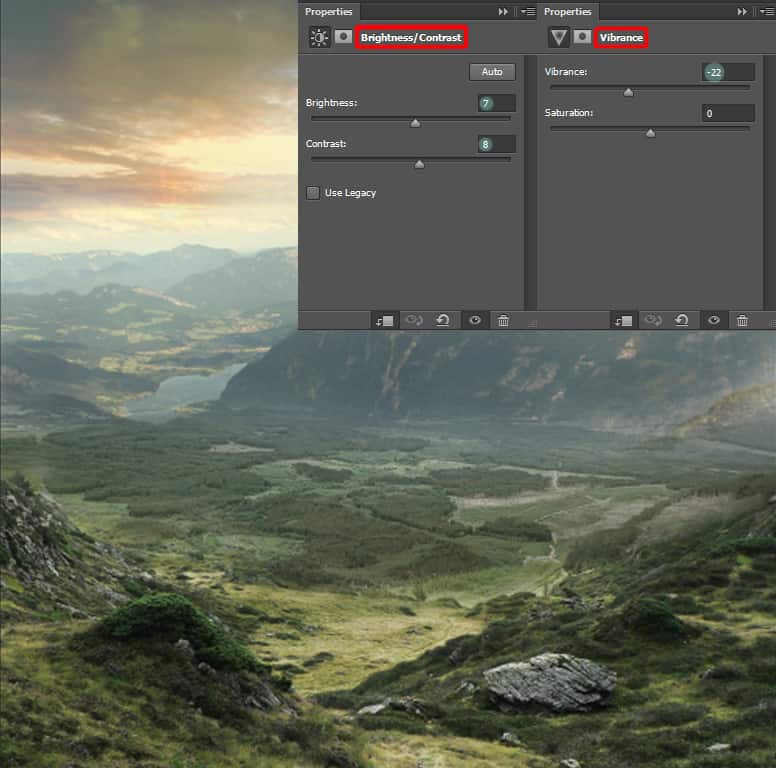
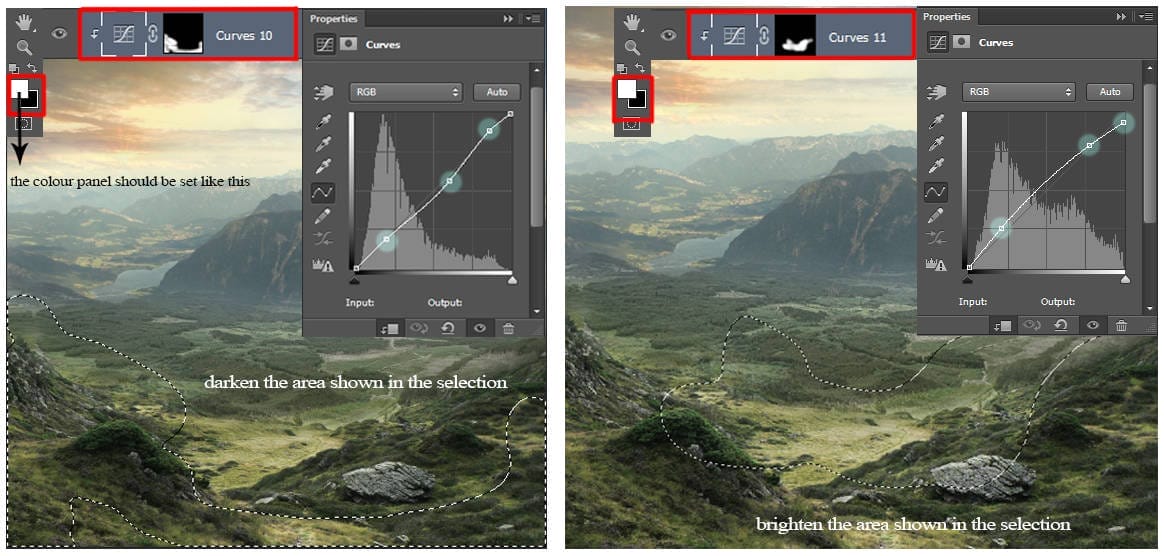
Now, create a second Curves adjustment layer to add a bit of brightness to the middle section of landscape. Refer the preview shown below:
Step 7
Now that the main scene has been created, let’s add some further details into the scene.
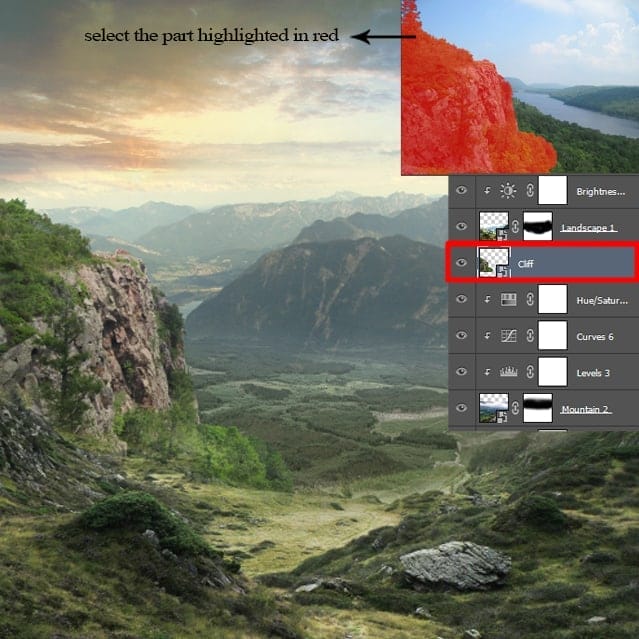
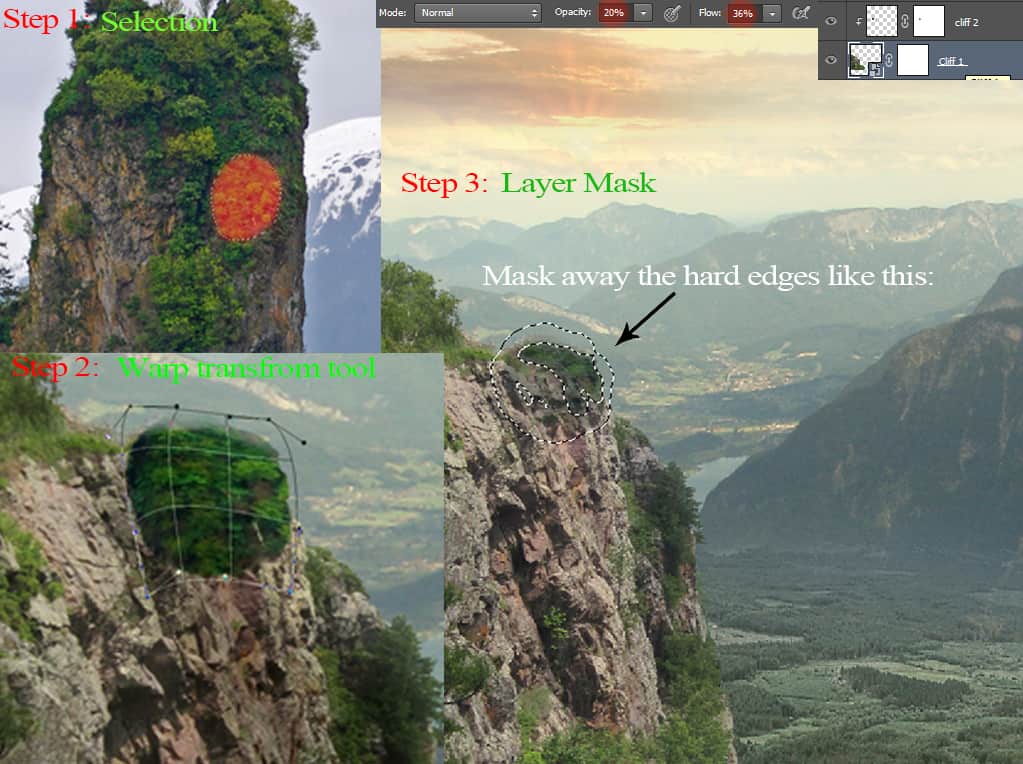
Open the cliff background stock and import it into the main canvas selecting only the cliff part and place it between the landscape and mountains’ layers as shown in the preview below:
Then take the ‘Cliff 2’ stock and take the part shown in the selection in red colour and with clipping mask place it on the tip of cliff 1 and using the Warp Transform Tool, transform it as shown in the image below:
Then add a layer mask to it and using a soft brush of low opacity between 20-36%, mask the hard edges away.
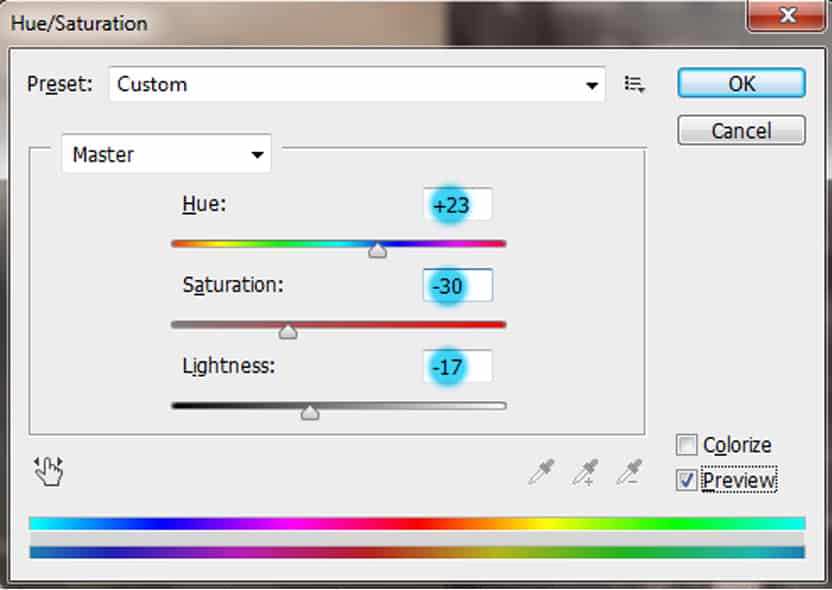
Still on cliff 2 layer, hit Cmd/Ctrl+U on the keyboard to add a bit of Hue/Saturation to it:
Step 8
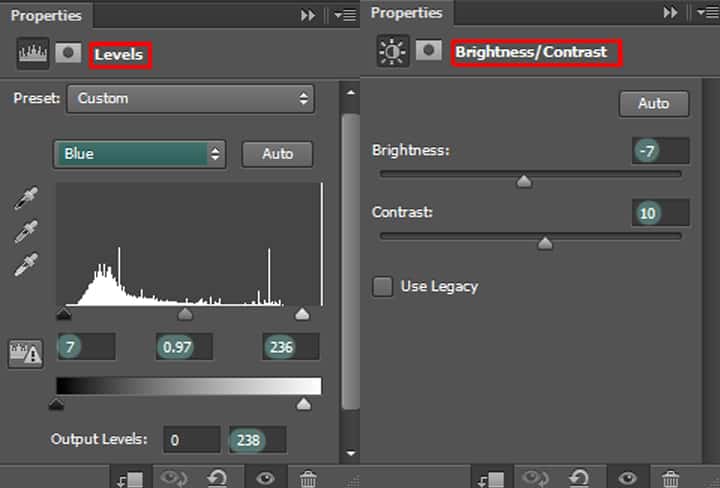
Go to Layer > New Adjustment Layer > Levels and create a levels adjustment layer in clipping mask so that only the cliff gets affected and apply the values shown below for the blues channel:
Then create a Brightness/Contrast adjustment layer, decrease the brightness to -7 and increase the contrast +10:
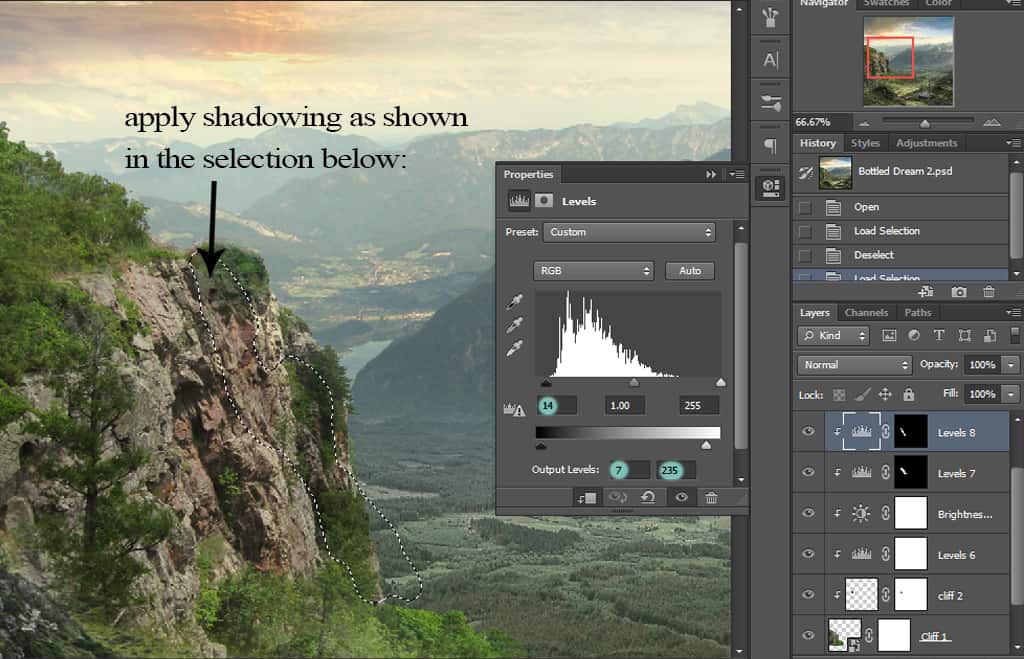
Create a Levels adjustment layer and increase the highlights to add some lighting on the cliff’s top. Fill it’s layer mask with black, the same as we did in Step 6 and using a soft brush- 100% opacity and with the foreground colour set to white, reveal back the effects of the levels adjustment as shown in the selection below:
Create another Levels adjustment layer, this time for some shadowing. And following the same procedure with the previous Levels layer, fill the layer mask with black and using a soft brush (B) reveal back the effects as shown below:

Step 9
Create a third Levels adjustment layer, in clipping mask and apply the following values to make the area of the cliff away from the lighting slightly darker. Follow the same procedure as you did with the other two levels adjustment above.
Create a New layer (Cmd/Ctrl+Shift+N) above all the cliff’s adjustments layers. Now take a Soft, Black Brush with Opacity 24% and Flow 51%, and paint some more shadows again as shown below. With blend mode Normal, reduce the opacity to 35%.
17 responses to “Create a Surreal and Magical Dream Bottle Landscape”
-
I have to say, this may be long but it is the most complete tutorial I have ever seen and I have been looking at tutorials for 20 years. Thank you for the assets, your time and your expertise. It’s wonderful. Don’t worry about people with short attention spans! XOX
-
I try but as a French speaker, it is realy hard and I couldn’t find some translation…
Thanks anyway.
Regards.
Françoise Labio -
really long, really tireing, but good tutorial, but its really really long
-
Really love it but i think a video Tut is better :D
-
its very long please make it short :(
-
Awesome tutorial. I always wonder how much patience these guys have to write such a long and detailed article.
-
It means that the .exe file is missing. Sometimes it happens because you have had a previous version of it and accidentally deleted it. But maybe you are installing it from a CD-ROM and it doesn’t have the file or it is located in another folder. Try to open the folder ahead i.e.: C:users-AppDataLocalAdobeOOBEPDAppDECore and see if there is any exe file. Another reason could be the path’s name.
-
???
-
Cool post this is really good
-
Hell yeah!
-
Yeah!:D
-
wonderful
-
Awesome tutorial. I like the way these tutorials explain the things… specially the screenshots.
-
Thank you for sharing this I have learned a lot and will use some of it in my own compositions.
-
Osm
-
yep:)
-
-
Excelente


Leave a Reply