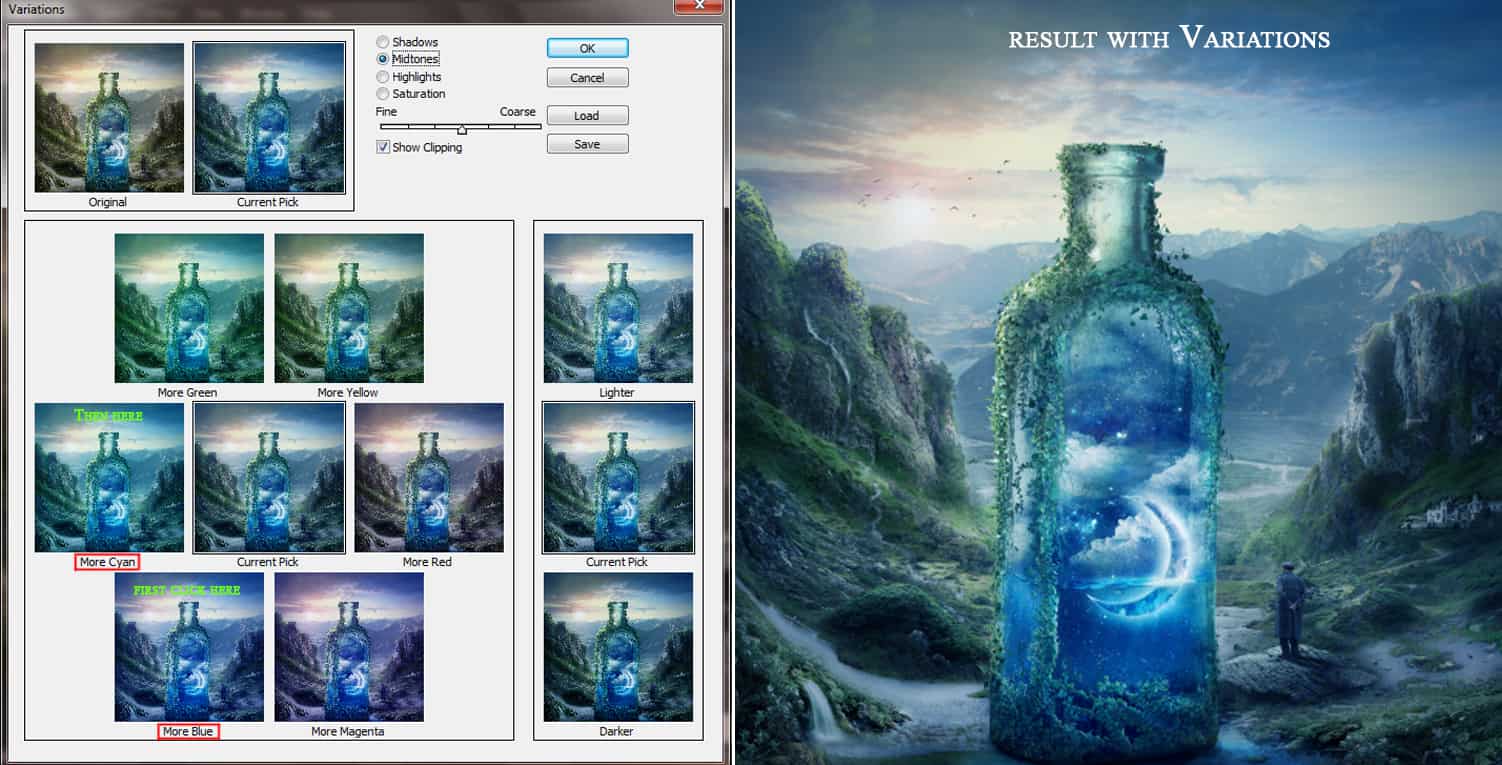
Now go to Image >Adjustments >Variations to change the colour of the whole scene. First click on ‘More Blue’, then on ‘More Cyan’. Click ok.
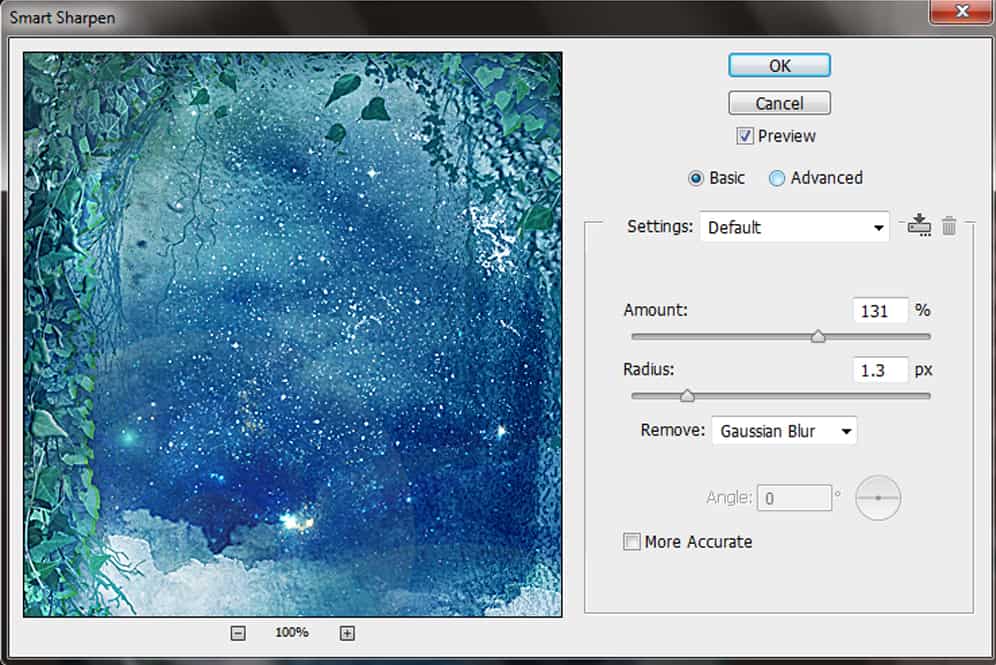
Then to sharpen the image, go to Filters > Sharpen > Smart Sharpen. Keep the Amount: 131 and Radius: 1.3px.
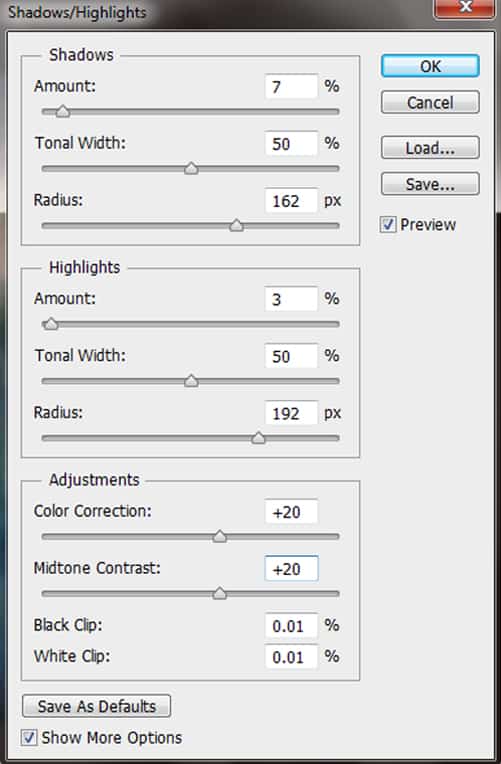
To adjust the shadows and highlights, go to Image > Adjustments > Shadows/Highlights and set the following values shown below:
Step 114
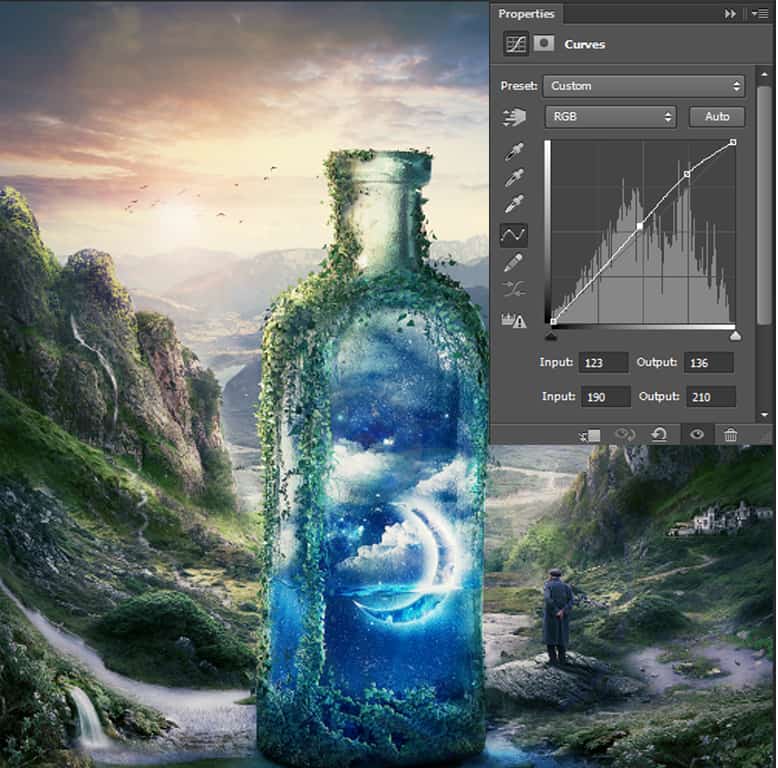
To create some final effects, I added a Curves layer to give the scene a slightly yellowish tone:
Then apply a Color Balance adjustment to enhance the lighting:
I wanted to add some contrast to the whole image. So create a Gradient Map adjustment layer. Go to Layer >New adjustment layer >Gradient map. And apply those values (the numbers indicate the color codes). Set the blending mode to soft light and opacity 16%


Step 115
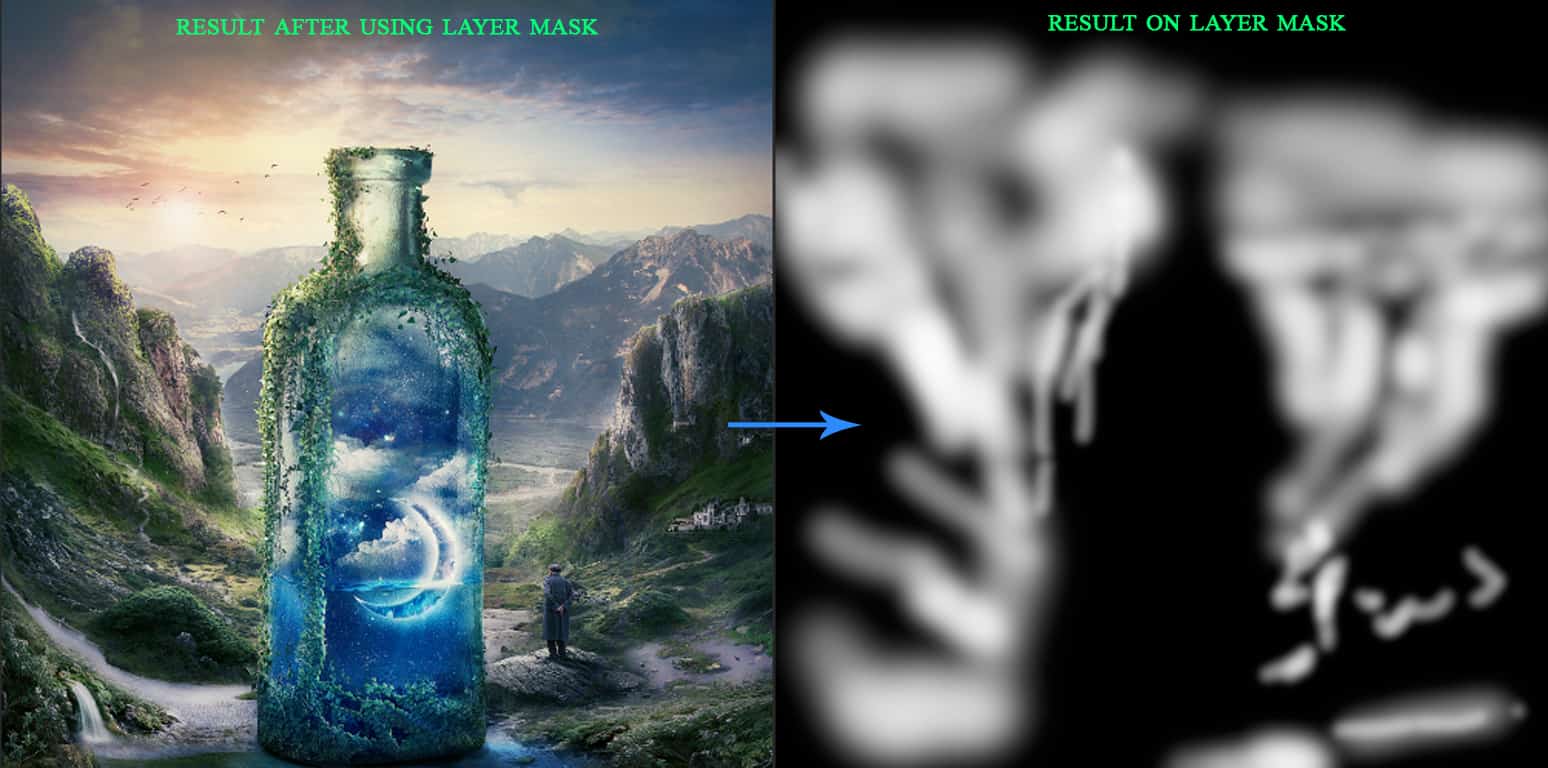
Add Curves adjustment again to brighten some part of the scene. Fill the layer mask with black and use a white brush to bring back the brightening effect from the sky, mountains and the surrounding areas near the bottle.
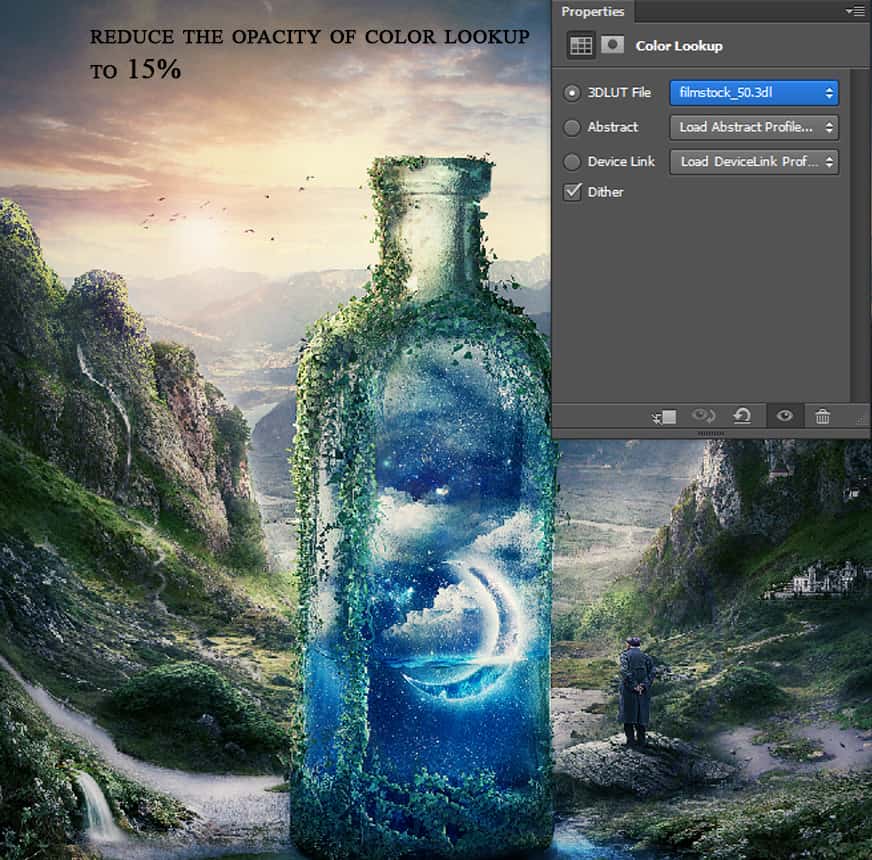
Then apply a Color Lookup adjustment, select ‘filmstock_50’ and decrease the opacity to 15%.
Group all these adjustments together and name it ‘Final Adjustments’.
Step 116
And finally, select the topmost layer and hit Cmd/Ctrl+Shift+Alt+E to merge all the visible layers into a single layer.
Name this layer, say Camera Raw Filter. Go to Filter > Camera Raw. Prior applying the filter, convert this layer into smart object by going to layer > smart objects > convert to smart object.
Use the values shown below:

Final Results

Download the PSD
Tutorial by S. Amber
 Thank you for reading, I hope that you’ve learned something new from my tutorial.
Feel free to share your outcomes, suggestions and feedback in the comment box below.
– S. Amber
17 responses to “Create a Surreal and Magical Dream Bottle Landscape”
-

I have to say, this may be long but it is the most complete tutorial I have ever seen and I have been looking at tutorials for 20 years. Thank you for the assets, your time and your expertise. It’s wonderful. Don’t worry about people with short attention spans! XOX
-
I try but as a French speaker, it is realy hard and I couldn’t find some translation…
Thanks anyway.
Regards.
Françoise Labio -
really long, really tireing, but good tutorial, but its really really long
-
Really love it but i think a video Tut is better :D
-
its very long please make it short :(
-
Awesome tutorial. I always wonder how much patience these guys have to write such a long and detailed article.
-
It means that the .exe file is missing. Sometimes it happens because you have had a previous version of it and accidentally deleted it. But maybe you are installing it from a CD-ROM and it doesn’t have the file or it is located in another folder. Try to open the folder ahead i.e.: C:users-AppDataLocalAdobeOOBEPDAppDECore and see if there is any exe file. Another reason could be the path’s name.
-
???
-
Cool post this is really good
-
Hell yeah!
-
Yeah!:D
-
wonderful
-
Awesome tutorial. I like the way these tutorials explain the things… specially the screenshots.
-
Thank you for sharing this I have learned a lot and will use some of it in my own compositions.
-
Osm
-
yep:)
-
-
Excelente
Leave a Reply