Luminar AI lets you turn your ideas into reality with powerful, intelligent AI. Download the photo editor and see how you can completely transform your photos in a few clicks.
Using a layer mask, erase the right part of the texture with a soft brush. Then change the blend mode to Multiply – 44%.
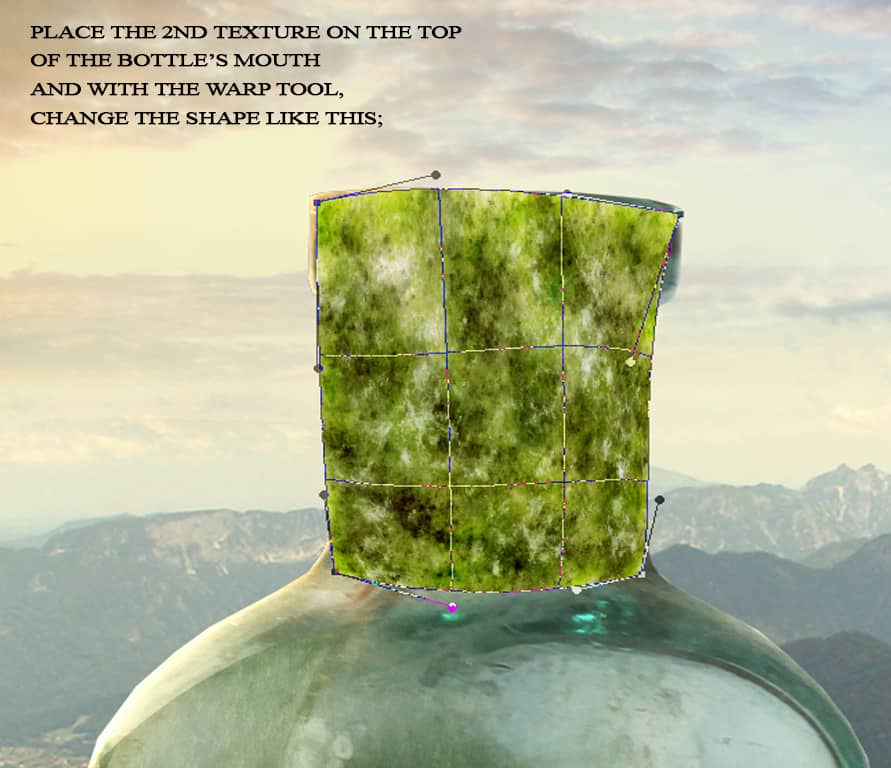
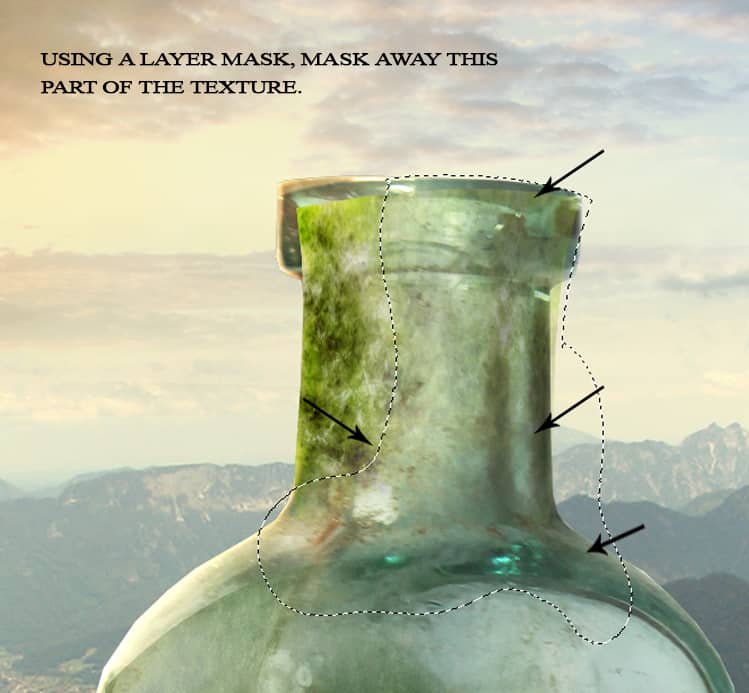
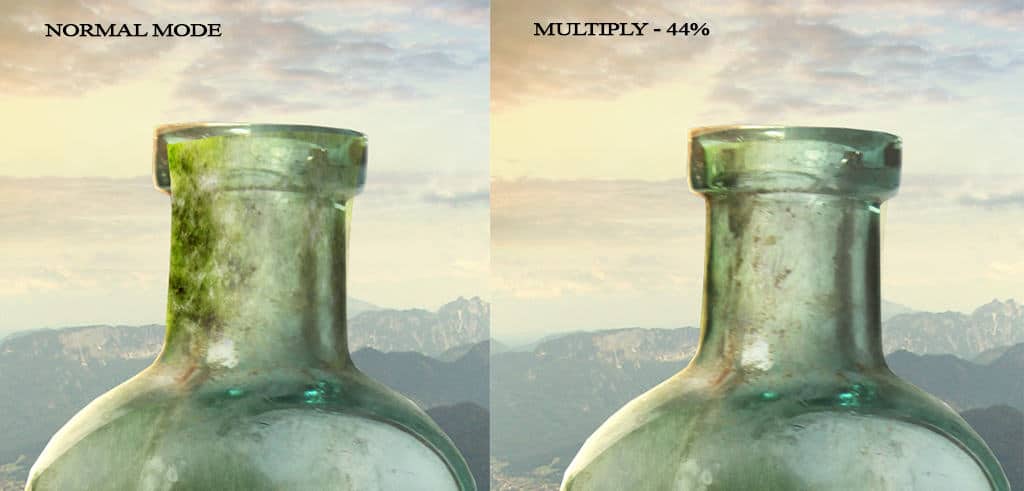
Step 70
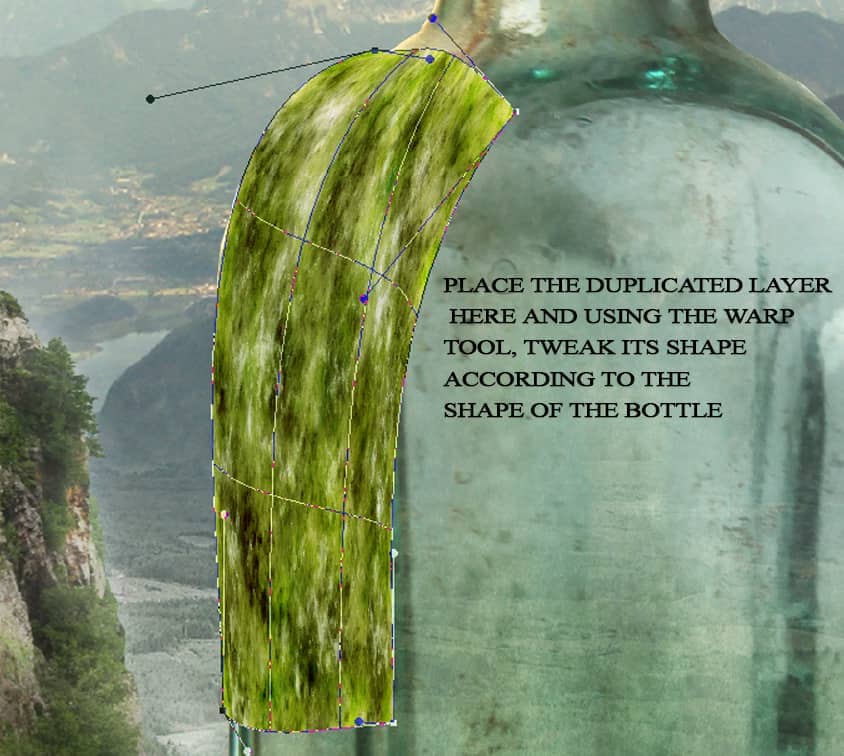
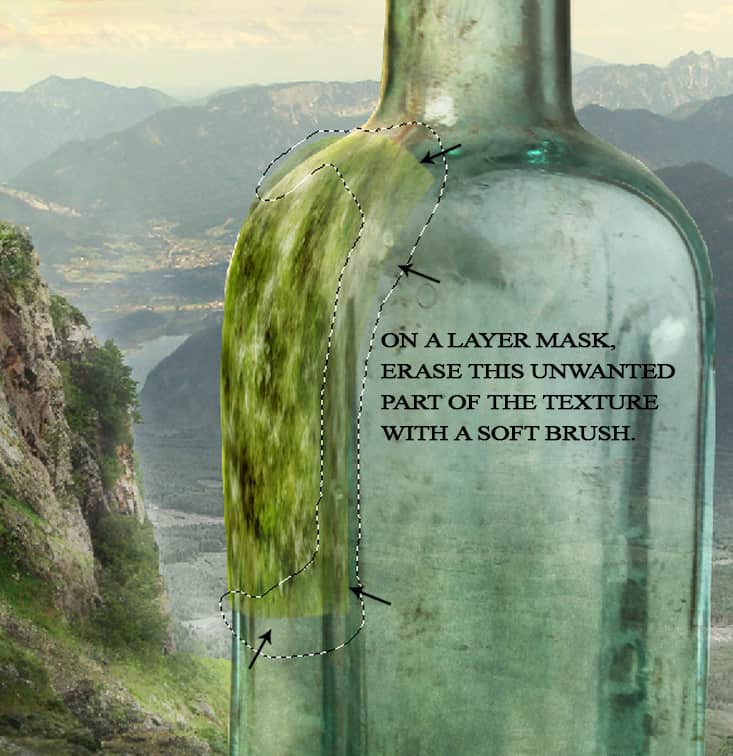
Duplicate the second texture layer and place it like shown in the image below.
With the Warp tool, tweak its shape like the bottle’s and using a layer mask, erase the unwanted part with a soft brush of opacity about 50%.
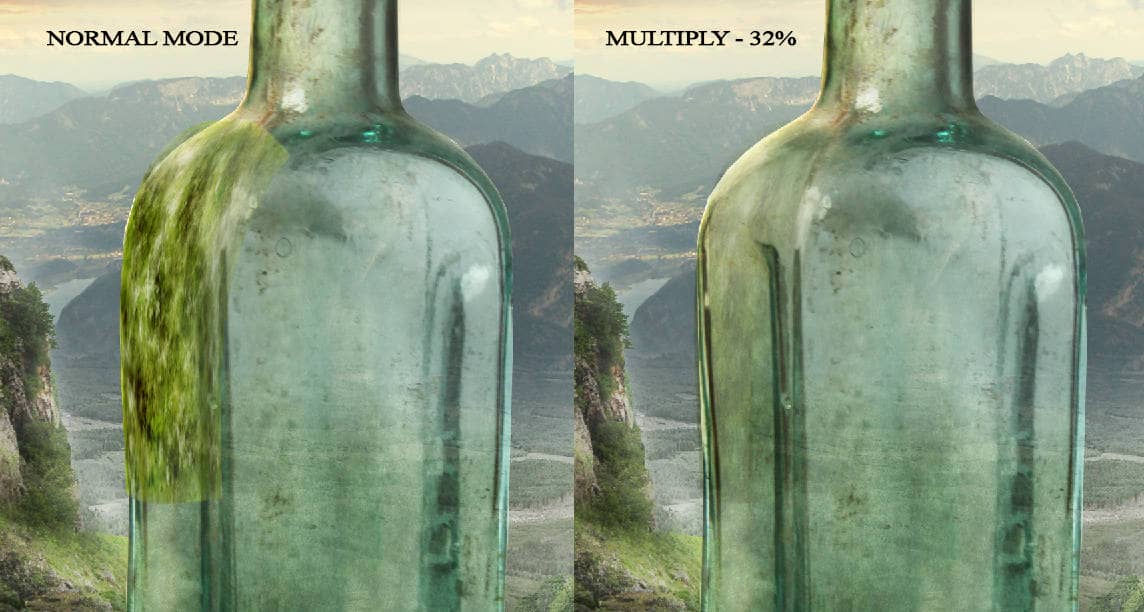
Change the blend mode to Multiply – 32%.
Step 71
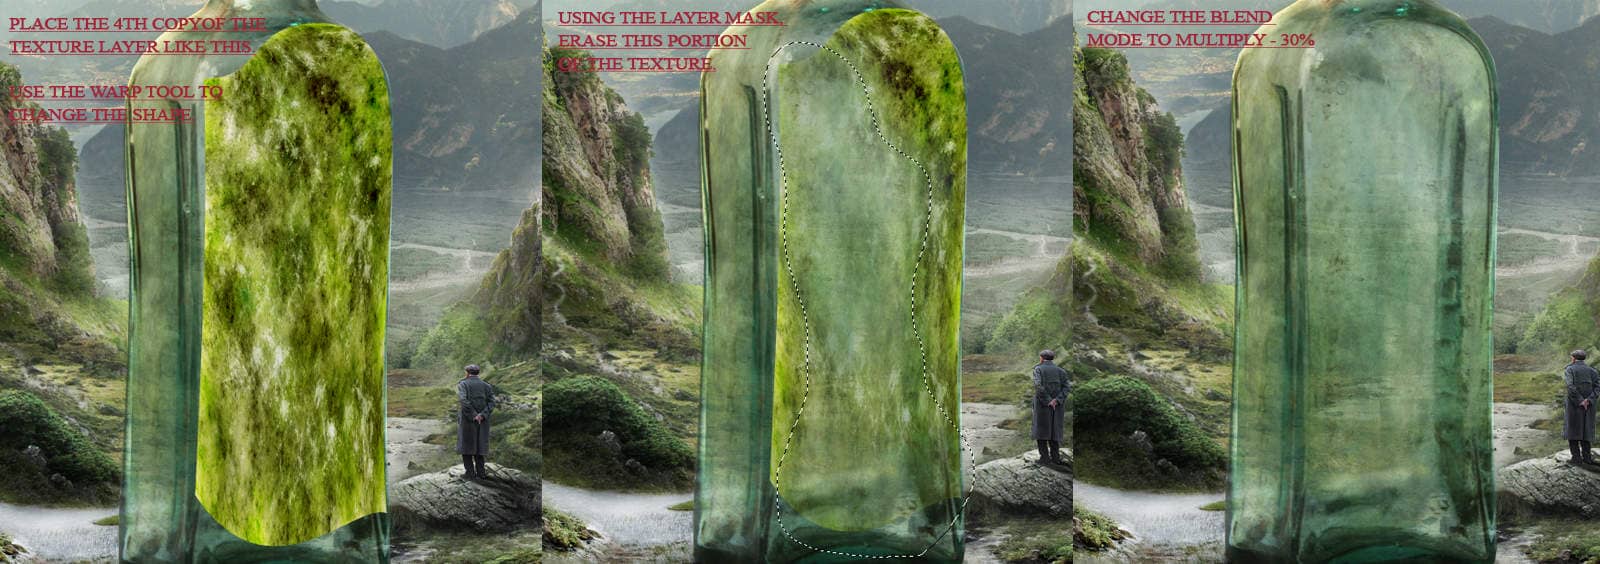
Duplicate the previous texture layer thrice and place them as such:


Step 72
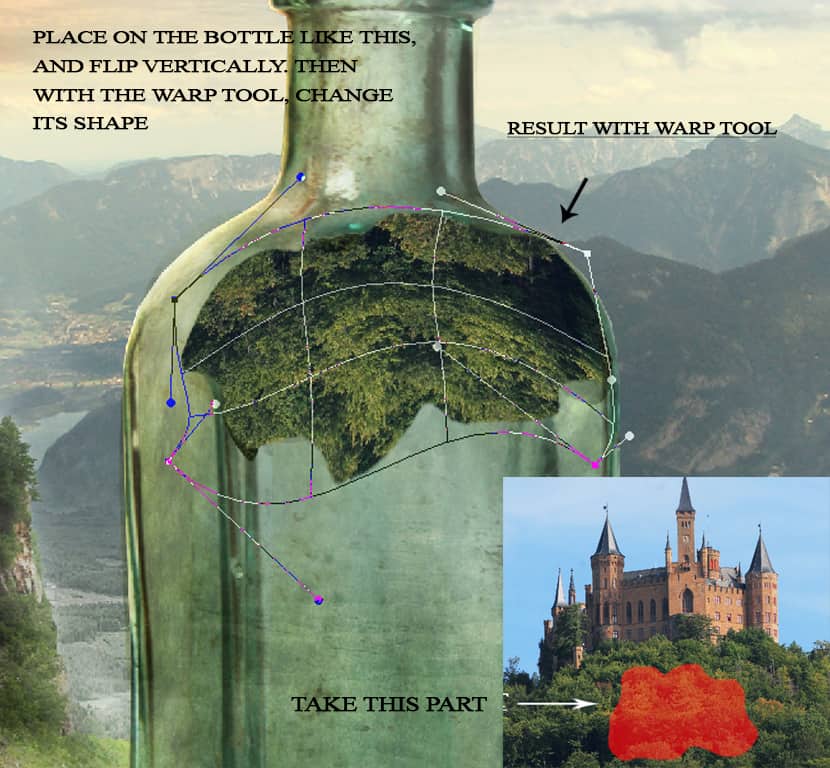
Open texture 3 stock, take the tree part and put it over the bottle:
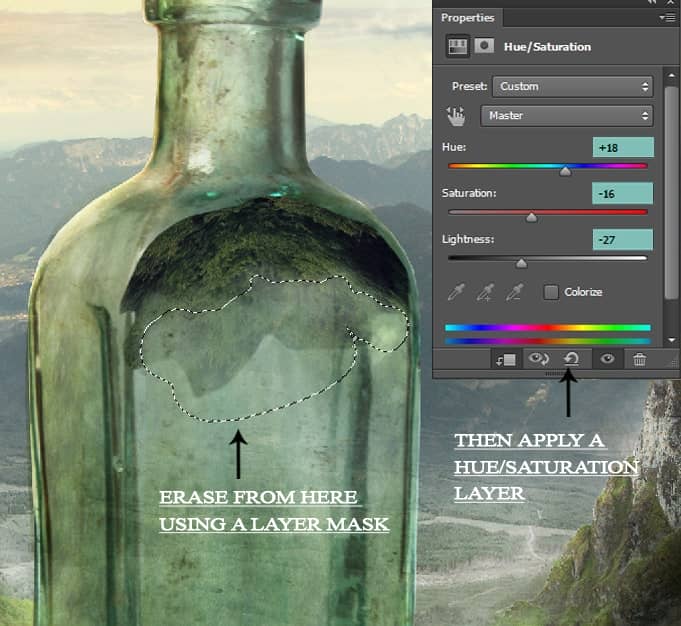
Go to Edit > Transform > Flip Vertical and with the transform tool still activated, use the Warp tool to transform its shape. Use a layer mask to erase the hard edges with a soft brush of low opacity (35%).
Desaturate it by applying Hue/Saturation layer, in clipping mask.
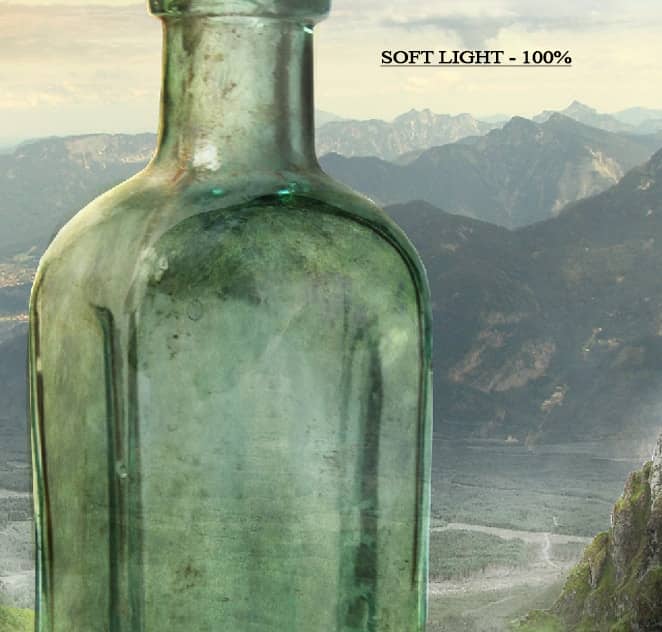
Change the blend mode to Soft Light – 100%.
Step 73
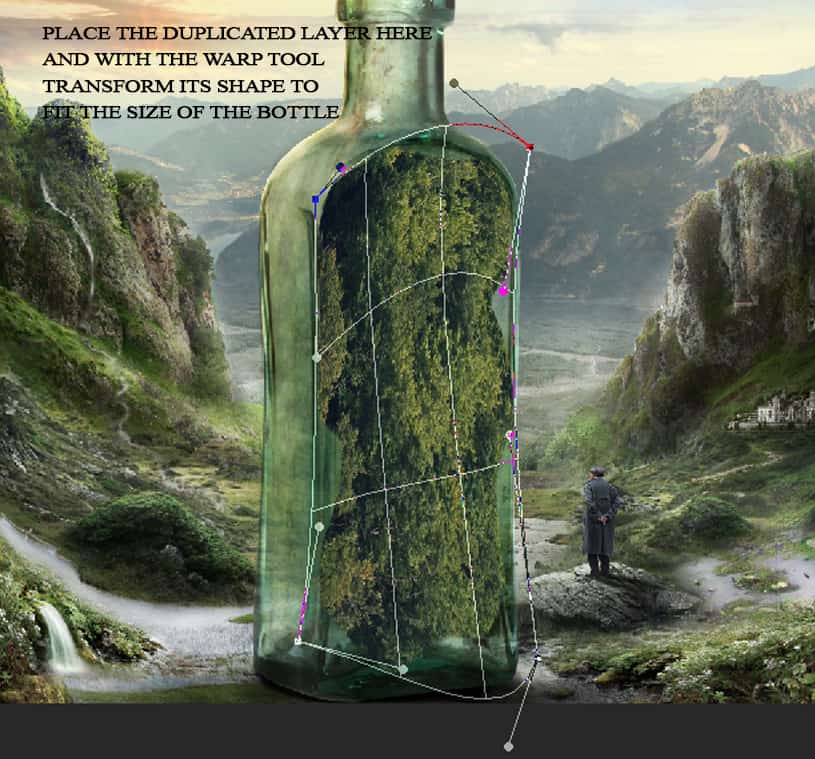
Duplicate the texture 3 layer again and put it over the bottle’s body like shown below. Again use the Warp tool and tweak its shape to fit the size of the bottle.
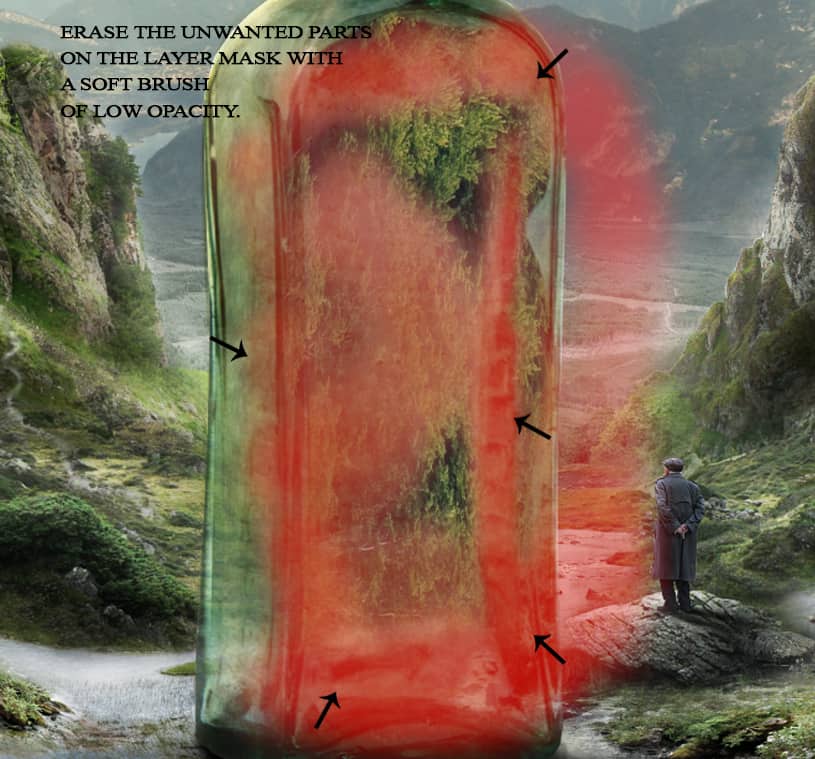
Apply a layer mask and hide the unwanted parts with a low opacity soft brush. Then create a Hue/saturation layer in clipping mask and use the same values as with the previous layer.
Hue: +18, Saturation: - 16, Lightness -27.
Alter the blend mode to Soft Light - 100%.
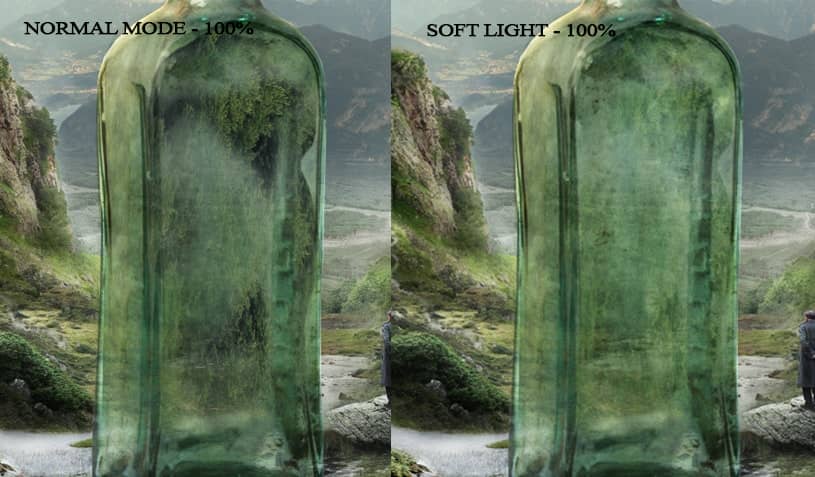
Step 74
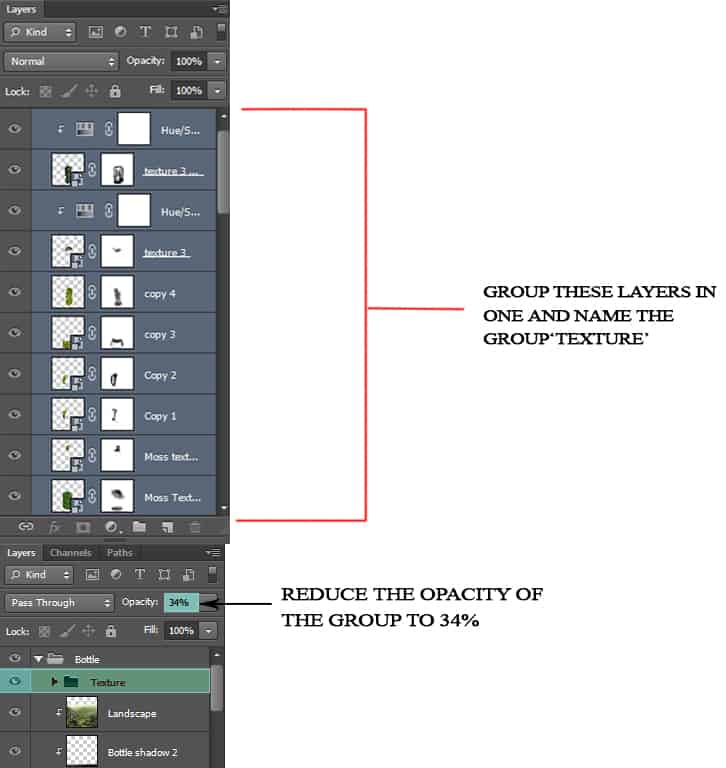
Now group all the three texture layers as well as the duplicated layers. Name the group ‘Texture’ and reduce the group’s opacity to 34%.
Remember to place this texture group within the bottle layers group.
Step 75
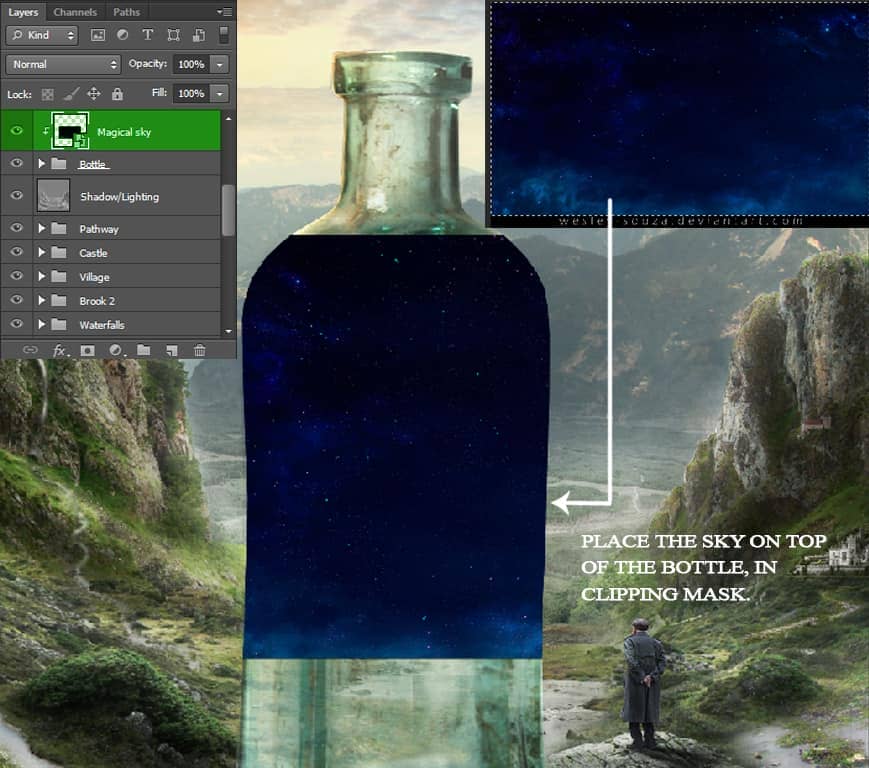
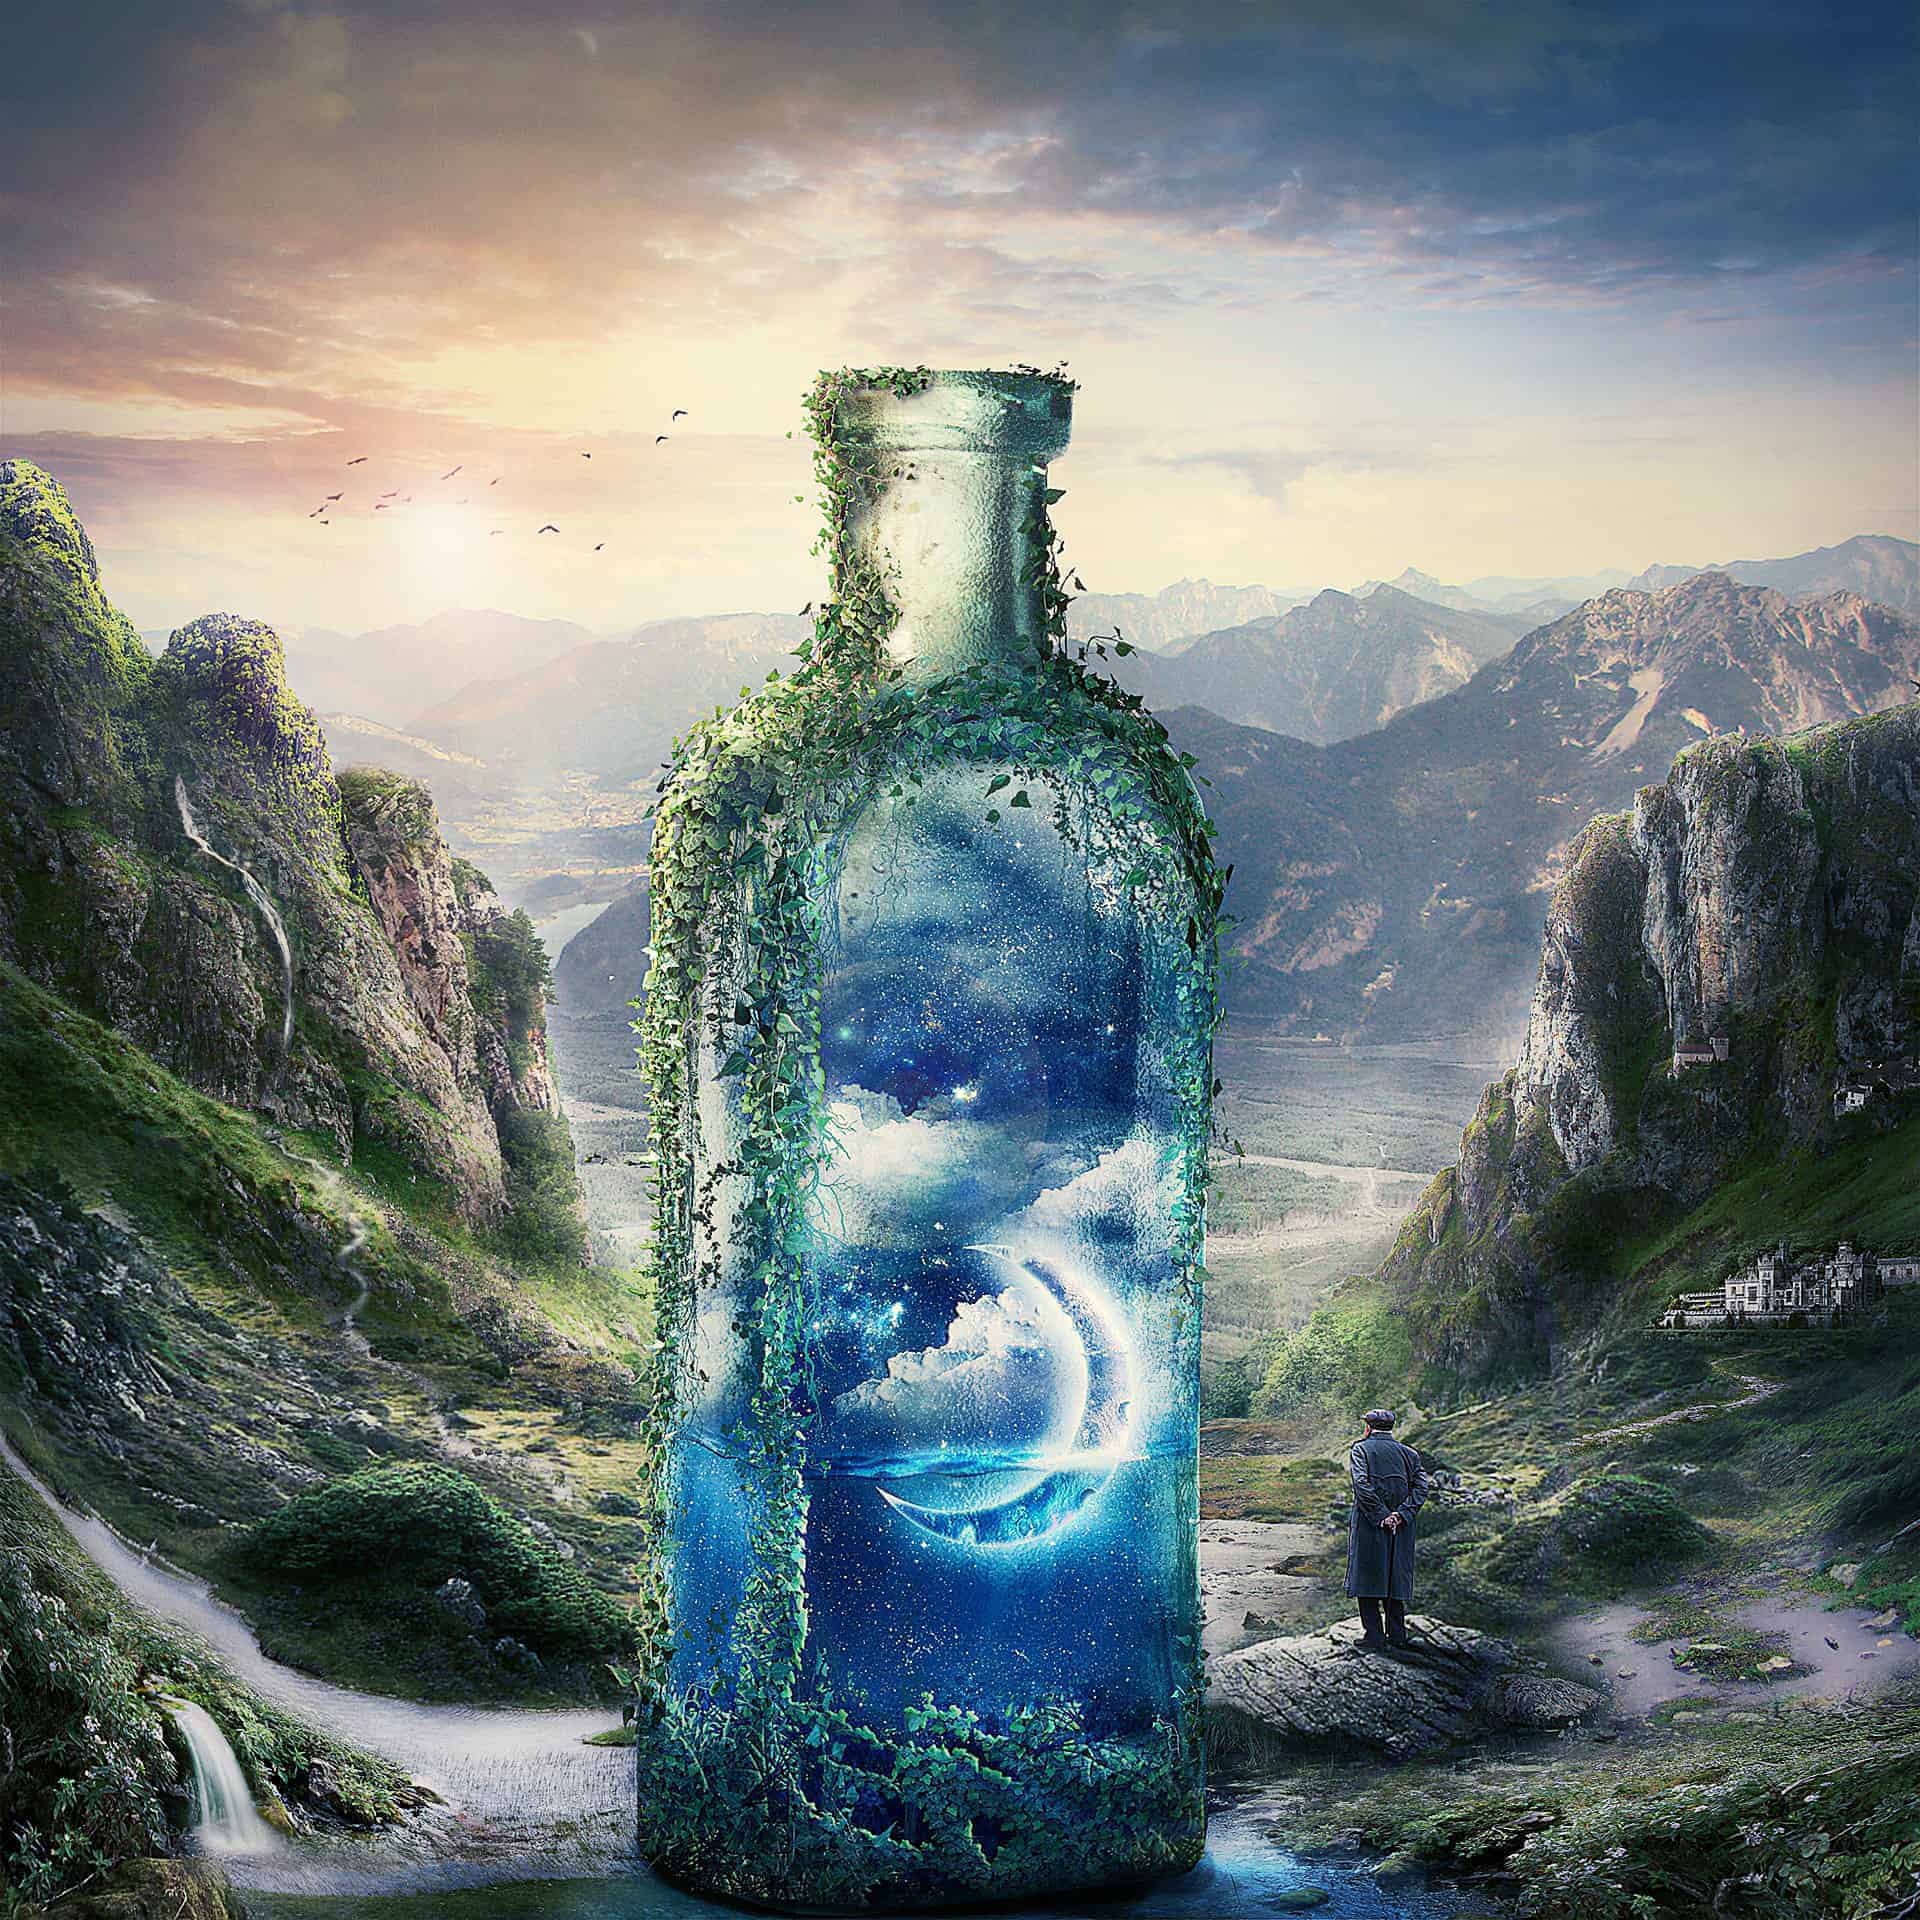
We will now create a scene inside the bottle so open the magical sky stock and select the sky part. Drag it on to your main document above the bottle group and with the transform tool scale its size.
Place it on top of the bottle, in clipping mask. Now create a layer mask for it, we will erase the unwanted part of the sky.
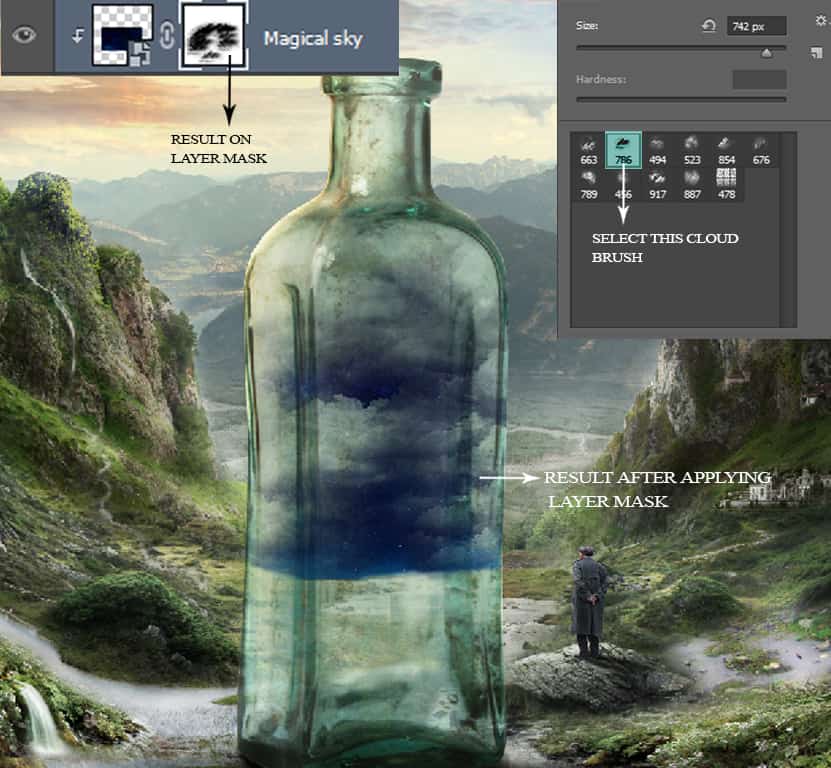
So load the cloud brushes and select the second brush. Decrease the opacity of the brush to 45% and then carefully mask away the sky to look like this:
Step 76
Create a new group (Cmd/Ctrl+G) above the magical sky name it “Underwater” and change its blend mode to Normal from Pass Through.


17 comments on “Create a Surreal and Magical Dream Bottle Landscape”
I have to say, this may be long but it is the most complete tutorial I have ever seen and I have been looking at tutorials for 20 years. Thank you for the assets, your time and your expertise. It's wonderful. Don't worry about people with short attention spans! XOX
I try but as a French speaker, it is realy hard and I couldn’t find some translation…
Thanks anyway.
Regards.
Françoise Labio
really long, really tireing, but good tutorial, but its really really long
Really love it but i think a video Tut is better :D
its very long please make it short :(
Awesome tutorial. I always wonder how much patience these guys have to write such a long and detailed article.
It means that the .exe file is missing. Sometimes it happens because you have had a previous version of it and accidentally deleted it. But maybe you are installing it from a CD-ROM and it doesn't have the file or it is located in another folder. Try to open the folder ahead i.e.: C:users-AppDataLocalAdobeOOBEPDAppDECore and see if there is any exe file. Another reason could be the path's name.
???
Cool post this is really good
Hell yeah!
Yeah!:D
wonderful
Awesome tutorial. I like the way these tutorials explain the things... specially the screenshots.
Thank you for sharing this I have learned a lot and will use some of it in my own compositions.
Osm
yep:)
Excelente